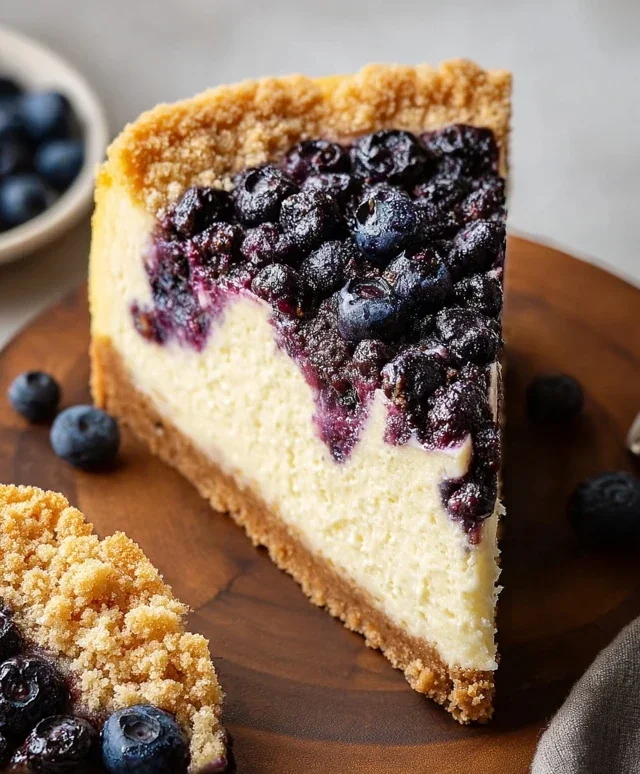
No-Bake Banoffee Cheesecake – Easy Delicious Dessert
No-Bake Banoffee Cheesecake is the dessert you’ve been dreaming of, and today, I’m going to show you exactly how to create this slice of heaven in your own kitchen. Forget the oven and the fuss; this wonderfully indulgent treat is all about assembly and pure deliciousness. There’s a reason why banoffee pie, and its cheesecake cousin, have captured so many hearts: the irresistible combination of creamy cheesecake, sweet caramel, ripe bananas, and a crum extractbly biscuit base is simply magical. What makes our No-Bake Banoffee Cheesecake truly special is how effortlessly it delivers that rich, decadent flavor profile without any baking required. It’s perfect for those sweltering summer days when you want a showstopper dessert without turning on the heat, or for any occasion where a truly satisfying, no-stress sweet treat is in order. Get ready to impress yourself and everyone lucky enough to snag a piece!
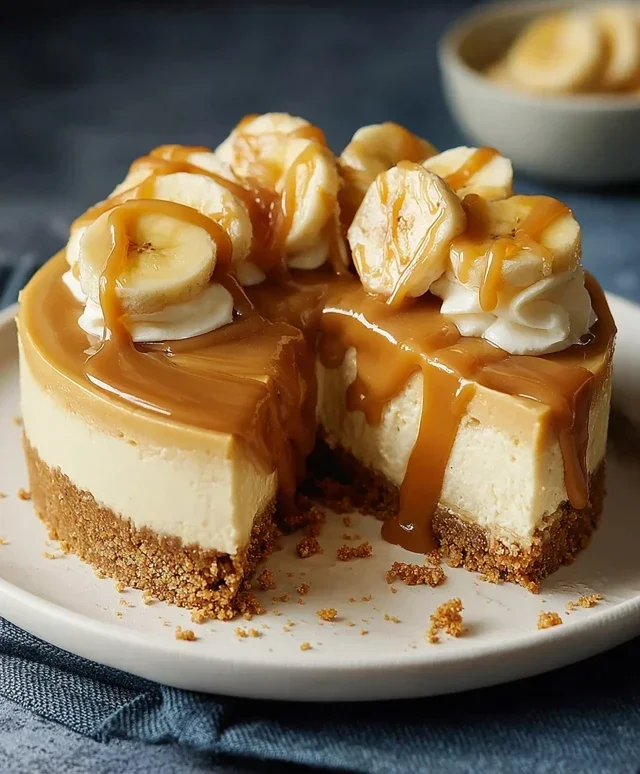
No-Bake Banoffee Cheesecake
Get ready for a dessert sensation that’s ridiculously easy to make and utterly divine to eat. This No-Bake Banoffee Cheesecake is the ultimate crowd-pleaser, combining the classic flavours of banana and toffee in a creamy, dreamy cheesecake form. The best part? Absolutely no oven required! This recipe is perfect for those warmer days, or when you simply crave a decadent treat without the fuss of baking. We’re using a wonderfully creamy dairy-free base and a rich, luscious caramel that will have everyone beggin extractg for the recipe. Let’s dive in and create some magic!
Ingredients:
Crust Preparation
The foundation of any great cheesecake is a fantastic crust, and this one is no exception. We’re going for a classic biscuit base, but with a dairy-free twist.
1. Begin extract by crushing your plain biscuits. You can do this by placing them in a sturdy zip-lock bag and giving them a good bash with a rolling pin, or by pulsing them in a food processor until you have fine crum extractbs. Aim for a consistency similar to coarse sand.
2. Next, melt the dairy-free butter or margarine in a small saucepan over low heat, or in the microwave in short bursts. Once fully melted, pour this over the biscuit crum extractbs. Stir everything together thoroughly until all the crum extractbs are evenly coated with the melted butter. This ensures your crust will hold together beautifully.
3. Now, transfer this crum extractb mixture into your chosen cheesecake tin (a springform tin is ideal for easy removal). Press the crum extractbs down firmly and evenly across the base of the tin. You can use the back of a spoon or the base of a glass to achieve a compact and flat layer. Make sure to press it right up to the edges for a neat finish. Pop this base into the refrigerator for at least 30 minutes to firm up while you prepare the filling. This chilling time is crucial for a solid base.
Creamy Cheesecake Filling
This is where the magic happens! We’re creating a velvety smooth, dairy-free cheesecake filling that’s light yet incredibly satisfying.
4. For the cheesecake filling, you’ll need those pre-soaked cashew nuts. Drain them thoroughly and rinse them well. Place the drained cashews into a high-powered blender or food processor. Add the dairy-free cream cheese, coconut cream, and icing sugar. Blend until the mixture is incredibly smooth and creamy, with no grainy texture from the cashews. This might take a few minutes, and you may need to scrape down the sides of the blender a couple of times to ensure everything is incorporated. The consistency should be thick and luxurious. If you find it too thick to blend, you can add a tablespoon of water or a little more coconut cream.
5. Once your filling is perfectly smooth, it’s time to add the banana. Peel the medium-sized banana and break it into a few pieces before adding it to the blender with the cashew mixture. Blend again until the banana is completely incorporated and the filling has a uniform colour and texture. The banana adds a subtle sweetness and that classic banoffee flavour.
6. Now, retrieve your chilled biscuit base from the refrigerator. Spoon the creamy banoffee filling evenly over the base. Gently spread the filling to create a smooth, flat surface. Don’t worry if it’s not perfectly smooth; a slightly rustic look can be charming!
Assembly and Finishing Touches
The final steps bring all the delicious elements together for a show-stopping dessert.
7. Drizzle a generous amount of vegan caramel sauce over the surface of the cheesecake filling. You can create swirls or patterns with a knife or skewer for a more decorative effect. Try to get some caramel down into the filling for extra pockets of flavour.
8. Place the assembled cheesecake back into the refrigerator and chill for at least 4-6 hours, or preferably overnight. This chilling time is essential for the cheesecake to set properly and for the flavours to meld together beautifully. The longer it chills, the firmer and more delicious it will be.
9. Just before serving, whip the dairy-free whipping cream until it forms soft peaks. This adds a lovely light and airy element to the rich cheesecake.
Serving Your Masterpiece
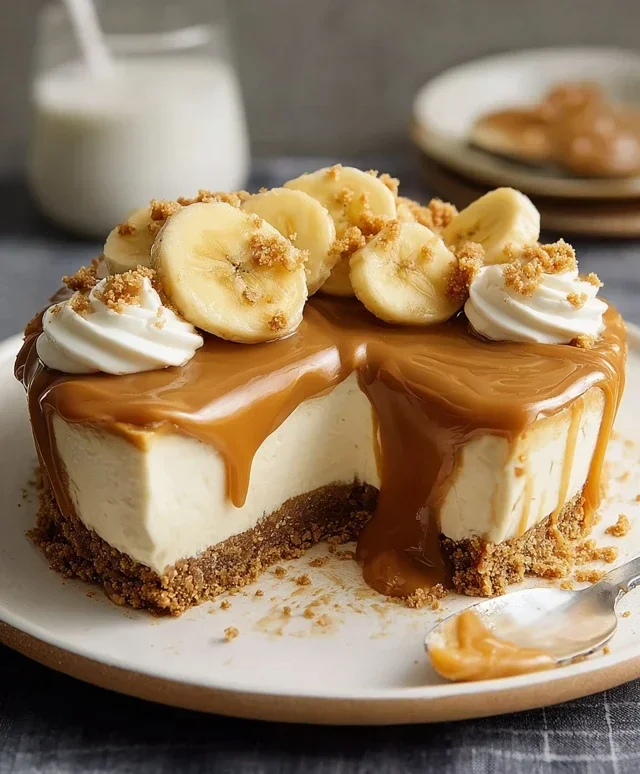
When you’re ready to serve your No-Bake Banoffee Cheesecake, carefully remove it from the springform tin. Arrange fresh banana slices artfully on top of the cheesecake. Dollop or pipe the whipped dairy-free cream over the top. Finish with an extra drizzle of vegan caramel sauce. Slice and enjoy this absolutely irresistible treat! It’s a wonderful dessert for parties, special occasions, or just because you deserve it. The combination of the crunchy biscuit base, the smooth creamy filling, sweet banana, and rich caramel is pure bliss. Enjoy every bite!
Conclusion:
And there you have it – your guide to creating an absolutely show-stopping No-Bake Banoffee Cheesecake! This recipe is truly a winner because it delivers all the decadent flavors of a traditional banoffee pie with the creamy, luxurious texture of cheesecake, all without the fuss of turning on the oven. It’s perfect for those hot summer days when you want a treat without heating up your kitchen, or anytime you’re craving something utterly delicious and impressively easy to make. I know you’ll love how surprisingly simple it is to achieve such a fantastic result.
Serving this No-Bake Banoffee Cheesecake is a joy. It looks stunning on its own, but a sprinkle of extra toffee sauce, a few thin slices of fresh banana, and a dollop of whipped cream take it to the next level. For variations, consider adding a touch of cinnamon to the biscuit base, or swirling some chocolate ganache through the banana layer for an extra decadent twist. Don’t be afraid to experiment with different biscuits for the base too – digestive biscuits are classic, but gin extractgersnaps could offer a lovely spicy contrast. I truly encourage you to give this recipe a try; you might just discover your new favorite dessert!
Frequently Asked Questions:
Can I make this No-Bake Banoffee Cheesecake ahead of time?
Absolutely! This cheesecake is actually best made a few hours, or even a day, in advance. This allows the flavors to meld beautifully and the cheesecake to set properly, ensuring a perfect slice every time.
What if I don’t have condensed milk?
While condensed milk is key for the toffee layer’s texture and sweetness, you could try making a dulce de leche from scratch by simmering a can of whole milk (not evaporated) with sugar until it caramelizes and thickens. However, it won’t be exactly the same and will require more time.
No-Bake Banoffee Cheesecake
A delicious and easy no-bake banoffee cheesecake with a biscuit base, creamy cashew filling, and layers of banana and caramel.
Ingredients
-
200g plain biscuits
-
100g dairy-free butter or margarine
-
140g cashew nuts (pre-soaked in warm water overnight)
-
340g dairy-free cream cheese
-
50g coconut cream
-
80g icing sugar
-
1 medium-sized banana
-
Vegan caramel sauce
-
Fresh banana slices
-
80ml dairy-free whipping cream
Instructions
-
Step 1
Crush the plain biscuits into fine crumbs. Melt the dairy-free butter or margarine and mix with the biscuit crumbs until well combined. Press this mixture firmly into the base of a 20cm springform tin. -
Step 2
Drain the soaked cashew nuts and place them in a high-powered blender. Add the dairy-free cream cheese, coconut cream, and icing sugar. Blend until completely smooth and creamy. -
Step 3
Pour half of the cashew cheese mixture over the biscuit base in the springform tin. Drizzle generously with vegan caramel sauce. -
Step 4
Slice the medium-sized banana and arrange the slices over the caramel layer. Top with the remaining cashew cheese mixture, spreading it evenly. -
Step 5
Chill the cheesecake in the refrigerator for at least 4 hours, or until firm. -
Step 6
Before serving, whip the dairy-free whipping cream until soft peaks form. Decorate the top of the cheesecake with swirls of whipped cream, fresh banana slices, and a final drizzle of vegan caramel sauce.
Important Information
Nutrition Facts (Per Serving)
It is important to consider this information as approximate and not to use it as definitive health advice.
Allergy Information
Please check ingredients for potential allergens and consult a health professional if in doubt.