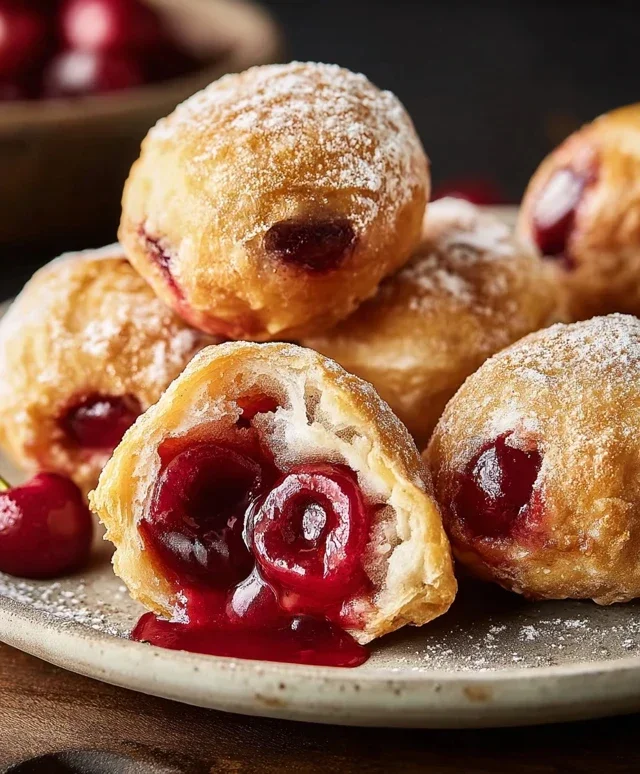
Cherry Pie Bombs- Irresistible Easy Dessert
Cherry Pie Bombs are an absolute showstopper, and I’m so excited to share this recipe with you! There’s something undeniably magical about a classic cherry pie, but what if I told you we could capture all that comforting, nostalgic goodness in a perfectly portioned, bite-sized explosion of flavor? That’s precisely what these Cherry Pie Bombs deliver. Imagin extracte tender, flaky pastry encasing a sweet and tart cherry filling that bursts with every mouthful. They’re incredibly satisfying, making them perfect for parties, potlucks, or simply treating yourself to a little piece of pie heaven. What truly sets these Cherry Pie Bombs apart is the delightful surprise inside and the ease with which you can enjoy them without needing a fork and knife. Get ready for pure cherry bliss in every single bomb!
Cherry Pie Bombs
Get ready to experience a burst of sweet, cherry goodness with these incredibly easy Cherry Pie Bombs! These delightful treats are a shortcut to pure dessert bliss, taking the beloved flavors of cherry pie and transforming them into perfectly portioned, fried dough pockets of joy. Forget slaving over a traditional pie crust; these bombs use a simple pantry staple to deliver maximum flavor with minimal effort. They’re perfect for a quick treat, a party appetizer, or a fun baking project with the kids. The crispy, golden exterior gives way to a warm, gooey cherry filling, all topped with a sweet glaze that’s simply irresistible. Trust me, once you make these, they’ll become a regular in your dessert rotation. Let’s dive into what you’ll need and how to create these little explosions of deliciousness.
Ingredients:
Preparing Your Cherry Pie Bombs
The beauty of these Cherry Pie Bombs lies in their simplicity, and the first step is all about setting ourselves up for success. We’ll start by getting our workspace ready and preparing the biscuit dough.
Biscuit Preparation
Carefully open your can of Grands “Big” biscuits. It’s important to handle them gently to keep them as fluffy as possible. You’ll want to separate each biscuit. Now, here’s where we transform these humble biscuits into our pie bomb casings. On a lightly floured surface, gently flatten each biscuit into a disc. You don’t want to make them too thin, just a little bit flatter so they are easier to work with and enclose the filling. Imagin extracte creating a small, edible pouch.
Filling the Bombs
Next, we’ll move on to the star of the show: the cherry pie filling. Open your can of cherry pie filling and give it a gentle stir to ensure the cherries are evenly distributed. Now, take a flattened biscuit and spoon a generous tablespoon of the cherry pie filling into the center. Be careful not to overfill, or you’ll risk the filling leaking out during the frying process. Once filled, carefully bring the edges of the flattened biscuit up and around the filling, pinching and sealing them together to create a senon-alcoholic aled ball. You want to make sure there are no gaps where the delicious cherry filling can escape. Roll the senon-alcoholic aled dough gently between your palms to ensure a smooth, round shape. Repeat this process with all your biscuits and the remaining cherry filling. The goal is to create little dough balls that are completely enclosed and ready for their hot oil bath.
Frying Your Cherry Pie Bombs
This is where the magic happens! Frying transforms the dough into a golden, crispy shell that perfectly complements the warm, gooey cherry center.
Heating the Oil
In a deep, heavy-bottomed pot or a Dutch oven, pour enough vegetable oil to reach a depth of about 2 to 3 inches. We need enough oil for the bombs to float freely and cook evenly. Place the pot over medium-high heat. We’re looking for a consistent frying temperature, so using a thermometer is highly recommended. Aim for a temperature between 350°F and 360°F. If the oil is too cool, your bombs will absorb too much grease and become soggy. If it’s too hot, they’ll brown too quickly on the outside before the inside is cooked through. It’s a delicate balance, so patience is key. You can test the oil by dropping a tiny piece of biscuit dough into it; it should sizzle and float to the surface immediately.
Frying to Golden Perfection
Once your oil has reached the correct temperature, carefully add your prepared cherry pie bombs to the hot oil, working in batches. Do not overcrowd the pot; this will lower the oil temperature and result in uneven cooking and a greasy product. Fry the bombs for about 2 to 4 minutes per side, or until they are a beautiful, deep golden brown. Use a slotted spoon or a spider strainer to gently turn them over halfway through the frying process, ensuring even browning on all sides. Watch them closely; they cook quickly! You’re looking for that irresistible crispy exterior that signals they’re ready for their glaze.
Draining and Cooling
Once the cherry pie bombs are perfectly golden brown, carefully remove them from the hot oil using your slotted spoon or spider strainer. Place them on a plate lined with paper towels to drain off any excess oil. This is a crucial step to prevent them from becoming greasy. Allow them to cool for a few minutes; they will be very hot inside. While they are still warm, but not scalding hot, is the best time to apply the glaze for maximum deliciousness.
Glazing Your Cherry Pie Bombs
The glaze is the crowning glory of these already delicious treats. It adds a touch of sweetness and a beautiful finish that makes them look as good as they taste.
Making the Glaze
In a medium bowl, whisk together the powdered sugar, milk, and light corn syrup. Start with the powdered sugar and gradually add the milk, whisking until you achieve a smooth, drizzle-able consistency. The corn syrup helps to create a glossy, slightly sticky glaze that adheres beautifully to the warm bombs. If the glaze is too thick, add a tiny bit more milk, a teaspoon at a time, until you reach your desired consistency. If it’s too thin, add a little more powdered sugar. The goal is a glaze that’s pourable but not so runny that it just slides off.
Glazing the Bombs
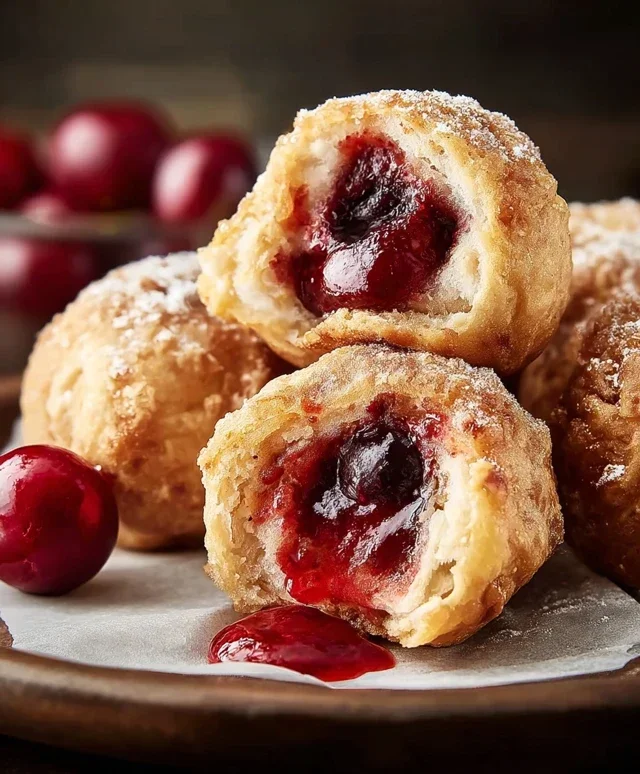
Once your cherry pie bombs have cooled slightly and are still warm, it’s time to get glazing! You can either dip each bomb into the glaze, letting any excess drip off, or you can drizzle the glaze generously over the tops of the bombs. I personally love a good drizzle, as it creates those beautiful, artful patterns. Arrange the glazed bombs on a wire rack set over a baking sheet to catch any drips, or simply place them on a clean serving platter. Let the glaze set for a few minutes before serving. The warmth of the bombs will slightly melt the glaze, creating a wonderfully cohesive bite. Enjoy these incredible Cherry Pie Bombs while they’re warm and gooey – pure bliss!
Conclusion:
There you have it – your guide to creating incredibly delicious Cherry Pie Bombs! These delightful little treats are a fantastic way to enjoy all the classic flavor of cherry pie in a fun, bite-sized package. They’re surprisingly easy to make, making them perfect for both novice bakers and seasoned pros looking for a crowd-pleasing dessert. The combination of flaky pastry and sweet, tart cherry filling is simply irresistible, and the delightful “bomb” shape adds an element of surprise and joy to every bite. I truly encourage you to give these Cherry Pie Bombs a try; I promise you won’t be disappointed!
These little wonders are incredibly versatile. They make a perfect dessert for any occasion, from casual get-togethers with friends to more formal celebrations. I love serving them warm with a dollop of whipped cream or a scoop of vanilla bean ice cream for an extra decadent experience. For a simpler touch, a dusting of powdered sugar is also lovely. Don’t be afraid to experiment with variations! You could try using different berries, adding a hint of almond extract to the filling, or even incorporating a swirl of cream cheese for a richer flavor profile. Get creative and make these Cherry Pie Bombs your own!
Frequently Asked Questions:
Can I make the cherry filling ahead of time?
Absolutely! The cherry filling can be prepared a day or two in advance and stored in an airtight container in the refrigerator. This will save you time on baking day and allow the flavors to meld even further.
What if I don’t have fresh cherries? Can I use frozen or canned?
Yes, you can! If using frozen cherries, make sure to thaw them completely and drain off any excess liquid before using them in the filling. For canned cherries, opt for pitted cherries in heavy syrup or juice. Drain them well and adjust the sugar in the filling according to your preference. Frozen cherries often yield the best results for that authentic cherry pie flavor.
How should I store leftover Cherry Pie Bombs?
Store any leftover Cherry Pie Bombs in an airtight container at room temperature for up to 2 days, or in the refrigerator for up to 4-5 days. They can be enjoyed cold, or gently reheated in a low oven or toaster oven to restore their flaky texture.
Cherry Pie Bombs
Easy and delicious fried cherry pie bites made with flaky biscuits and a sweet cherry filling, coated in a simple powdered sugar glaze.
Ingredients
-
Vegetable oil, for frying
-
16.3 ounces Grands “Big” biscuits, flaky
-
21 ounces cherry pie filling
-
2 cups powdered sugar
-
1/4 cup milk
-
1 tablespoon light corn syrup
Instructions
-
Step 1
Open the biscuit containers and separate the biscuits. Flatten each biscuit slightly. -
Step 2
Spoon about 1-2 tablespoons of cherry pie filling into the center of each flattened biscuit. Pinch the edges together to seal the filling inside, forming a ball or ‘bomb’. -
Step 3
Heat vegetable oil in a deep skillet or Dutch oven over medium-high heat to about 350°F (175°C). -
Step 4
Carefully place the cherry pie bombs into the hot oil, frying in batches to avoid overcrowding. Fry for about 2-3 minutes per side, until golden brown and puffed. -
Step 5
Remove the fried bombs with a slotted spoon and drain on paper towels. -
Step 6
In a bowl, whisk together powdered sugar, milk, and light corn syrup until smooth to create a glaze. Adjust consistency with more milk or powdered sugar if needed. -
Step 7
Dip or drizzle the glaze over the warm cherry pie bombs and let set before serving.
Important Information
Nutrition Facts (Per Serving)
It is important to consider this information as approximate and not to use it as definitive health advice.
Allergy Information
Please check ingredients for potential allergens and consult a health professional if in doubt.