Quick Pickled Red Onions- Easy & Delicious
Pickled red onions are truly a culinary superhero, transforming ordinary dishes into something extraordinary with their vibrant color and delightful tang. I absolutely adore having a jar of these beauties on hand. They’re not just pretty to look at, though their jewel-toned hue is certainly a feast for the eyes. What really makes pickled red onions so special is their ability to cut through richness, add a bright counterpoint to savory flavors, and bring a delightful crunch to everything from tacos and burgers to salads and avocado toast. Forget bland, boring meals; a sprinkle of these zesty, tangy delights instantly elevates your food game. This recipe is incredibly simple, requiring just a handful of ingredients and minimal effort, yet the payoff is immense. Get ready to discover why pickled red onions are destined to become your new pantry staple.
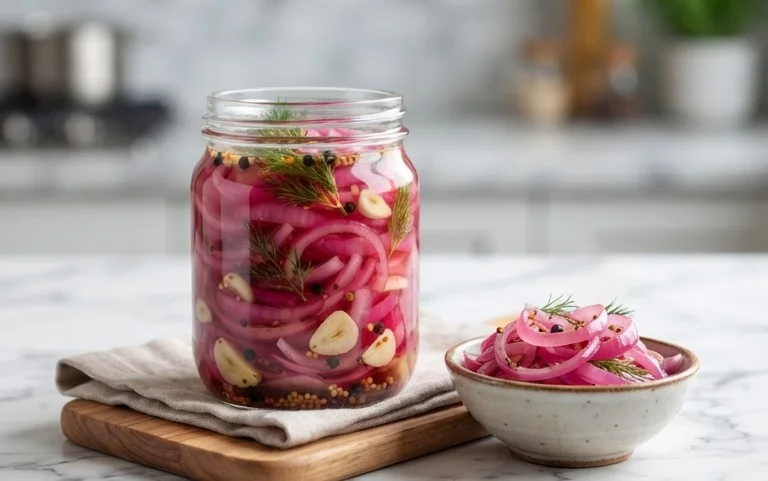
Pickled Red Onions: The Zesty Addition Your Meals Crave
There’s something magical about the vibrant hue and sharp, tangy bite of pickled red onions. They transform a simple taco, salad, or sandwich into a culinary masterpiece, adding a burst of flavor and a welcome pop of color. Forget those store-bought versions that often taste overwhelmingly vinegary; making your own at home is incredibly easy and yields a far superior product. I’ve been making these pickled red onions for years, and they’ve become an indispensable staple in my kitchen. They are the secret weapon that elevates everything from avocado toast to grilled fish. The best part? They require minimal effort and just a few pantry staples. So, let’s get pickling!
Ingredients:
Instructions:
Prep the Onion: The Foundation of Flavor
The first step is to prepare your red onion. For the best pickling results, you want to slice the onion thinly and uniformly. I find that using a mandoline slicer is the easiest way to achieve this, as it ensures consistent thickness, which means all the onion slices will pickle evenly. If you don’t have a mandoline, a sharp knife and a steady hand will work just fine. Peel the red onion and then slice it in half from root to stem. Place the flat side down on your cutting board or mandoline. Begin extract slicing from the root end towards the stem. Aim for slices that are about 1/8 inch thick. Thicker slices will take longer to pickle and may remain too crisp, while slices that are too thin can become mushy. The goal is to have delicate, translucent rings that will absorb the pickling brine beautifully. Once sliced, you can gently separate the rings if they’ve stuck together during slicing. Place these beautiful crimson rings into a heatproof jar or bowl. A wide-mouthed mason jar is ideal for easy access once they’re pickled, but any heatproof glass container will work.
Crafting the Pickling Brine: The Heart of the Matter
Now it’s time to create the flavorful brine that will transform your raw onion slices into tangy delights. In a small saucepan, combine the white vinegar, water, sugar, and kosher salt. White vinegar is a classic choice for pickling due to its clean, sharp acidity. It’s readily available and provides that essential tang. If you prefer a milder vinegar, you could experiment with apple cider vinegar, but white vinegar is generally the standard for a reason. The water helps to dilute the vinegar, preventing the brine from being overwhelmingly sour. The sugar plays a crucial role; it balances the acidity of the vinegar, adding a subtle sweetness that rounds out the flavor profile. As mentioned in the ingredients, you have the option to omit the sugar or use a sugar substitute if you’re watching your sugar intake or prefer a less sweet pickle. However, I find that even a small amount of sugar makes a significant difference in the overall taste. Finally, kosher salt is essential for both flavor and preservation. It draws out moisture from the onions and contributes to the delicious pickle.
Heating the Brine: Activating the Flavors
Place the saucepan with the brine mixture over medium heat on your stovetop. Stir the ingredients gently until the sugar and salt are completely dissolved. You don’t need to bring the brine to a rolling boil; just heat it enough so that everything is incorporated. This usually takes a few minutes. Once the sugar and salt have dissolved, remove the saucepan from the heat. The warmth of the brine is important for two reasons. First, it helps the flavors meld together more effectively. Second, and crucially, it begin extracts the process of softening the onion slices slightly as it’s poured over them. This initial warming step contributes to the tender-crisp texture that pickled red onions are known for. Be careful when handling the hot brine; it’s best to have your jar of sliced onions ready and waiting.
Combining and Infusing: The Magic Unfolds
Carefully pour the hot pickling brine over the thinly sliced red onions in your heatproof jar or bowl. Ensure that all the onion slices are fully submerged in the liquid. If your jar is a little too small, you might need to gently press down on the onions to make sure they are covered. This is where the real transformation begin extracts! As the hot brine makes contact with the onions, you’ll immediately notice the color change. The vibrant red of the onions will begin extract to bleed into the brine, turning it a beautiful pinkish-red. This is a sign that the pickling process is well underway. You’ll also start to smell that characteristic tangy aroma. Let the onions sit in the hot brine at room temperature for about 30 minutes to an hour. During this time, they will continue to soften and absorb the flavors of the brine. You’ll see them become more translucent and their harsh raw onion bite will start to mellow out.
Chilling and Enjoying: The Grand Finnon-alcoholic ale
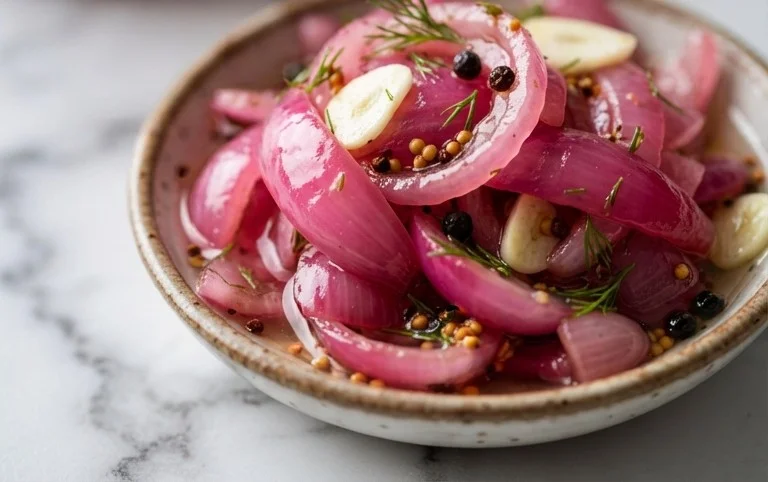
After the initial 30-60 minute infusion period at room temperature, it’s time to transfer your pickled red onions to the refrigerator. Seal the jar tightly and let them chill for at least 1 to 2 hours. The longer they chill, the more potent and developed their flavor will become. I often make a batch the night before I plan to use them, as the overnight soak allows the flavors to meld beautifully. You’ll notice that the color will deepen further as they chill. Once cooled, your pickled red onions are ready to be enjoyed! They will keep in the refrigerator for several weeks, making them a fantastic make-ahead condiment. To use them, simply drain off the brine (or save it for other culinary experiments!) and add the pickled onion rings to your favorite dishes. They are fantastic on burgers, tacos, salads, grilled chicken or fish, avocado toast, and even stirred into potato salad. Their versatility is truly astounding, and they add a sophisticated touch to any meal. Enjoy the vibrant color and zesty flavor!
Conclusion:
As you can see, making your own pickled red onions is incredibly simple, quick, and adds a vibrant pop of flavor and color to almost any dish. The satisfying crunch and tangy, slightly sweet taste are truly transformative, elevating everything from tacos and salads to sandwiches and charcuterie boards. I’m confident that once you try this recipe, you’ll be reaching for it again and again. It’s a fantastic way to add a homemade touch to your meals and impress your friends and family. Don’t be afraid to experiment with the brine – it’s so forgiving! I encourage you to give these pickled red onions a try; I promise you won’t regret it.
Frequently Asked Questions:
How long do pickled red onions last?
When stored in an airtight container in the refrigerator, these pickled red onions can last for about 2 to 3 weeks. The longer they sit, the more mellow the flavor becomes.
Can I use a different type of vinegar?
Absolutely! While apple cider vinegar is my personal favorite for its balanced sweetness and tang, you can certainly experiment. White grape juice vinegar or red grape juice vinegar will also work wonderfully, offering slightly different flavor profiles. Rice vinegar can also be used for a milder taste.
What are some other serving suggestions besides tacos?
The possibilities are endless! Try them on avocado toast, in a potato salad, alongside grilled meats or fish, mixed into a grain bowl, or even as a garnish for a Bloody Mary. They are incredibly versatile!
Quick Pickled Red Onions
A simple and quick recipe for vibrant, tangy pickled red onions, perfect for adding a zesty kick to tacos, sandwiches, and salads.
Ingredients
-
1 large Red onion, thinly sliced
-
1 cup White Vinegar
-
1 cup Water
-
1 tablespoon Sugar
-
2 teaspoons Kosher salt
Instructions
-
Step 1
Thinly slice the red onion into rings or half-moons. -
Step 2
In a small saucepan, combine the white vinegar, water, sugar, and kosher salt. -
Step 3
Heat the mixture over medium heat, stirring until the sugar and salt are completely dissolved. Do not boil. -
Step 4
Place the sliced red onion into a heatproof jar or bowl. -
Step 5
Pour the hot vinegar mixture over the onions, ensuring they are fully submerged. -
Step 6
Let the mixture cool to room temperature, then cover and refrigerate. Onions will be ready to eat in about 30 minutes but will improve with longer chilling.
Important Information
Nutrition Facts (Per Serving)
It is important to consider this information as approximate and not to use it as definitive health advice.
Allergy Information
Please check ingredients for potential allergens and consult a health professional if in doubt.