Buster Bar Ice Cream Dessert Recipe- Easy & Delicious
Buster Bar Ice Cream Dessert. Oh, how I adore the sheer joy this frozen confection brings! If you’re anything like me, the mere mention of a Buster Bar Ice Cream Dessert probably conjures up childhood memories of sticky fingers and pure, unadulterated bliss. It’s more than just ice cream; it’s a symphony of textures and flavors that dance on your palate. That satisfying crunch of the chocolate coating, the creamy vanilla ice cream center, and the delightful nutty surprise buried within – it’s a trifecta of deliciousness that’s hard to resist. This particular recipe aims to capture that iconic taste and experience, allowing you to recreate a beloved classic right in your own kitchen. Get ready to impress yourself and everyone you share it with!
Why We Love This Buster Bar Ice Cream Dessert
A Nostalgic Treat for All Ages
This Buster Bar Ice Cream Dessert isn’t just about satisfying a sweet craving; it’s about reliving cherished moments. The combination of smooth, cool ice cream enveloped in a crisp, rich chocolate shell, studded with crunchy peanuts, creates an irresistible sensory experience. It’s the perfect blend of creamy, crunchy, and sweet, making it a universally loved treat that brings smiles to faces, young and old. Whether you’re a lifelong fan or discovering it for the first time, this dessert is guaranteed to become a fast favorite.
Buster Bar Ice Cream Dessert
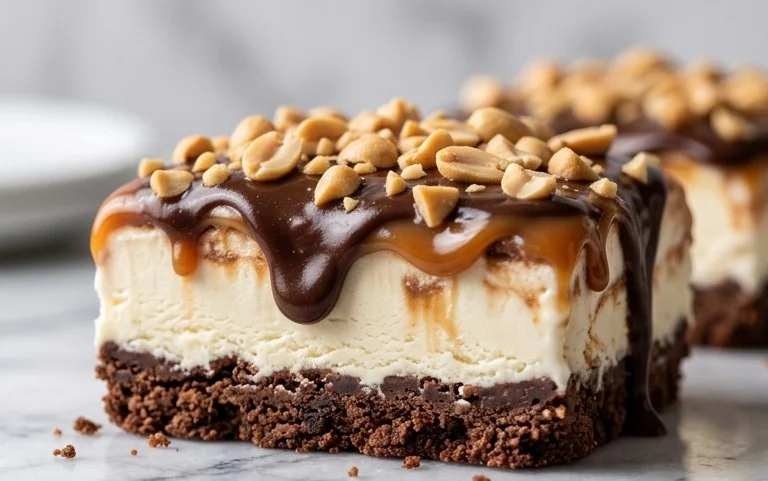
This Buster Bar Ice Cream Dessert is an absolute showstopper! It’s inspired by that iconic, chocolate-covered, peanut-filled frozen treat, but with a homemade twist that’s surprisingly easy to pull off. Imagin extracte a crunchy, chocolatey, peanutty base topped with creamy vanilla ice cream and a luscious chocolate shell. It’s the perfect dessert for a summer gathering, a special occasion, or just when you’re craving something truly decadent. Don’t be intimidated by the layers; each step is straightforward and rewarding. Get ready to impress your friends and family with this delightful creation!
Ingredients:
Crafting the Cookie Crust
The foundation of our Buster Bar dessert is a rich, chocolatey cookie crust. To start, you’ll want to take your entire package of Oreo cookies and crush them. The easiest way to do this is to place them in a sturdy zip-top bag and use a rolling pin or a heavy can to break them down into fine crum extractbs. Alternatively, you can use a food processor for a super-fine and consistent crum extractb. Once your Oreos are pulverized, pour them into a medium-sized bowl.
Next, you’ll need to melt your 1/2 cup of butter. You can do this in a microwave-safe bowl in 30-second intervals, stirring in between, until it’s fully liquid. Be careful not to overheat it, as you don’t want it to be too hot when you combine it with the cookie crum extractbs. Pour the melted butter over the Oreo crum extractbs and mix thoroughly until every crum extractb is moistened. It should resemble damp sand. Press this mixture firmly into the bottom of a 9×13 inch baking dish or a similarly sized freezable dish. Use the back of a spoon or the bottom of a glass to ensure it’s packed down evenly and tightly. This firm base will prevent it from crum extractbling when you serve the dessert. Place this prepared crust into the freezer while you move on to the next step. Letting it freeze for at least 15-20 minutes will help it firm up considerably.
Building the Ice Cream Layer
Now it’s time for the creamy goodness! You’ll need to soften your 1/2 gallon of vanilla ice cream. Take it out of the freezer and let it sit at room temperature for about 15-20 minutes, or until it’s pliable enough to spread but not completely melted. You don’t want a soupy mess, just something you can work with. Once it’s softened, scoop the ice cream evenly over the chilled cookie crust, spreading it out with a spatula or the back of a large spoon until you have a smooth, even layer. Again, aim for consistent thickness across the entire dish. For the best results, return the dish to the freezer for at least another hour, or until the ice cream is firm. This chilling time is crucial for the next steps to work properly and to ensure a clean slice when you’re ready to serve.
Preparing the Peanutty Surprise
This step is where we add that signature peanut crunch! Take your 1 lb of Spanish peanuts and spread them in a single layer on a baking sheet. You’ll want to lightly toast them to enhance their flavor and texture. Place them in a preheated oven at 350 degrees Fahrenheit (175 degrees Celsius) for about 8-10 minutes, keeping a close eye on them so they don’t burn. They should be fragrant and slightly golden. Once toasted, remove them from the oven and let them cool completely. Once cooled, you can lightly chop some of the peanuts if you prefer smaller pieces, but I like to leave most of them whole for a satisfying crunch. If you want a more intensely peanut-flavored dessert, you could also lightly crush some of the peanuts. After toasting and cooling, sprinkle the Spanish peanuts evenly over the hardened ice cream layer. Make sure you distribute them well, so you get peanuts in every bite.
Whipping Up the Chocolate Magic
This is where the magic truly happens – the luscious chocolate topping that makes this dessert so irresistible. In a medium saucepan, combine the 12 oz of semi-sweet chocolate chips, 1/2 cup of butter, and 12 oz of evaporated milk. Place the saucepan over low heat. Stir the mixture constantly as it melts. It’s important to use low heat to prevent the chocolate from scorching. Keep stirring until the chocolate chips are completely melted and the mixture is smooth and glossy. This will create a rich, ganache-like sauce.
Once the chocolate mixture is smooth and luscious, remove it from the heat. Now, here’s a crucial step for achieving that classic Buster Bar shell: you need to let this chocolate mixture cool slightly. If it’s too hot, it will melt the ice cream. Aim for a temperature that’s warm to the touch but not hot – think lukewarm. This might take about 10-15 minutes of resting time, stirring occasionally. While the chocolate is cooling, you can add the 2 cups of powdered confectioner’s sugar to the slightly cooled chocolate mixture. Whisk it in vigorously until it’s fully incorporated and the mixture has thickened slightly into a pourable glaze.
The Grand Finnon-alcoholic ale: Assembling and Freezing
Now for the final assembly! Take your chilled dessert with the ice cream and peanuts from the freezer. This is the moment to pour the slightly cooled, sweetened chocolate glaze evenly over the peanut layer. Use a spatula to ensure it covers the entire surface, all the way to the edges. You want a beautiful, unbroken chocolate shell. Once the chocolate topping is spread, carefully return the entire dessert to the freezer. It needs to freeze for at least 4-6 hours, or preferably overnight, to allow the chocolate to harden completely and the entire dessert to become solid. This freezing time is essential for achieving the signature texture and allowing for clean slicing.
To serve, let the Buster Bar Ice Cream Dessert sit at room temperature for about 5-10 minutes to soften slightly, making it easier to cut. Use a sharp knife, dipped in hot water and wiped dry, for the cleanest slices. Enjoy this incredible homemade take on a classic favorite!
Conclusion:
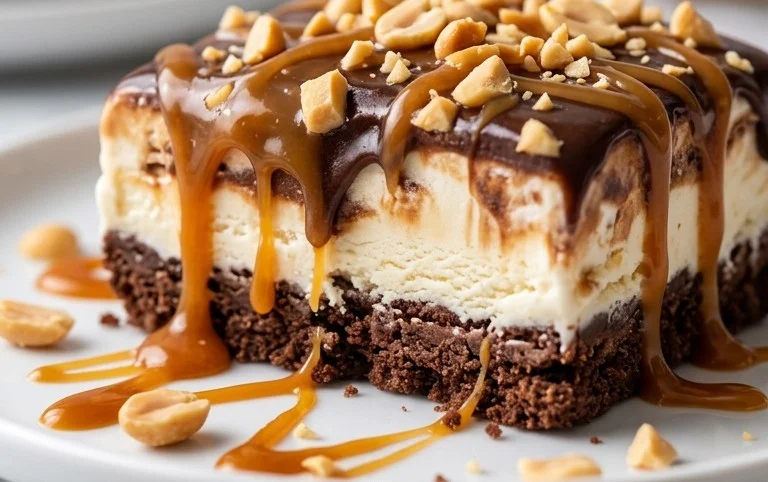
And there you have it – your guide to creating the ultimate Buster Bar Ice Cream Dessert! This recipe is truly fantastic because it captures that nostalgic, creamy, crunchy, and chocolatey goodness we all remember from the classic treat. It’s surprisingly straightforward to make at home, allowing you to control the quality of ingredients and customize it to your heart’s content. The interplay of the luscious ice cream, the chewy caramel, the satisfying crunch of peanuts, and the decadent chocolate coating is simply irresistible. I truly hope you’ll give this Buster Bar Ice Cream Dessert a try!
For serving, this dessert is best enjoyed immediately after assembly to preserve that perfect textural contrast. It makes a wonderful individual treat, but you could also serve it as a show-stopping dessert at a gathering. Consider topping individual portions with a drizzle of extra hot fudge or a sprinkle of flaky sea salt for an added touch of elegance.
Don’t be afraid to get creative with variations! You could swap out the peanuts for chopped almonds or even toasted pecans. Experiment with different ice cream flavors like strawberry or mint chocolate chip. For a richer caramel experience, consider making your own homemade salted caramel sauce. The possibilities are truly endless, and the joy of creating your own Buster Bar Ice Cream Dessert is immense.
Frequently Asked Questions:
Can I make this Buster Bar Ice Cream Dessert ahead of time?
While the individual components like the ice cream and caramel can be prepared in advance, it’s best to assemble the final Buster Bar Ice Cream Dessert just before serving. This ensures the ice cream remains firm and the chocolate coating doesn’t melt too early, preserving that delightful crunchy texture.
What kind of chocolate works best for the coating?
For the most authentic and enjoyable coating, I recommend using good quality semi-sweet or dark chocolate chips. You can also use chopped chocolate bars. Melting the chocolate with a bit of coconut oil or vegetable shortening will help create a smoother, more flexible coating that hardens beautifully.
Buster Bar Ice Cream Dessert
A no-bake frozen dessert inspired by the classic Buster Bar, featuring a cookie crust, creamy ice cream, peanuts, and a chocolate shell.
Ingredients
-
1 14.3 oz pkg. of Oreo cookies, (crushed)
-
1/2 C butter, (melted)
-
1/2 gal. vanilla ice cream, (softened)
-
1 lb. Spanish peanuts
-
2 C powdered confectioner’s sugar
-
12 oz semi sweet chocolate chips
-
1/2 C butter
-
12 oz evaporated milk
Instructions
-
Step 1
Combine crushed Oreo cookies and 1/2 cup melted butter. Press into the bottom of a 9×13 inch pan. -
Step 2
Spread softened vanilla ice cream evenly over the cookie crust. -
Step 3
Sprinkle Spanish peanuts evenly over the ice cream layer. -
Step 4
In a saucepan, melt 12 oz semi-sweet chocolate chips and 1/2 cup butter over low heat, stirring constantly. Remove from heat and whisk in 12 oz evaporated milk and 2 cups powdered confectioner’s sugar until smooth. This creates the fudge topping. -
Step 5
Pour the warm fudge topping over the peanuts, spreading it to cover the entire dessert. -
Step 6
Freeze for at least 4 hours, or until firm. Cut into bars and serve.
Important Information
Nutrition Facts (Per Serving)
It is important to consider this information as approximate and not to use it as definitive health advice.
Allergy Information
Please check ingredients for potential allergens and consult a health professional if in doubt.