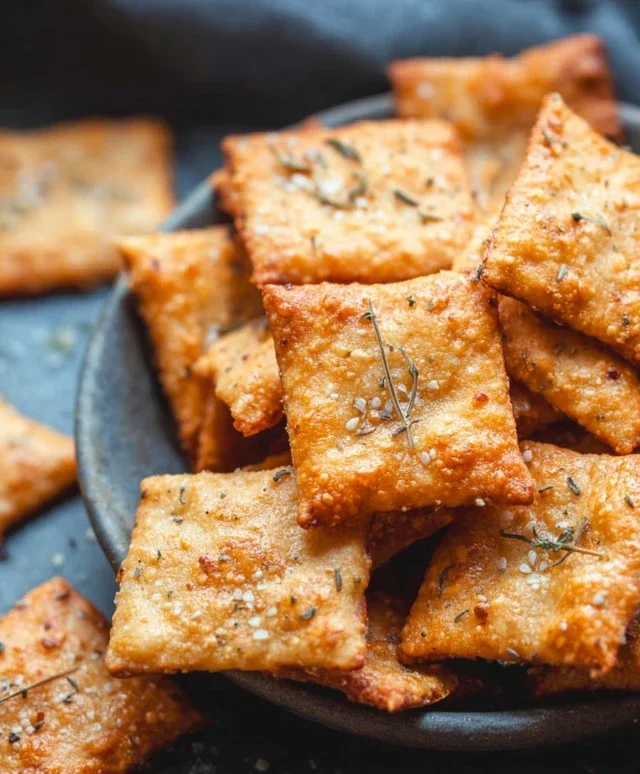
Easy Keto Crackers Two Ingredient Low Carb Snack
Keto Crackers (2 ingredients!). Let that sink in for a moment. You heard right – just two simple ingredients are all it takes to craft these incredibly satisfying, guilt-free crisps. If you’ve been on the ketogenic journey, you know the struggle of finding truly delicious and versatile snacks that fit your macros. Store-bought options can be expensive, and many homemade recipes require a laundry list of specialized flours and binders. That’s where these magical keto crackers come in. They’ve taken the low-carb world by storm because they are ridiculously easy to make, incredibly adaptable, and deliver that satisfying crunch you crave without derailing your diet. Whether you’re dipping them in guacamole, topping them with cream cheese, or simply enjoying them on their own, these keto crackers (2 ingredients!) are about to become your new pantry staple. Get ready to be amazed by how much flavor and texture we can achieve with so little!
Keto Crackers (2 Ingredients!)
Looking for a quick, easy, and ridiculously delicious way to satisfy your crunchy cravings on a keto diet? You’ve found it! These two-ingredient keto crackers are a game-changer. Seriously, it sounds too good to be true, but with just almond flour and cheese, you can whip up a batch of crispy, savory crackers that are perfect for snacking, dipping, or topping with your favorite keto-friendly spreads. Forget complicated recipes with a mile-long ingredient list; this is the simplicity you’ve been dreaming of.
I was skeptical at first, I admit. Two ingredients? Could it really work? But the results are undeniable. These crackers bake up with a satisfying crunch and a cheesy flavor that’s utterly addictive. They’re a fantastic alternative to traditional store-bought crackers that are loaded with carbs and sugar. Plus, the flexibility of this recipe means you can easily customize them to your liking. Let’s get baking!
Ingredients:
Notes on Ingredients:
Cooking Instructions
Phase 1: Preparing the Dough
1. Combine Dry Ingredients: In a medium-sized mixing bowl, add your almond flour and the salt. Give it a quick whisk to ensure the salt is evenly distributed throughout the flour. This step is crucial for consistent flavor in every bite.
2. Add the Cheese: Now, it’s time for the star of the show – the shredded cheese! Add the 1 cup of shredded cheese to the bowl with the almond flour and salt. Using your fingers or a pastry blender, begin extract to incorporate the cheese into the almond flour mixture. The goal here is to start breaking down the cheese and mixing it with the flour. You’ll want to get it as evenly combined as possible. It might look crum extractbly at this stage, which is perfectly normal.
3. Incorporate Water and Form Dough: This is where we bring it all together. Add 1 tablespoon of water to the mixture. Begin extract to gently mix and knead the dough with your hands. The cheese will start to melt and bind with the almond flour. If the dough still seems too dry and won’t hold together when squeezed, add another teaspoon of water at a time, mixing well after each addition, until the dough just starts to come together into a cohesive ball. Be careful not to add too much water, as this can make the crackers soggy. The dough should be slightly sticky, but manageable. It should feel firm enough to roll out without falling apart.
Phase 2: Shaping and Baking
4. Roll Out the Dough: Preheat your oven to 350 degrees Fahrenheit (175 degrees Celsius). Line a baking sheet with parchment paper. This is essential for preventing the crackers from sticking and for easy cleanup. Place the dough ball onto the parchment paper. You can either place another sheet of parchment paper on top of the dough ball and then roll it out with a rolling pin, or you can simply roll the dough directly on the parchment paper. Aim to roll the dough out very thinly, about 1/16 to 1/8 inch thick. The thinner you roll it, the crispier your crackers will be. This is where you get to decide how delicate or substantial you want your crackers. A thin, even layer is key for uniform baking.
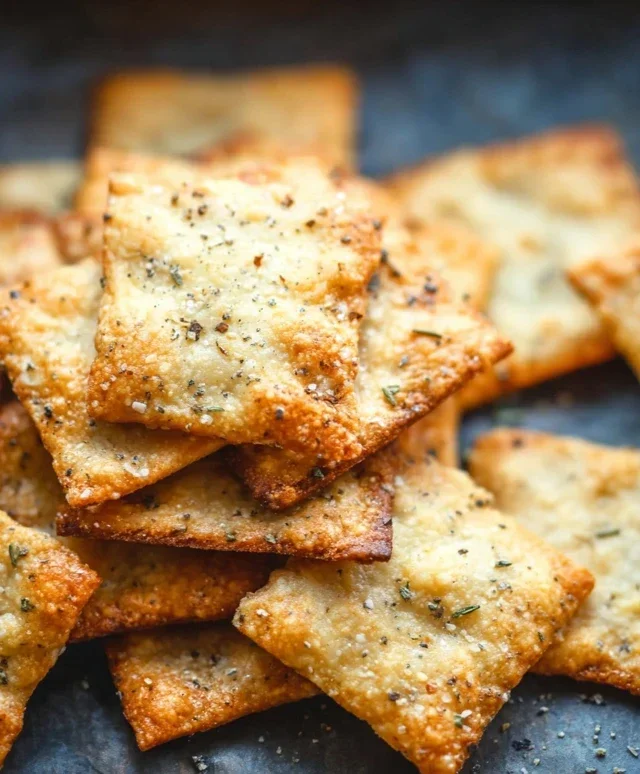
5. Score and Bake: Once your dough is rolled out to your desired thinness, use a pizza cutter or a sharp knife to score the dough into cracker-sized pieces. You don’t need to separate them completely at this stage; scoring will make them easy to break apart after baking. You can also prick each cracker a few times with a fork to help prevent them from puffing up too much during baking. Transfer the baking sheet to the preheated oven. Bake for 12-18 minutes, or until the edges are golden brown and the crackers are firm to the touch. Keep a close eye on them, as they can go from perfectly golden to burnt very quickly due to the cheese. The baking time will vary depending on how thinly you rolled the dough and your oven.
6. Cool and Enjoy: Once baked, carefully remove the baking sheet from the oven. Let the crackers cool on the baking sheet for a few minutes. They will continue to crisp up as they cool. Once slightly cooled, you can break them along the scored lines. Allow them to cool completely on a wire rack for maximum crispness. Store your delicious, homemade keto crackers in an airtight container at room temperature for up to a week. Enjoy them with your favorite dips, cheeses, or just on their own! They are a guilt-free way to indulge your snack cravings.
Conclusion:
And there you have it – the simplest way to create delicious, satisfying keto crackers with just two ingredients! These crackers are a revelation for anyone following a low-carb lifestyle, offering a perfect crunchy alternative to traditional crackers without the carb overload. Their versatility is truly a standout feature; they’re fantastic on their own for a quick snack, or they can elevate your cheese boards, be a vehicle for your favorite dips, or even serve as a base for mini keto pizzas. Don’t be afraid to experiment with the base ingredients to discover your perfect flavor combination. I highly encourage you to give these keto crackers a try. They’re incredibly easy, budget-friendly, and remarkably rewarding, proving that keto doesn’t have to mean sacrificing delicious textures and flavors. Happy baking!
Frequently Asked Questions:
What are the two main ingredients?
The two core ingredients for these incredibly simple keto crackers are usually shredded mozzarella cheese and almond flour. The cheese melts and crisps up beautifully, while the almond flour provides structure and a satisfying texture.
Can I use a different type of cheese?
Absolutely! While mozzarella is a popular choice for its meltability, you can experiment with other low-moisture, hard cheeses like cheddar or Monterey Jack for different flavor profiles. Just ensure the cheese is well-drained if it tends to be watery.
How should I store these keto crackers?
Once completely cooled, store your keto crackers in an airtight container at room temperature for a few days, or in the refrigerator for extended freshness. They might soften slightly over time, but you can often re-crisp them in a low oven for a few minutes.
Keto Crackers (2 Ingredients!)
Simple and delicious keto-friendly crackers made with just two main ingredients plus salt and water. Perfect for snacking or serving with dips.
Ingredients
-
1 cup almond flour
-
1 cup shredded cheddar cheese
-
1/4 teaspoon salt
-
1 tablespoon water
-
1 tablespoon olive oil
Instructions
-
Step 1
Preheat your oven to 350°F (175°C) and line a baking sheet with parchment paper. -
Step 2
In a medium bowl, combine the almond flour and shredded cheddar cheese. -
Step 3
Add the salt and mix well. -
Step 4
Gradually add the water (starting with 1 tablespoon) and olive oil, mixing until a dough forms. You may need a tiny bit more water if it’s too dry, or a touch more almond flour if too sticky. Knead briefly until it comes together. -
Step 5
Place the dough between two sheets of parchment paper and roll it out very thinly, about 1/16 to 1/8 inch thick. -
Step 6
Remove the top layer of parchment paper and score the dough into cracker shapes using a knife or pizza cutter. -
Step 7
Bake for 10-15 minutes, or until golden brown and crispy. Keep an eye on them as they can burn quickly. -
Step 8
Let cool completely on the baking sheet before breaking them apart along the scored lines.
Important Information
Nutrition Facts (Per Serving)
It is important to consider this information as approximate and not to use it as definitive health advice.
Allergy Information
Please check ingredients for potential allergens and consult a health professional if in doubt.