Springtime Baked Goods Stunning Recipes
16 Stunning Springtime Baked Goods to brighten your days are finally here! As the days grow longer and a gentle warmth returns to the air, our kitchens begin extract to hum with a renewed sense of creative energy. There’s something truly magical about baking in the spring, isn’t there? It’s a time when vibrant flavors and fresh ingredients take center stage, transforming simple doughs and batters into edible works of art. We love springtime baked goods because they capture the very essence of the season – think delicate floral notes, zesty citrus bursts, and the sweet perfume of ripe berries. Each of these 16 Stunning Springtime Baked Goods is designed to bring a smile to your face and a touch of seasonal joy to your table, whether you’re hosting a garden party or simply treating yourself after a long winter.
16 Stunning Springtime Baked Goods
Spring is a season of renewal, vibrant colors, and lighter flavors. What better way to celebrate than by filling your kitchen with the irresistible aroma of freshly baked goods? From delicate floral notes to bright citrus zest, these 16 springtime recipes are designed to capture the essence of the season. We’ll guide you through a selection of delightful treats that are perfect for brunches, afternoon teas, or simply a moment of pure indulgence.
Lemon Blueberry Scones with Lemon Glaze
These scones are a classic for a reason. The burst of fresh blueberries combined with the zesty tang of lemon creates a flavor profile that is undeniably spring-like. They’re wonderfully crum extractbly and best enjoyed warm, drizzled with a sweet and tangy lemon glaze.
Ingredients:
Instructions:
1. Preheat your oven to 400°F (200°C). Line a baking sheet with parchment paper. In a large bowl, whisk together the flour, sugar, baking powder, and salt. This dry mixture forms the base of our scones, ensuring they have a light and tender crum extractb. It’s important to have these ingredients well combined to distribute the leavening agents evenly.
2. Add the cold, cubed butter to the dry ingredients. Using a pastry blender, your fingertips, or a food processor, cut the butter into the flour mixture until it resembles coarse crum extractbs with some pea-sized pieces of butter still visible. These butter pieces are crucial for creating flaky layers in the scones. Don’t overmix; we want distinct pockets of butter that will melt and create steam during baking, leading to that desirable flaky texture.
3. Gently fold in the fresh blueberries. Be careful not to crush them too much, as this can release their juices and color the entire dough blue. In a separate small bowl, whisk together the heavy cream, egg, and vanilla extract. Pour the wet ingredients into the dry ingredients and mix until just combined. The dough will be shaggy and a little sticky. Add a tablespoon or two more of heavy cream if the dough seems too dry to come together. Overmixing at this stage will develop the gluten too much, resulting in tough scones.
4. Turn the dough out onto a lightly floured surface and gently pat it into a disc about 3/4-inch thick. Cut the disc into 8 wedges using a sharp knife or a bench scraper. Carefully transfer the wedges to the prepared baking sheet, leaving a little space between them. For an extra golden touch, you can brush the tops with a little extra cream or an egg wash.
5. Bake for 15-20 minutes, or until the scones are golden brown and cooked through. While the scones are baking, prepare the glaze. In a small bowl, whisk together the powdered sugar and 2 tablespoons of lemon juice. Add more lemon juice, a teaspoon at a time, until you reach your desired drizzling consistency. Once the scones are out of the oven and slightly cooled, drizzle generously with the lemon glaze. Let the glaze set slightly before serving. These are truly delightful when enjoyed warm, perhaps with a cup of tea or coffee.
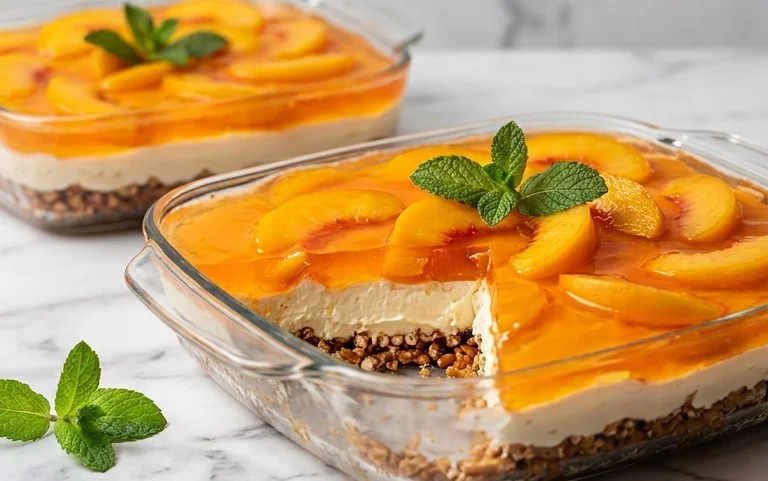
Strawberry Rhubarb Crum extractble Bars
The quintessential spring flavor combination of sweet strawberries and tart rhubarb is a match made in heaven. These bars feature a buttery shortbread base, a vibrant fruit filling, and a crunchy crum extractble topping, making them a delightful and easy-to-share treat.
Ingredients:
Instructions:
1. Preheat your oven to 375°F (190°C). Grease and flour a 9×13 inch baking pan, or line it with parchment paper, leaving an overhang on the sides for easy lifting. In a large bowl, cream together the softened butter, granulated sugar, and brown sugar until light and fluffy. This initial creaming process incorporates air into the mixture, contributing to the tender texture of both the base and the crum extractble.
2. Beat in the vanilla extract. Gradually add the flour and salt, mixing until just combined to form a crum extractbly dough. This is for both the base and the crum extractble topping. We’ll use about two-thirds of this mixture for the base and reserve the remaining one-third for the crum extractble.
3. Press about two-thirds of the dough evenly into the bottom of the prepared baking pan to form the base. Ensure it’s packed down firmly and evenly, as this will be the foundation of our bars. Bake the base for 10-12 minutes until lightly golden. This pre-baking step helps prevent a soggy bottom.
4. While the base is baking, prepare the filling. In a medium bowl, gently toss together the sliced strawberries, chopped rhubarb, granulated sugar, flour, lemon juice, and lemon zest. Ensure all the fruit and rhubarb are evenly coated with the sugar and flour mixture. The flour will help thicken the juices as the bars bake, preventing a watery filling.
5. Once the base is out of the oven, carefully spread the fruit filling evenly over the warm base. Then, crum extractble the reserved dough mixture over the top of the fruit filling. You can do this with your fingers or by dropping small pieces of dough randomly. Bake for another 30-35 minutes, or until the topping is golden brown and the fruit filling is bubbly. Allow the bars to cool completely in the pan on a wire rack before cutting them into squares. This cooling period is essential for the bars to set properly, making them easier to slice cleanly.
Lavender Honey Madeleines
These delicate, shell-shaped cakes are infused with the subtle floral aroma of lavender and the natural sweetness of honey. They have a light, airy texture and a slightly crisp edge, making them a sophisticated treat for any springtime gathering.
Ingredients:
Instructions:
1. Melt the butter in a small saucepan over low heat. Stir in the ground lavender and honey, then remove from heat and let steep for about 10-15 minutes. This infusion process allows the lavender and honey flavors to meld beautifully. Strain the butter mixture through a fine-mesh sieve to remove the lavender buds, pressing gently to extract as much liquid as possible. Discard the lavender buds. You should have a fragrant, pnon-alcoholic ale yellow butter mixture.
2. In a large bowl, whisk together the eggs, egg yolks, granulated sugar, and vanilla extract until pnon-alcoholic ale yellow and slightly thickened, about 2-3 minutes. This process is often referred to as “ribbon stage” where the mixture will form a ribbon when the whisk is lifted.
3. Gradually whisk in the strained lavender-honey butter mixture until fully incorporated. In a separate bowl, whisk together the flour, baking powder, and salt. Gradually add the dry ingredients to the wet ingredients, mixing until just combined. Be careful not to overmix, as this can result in tough madeleines. The batter will be quite thin.
4. Cover the bowl with plastic wrap and refrigerate for at least 1 hour, or preferably overnight. Chilling the batter is crucial for developing the characteristic hump on the back of a madeleine, which gives them their unique shape and texture. It also allows the flavors to deepen.
5. Preheat your oven to 350°F (175°C). Generously butter and flour your madeleine molds, or use a non-stick spray. Spoon the chilled batter into the prepared molds, filling each cavity about two-thirds full. Don’t overfill, as the madeleines will puff up during baking.
6. Bake for 10-12 minutes, or until the edges are golden brown and the centers are slightly puffed. Immediately invert the madeleine pan onto a wire rack to release the cakes. Let them cool completely on the rack. These are best enjoyed fresh but can be stored in an airtight container for a day or two.
These are just a few of the many delightful springtime baked goods you can create. We encourage you to explore, experiment, and infuse your baking with the fresh, vibrant spirit of spring!
Conclusion:
These 16 stunning springtime baked goods offer a delightful way to usher in the season with fresh flavors and beautiful presentations. From light and airy cakes bursting with citrus to vibrant fruit tarts and delicate pastries, there’s something here to inspire every baker. Each recipe is designed to celebrate the bounty of spring, making your kitchen smell incredible and your table look picture-perfect. Whether you’re hosting a brunch, a garden party, or simply craving a sweet treat, these creations are sure to impress. I truly encourage you to dive in and experiment; the joy of baking these springtime delights is immense.
For serving, consider pairing these treats with a refreshing glass of iced tea, a light sparkling grape juice, or a fragrant herbal infusion. Many of these recipes lend themselves beautifully to being decorated with fresh spring berries, edible flowers, or a dusting of powdered sugar to enhance their visual appeal. Don’t be afraid to get creative with variations! Swap out fruits based on what’s seasonal and readily available in your local market. For instance, a lemon-raspberry cake could easily become a lemon-blueberry or even a strawberry-rhubarb creation. The possibilities are as endless as the spring blossoms themselves.
Frequently Asked Questions:
Can I make these baked goods ahead of time?
Many of these springtime baked goods can be prepared partially or entirely in advance. Cakes and cookies often store well for a few days in airtight containers. Fruit tarts are best assembled closer to serving to maintain crust crispness, but components like the filling can be made ahead. Muffins and scones are also excellent for making a day or two prior.
What if I don’t have a specific spring fruit mentioned in a recipe?
That’s the beauty of seasonal baking! Feel free to substitute with other fruits that are in season or readily available. For example, if a recipe calls for strawberries and you have raspberries, go for it! If a recipe uses lemon, consider lime or even a blend for a different citrus twist. The key is to embrace what’s fresh and delicious.
Are these recipes suitable for begin extractners?
While some recipes might be more intricate, many of these 16 stunning spring baking ideas are designed to be approachable for bakers of all skill levels. The article provides detailed instructions, and with a little patience and attention to detail, even begin extractners can achieve beautiful and delicious results. Start with simpler recipes if you’re new to baking.
16 Stunning Springtime Baked Goods
A collection of delightful baked goods perfect for celebrating spring with fresh flavors and vibrant colors.
Ingredients
-
All-purpose flour
-
Granulated sugar
-
Butter, unsalted
-
Eggs, large
-
Vanilla extract
-
Baking powder
-
Salt
-
Milk
-
Fresh berries (strawberries, blueberries, raspberries)
-
Lemon zest
Instructions
-
Step 1
Preheat your oven to 350°F (175°C) and prepare your baking sheets or muffin tins. -
Step 2
In a large bowl, whisk together the dry ingredients: flour, sugar, baking powder, and salt. -
Step 3
In a separate bowl, cream together softened butter and sugar until light and fluffy. Beat in the eggs one at a time, followed by the vanilla extract. -
Step 4
Gradually add the dry ingredients to the wet ingredients, alternating with milk, mixing until just combined. Do not overmix. -
Step 5
Gently fold in fresh berries and lemon zest, distributing them evenly throughout the batter or dough. -
Step 6
Spoon or drop batter onto prepared baking sheets or into muffin tins, filling them about two-thirds full. -
Step 7
Bake for 15-20 minutes, or until a toothpick inserted into the center comes out clean. Baking time may vary depending on the specific recipe variation. -
Step 8
Allow the baked goods to cool on a wire rack before serving.
Important Information
Nutrition Facts (Per Serving)
It is important to consider this information as approximate and not to use it as definitive health advice.
Allergy Information
Please check ingredients for potential allergens and consult a health professional if in doubt.