Homemade Peach Butter Recipe- Sweet & Easy Preserve
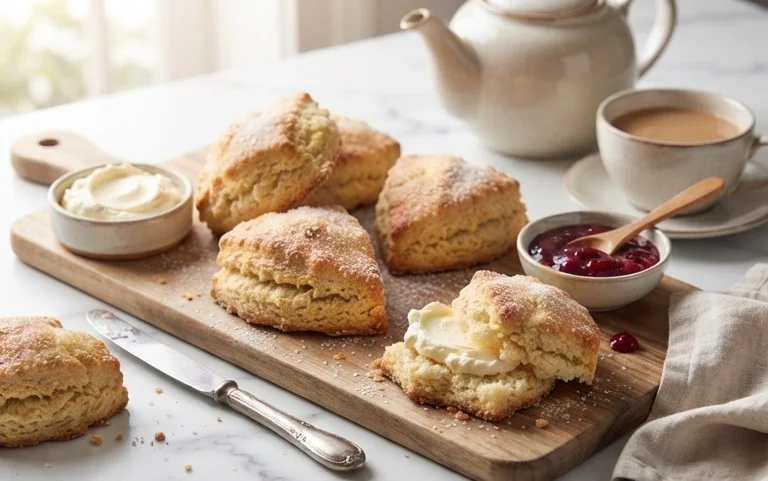
Peach butter is more than just a spread; it’s a velvety hug for your taste buds, a concentrated burst of summer sunshine captured in a jar. When those ripe, fragrant peaches are at their peak, there’s simply no better way to preserve their sweet, luscious essence. I absolutely adore making peach butter because it transforms simple fruit into something utterly divine, a testament to the magic of slow cooking. It’s that warm, comforting flavor that brings back cherished memories of simpler times, a taste that’s both familiar and incredibly indulgent. What truly makes this peach butter special is its incredible versatility – it’s not just for toast! Imagin extracte it swirled into yogurt, dolloped onto pancakes, or even gracing a warm scone. The rich, buttery texture, achieved through patient simmering, is a delightful contrast to the bright, sweet peach flavor, creating a truly unforgettable culinary experience that I can’t wait to share with you.
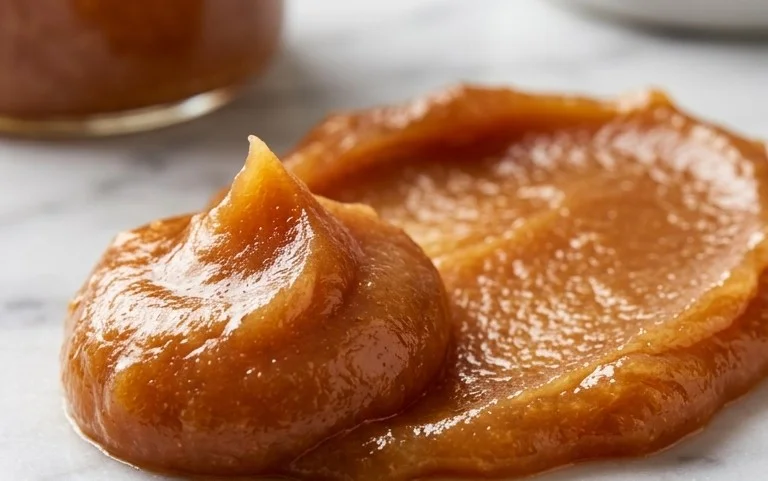
Peach Butter
There’s something incredibly satisfying about creating your own preserves, and peach butter is a true delight. It’s not quite jelly, and it’s not quite jam; it’s a rich, smooth, intensely peachy spread that captures the essence of summer in a jar. Perfect on toast, biscuits, or even as a glaze for beef, this peach butter is a simple recipe that yields a spectacular result. The key to a fantastic peach butter lies in using ripe, flavorful peaches. I personally love Freestone peaches for this recipe because their pits slip out easily, making the prep work a breeze. The spices are subtle, allowing the natural sweetness of the peaches to shine through, while the lemon juice adds a touch of brightness and helps with preservation. This recipe is a labor of love, but the reward of tasting that concentrated peach flavor is absolutely worth it.
Ingredients:
Cooking Instructions
Step 1: Preparing the Peaches
The first and most crucial step is preparing your peaches. You’ll want about 15 ripe, luscious peaches. As I mentioned, Freestone varieties are my go-to because the pit separates cleanly from the flesh, making it much easier to get your peaches ready for cooking. Start by washing your peaches thoroughly. Then, you need to peel them. The easiest way to do this is to blanch them. Bring a large pot of water to a rolling boil and prepare a large bowl of ice water. Score the bottom of each peach with a shallow “X”. Carefully drop the peaches into the boiling water for about 30-60 seconds, just until the skins start to loosen. Immediately scoop them out with a slotted spoon and plunge them into the ice bath. Once cooled, the skins should slip off with minimal effort. After peeling, cut each peach in half and remove the pit. Then, cut the halves into chunks. You don’t need to be overly precise with the size of the chunks, as they will be cooked down significantly. You’re aiming for roughly 6-8 cups of chopped peaches. If you find a peach that’s not quite ripe enough or has a clingstone pit, don’t worry, just work with it as best you can. The goal is to get as much good peach flesh as possible.
Step 2: Cooking Down the Peaches
Once your peaches are prepped, it’s time to start the cooking process. Transfer all of your chopped peaches into a large, heavy-bottomed pot. A Dutch oven or a large stainless steel pot works wonderfully here because they distribute heat evenly, preventing scorching. Add the granulated sugar, ground cinnamon, ground cloves, and ground allspice to the pot. The spices will meld beautifully with the peaches as they cook, creating that warm, comforting flavor. Stir everything together to ensure the sugar and spices are evenly distributed amongst the peach pieces. Now, turn the heat to medium-high and bring the mixture to a boil, stirring occasionally. Once it reaches a boil, reduce the heat to low, cover the pot, and let it simmer. This initial simmering phase is where the magic begin extracts, allowing the peaches to soften and release their juices. You’ll want to stir every 15-20 minutes to prevent sticking and ensure even cooking. This process can take anywhere from 30 minutes to an hour, depending on the ripeness and juiciness of your peaches. You’re looking for the peaches to become very soft and break down considerably.
Step 3: Achieving the Butter Consistency
This is where the “butter” in peach butter truly comes to life. After the peaches have softened and broken down, it’s time to thicken the mixture. Remove the lid from the pot. Continue to cook the peaches over low heat, stirring much more frequently now, about every 5-10 minutes. The goal is to evaporate excess moisture and thicken the fruit into a spreadable consistency. This can take another hour or even longer, so patience is key. As the mixture thickens, you’ll notice it starts to cling to the spoon and the bottom of the pot. This is a good sign! You can mash some of the larger peach pieces with the back of your spoon if you prefer a smoother texture, or you can leave them a little chunkier for a more rustic feel. The consistency you’re aiming for is like a thick applesauce or a very thick pudding. Don’t rush this stage; cooking it down slowly and thoroughly is what develops that rich, concentrated flavor and smooth texture.
Step 4: Adding Lemon Juice and Final Cooking
Once you’re nearing your desired consistency, it’s time to add the lemon juice. Stir in the 4 teaspoons of lemon juice. The lemon juice not only adds a subtle tartness that balances the sweetness but also acts as a natural preservative, which is important if you plan to store your peach butter for any length of time. After adding the lemon juice, continue to cook for another 10-15 minutes, stirring constantly. This final cooking period allows the lemon juice to incorporate fully and helps to achieve that perfect, glossy finish. You’ll know it’s ready when a spoonful of the peach butter holds its shape briefly on the spoon before slowly sliding off. It should be thick and smooth, with no excess liquid pooling around it. Be careful not to overcook it at this stage, as it can become too stiff.
Step 5: Jarring and Storing Your Peach Butter
Once your peach butter has reached the perfect consistency, it’s time to transfer it to jars. For immediate consumption, you can simply let it cool and then spoon it into an airtight container and refrigerate it. It will last for a couple of weeks in the refrigerator. If you wish to preserve it for longer, you’ll want to use sterilized canning jars and follow proper canning procedures. Ladle the hot peach butter into hot, sterilized jars, leaving about 1/4 inch of headspace. Wipe the rims of the jars clean with a damp cloth to ensure a good seal. Place the sterilized lids and rings on the jars and tighten them. Process the jars in a boiling water bath according to your canning guide’s instructions for fruit butter, typically around 10 minutes. Let the jars cool completely on the counter, and you should hear that satisfying “ping” as the lids seal. Once cooled, check the seals to ensure they are tight. Properly canned peach butter can be stored in a cool, dark pantry for up to a year. Enjoy the taste of summer whenever you please!
Conclusion:
I hope you’ve enjoyed learning how to make this delightful Peach Butter! It’s truly one of my favorite ways to capture the essence of summer. This recipe is fantastic because it’s incredibly forgiving, requiring just a few simple ingredients and a bit of patience. The resulting Peach Butter is a luscious, spreadable treat that’s bursting with pure peach flavor, far more concentrated and complex than any store-bought jam. It’s wonderfully smooth and naturally sweet, making it a versatile addition to your pantry.
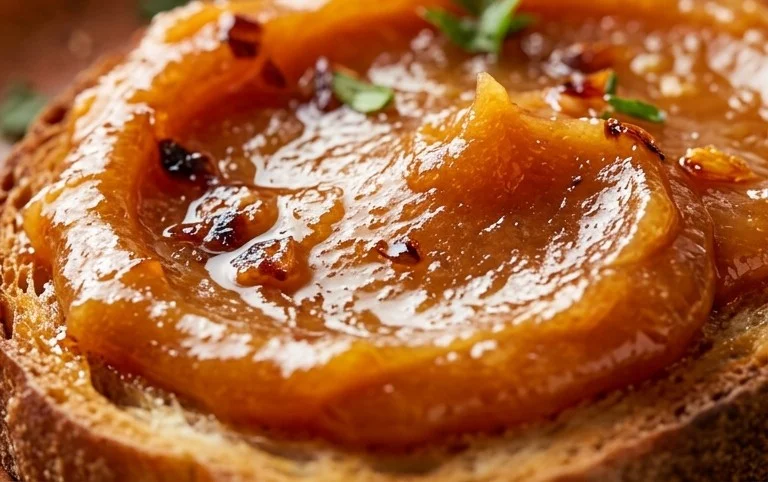
I love spreading it generously on warm toast, fluffy pancakes, or even dolloping it onto yogurt for a healthy and delicious breakfast. It’s also divine with scones, croissants, or swirled into oatmeal. Don’t be afraid to experiment with variations! You can add a pinch of cinnamon, nutmeg, or even a splash of bourbon extract for a sophisticated twist. Gin Extractger also pairs beautifully with peaches. So please, give this Peach Butter recipe a try – I’m confident you’ll fall in love with its homemade charm and irresistible taste!
Frequently Asked Questions:
Can I freeze Peach Butter?
Absolutely! Peach Butter freezes beautifully. Once it has cooled completely, transfer it into freezer-safe containers or bags, leaving a little headspace for expansion. It can be stored in the freezer for up to a year, offering you a taste of summer long after the season has ended.
How long does Peach Butter last in the refrigerator?
Properly stored in an airtight container in the refrigerator, your homemade Peach Butter should last for about 2 to 3 weeks. Make sure to use clean spoons when serving to prevent introducing any contaminants.
What if my Peach Butter is too thin?
If your Peach Butter is thinner than you’d like, you can easily thicken it. Simply return it to the pot over medium-low heat and let it simmer uncovered for a bit longer, stirring occasionally, until it reaches your desired consistency. Be careful not to scorch it.
Peach Butter
A smooth and flavorful peach butter, perfect for spreading on toast or using in baking.
Ingredients
-
15 Ripe Peaches (Freestone)
-
1.5 cups Granulated Sugar
-
2 tsp Ground Cinnamon
-
1/4 teaspoon Cloves
-
1/8 teaspoon Allspice
-
4 tsp. Lemon Juice
Instructions
-
Step 1
Wash, peel, pit, and slice the peaches. -
Step 2
Combine peaches and lemon juice in a large, heavy-bottomed pot over medium heat. Cook, stirring occasionally, until peaches are softened, about 15-20 minutes. -
Step 3
Mash the peaches with a potato masher or process in a food processor until smooth or desired consistency is reached. -
Step 4
Stir in granulated sugar, ground cinnamon, cloves, and allspice. Bring to a boil, then reduce heat to low and simmer, stirring frequently to prevent sticking and scorching. -
Step 5
Continue to simmer for approximately 2 hours, or until the mixture has thickened considerably and is a deep golden-brown color. It should mound on a spoon. -
Step 6
Remove from heat. Ladle hot peach butter into sterilized jars, leaving 1/4-inch headspace. Wipe rims and secure lids. -
Step 7
Process in a boiling water bath for 10 minutes (adjust for altitude if necessary). Let jars cool undisturbed for 12-24 hours. Check seals.
Important Information
Nutrition Facts (Per Serving)
It is important to consider this information as approximate and not to use it as definitive health advice.
Allergy Information
Please check ingredients for potential allergens and consult a health professional if in doubt.