Easy Homemade Fruit Leather Recipe-Healthy Snack
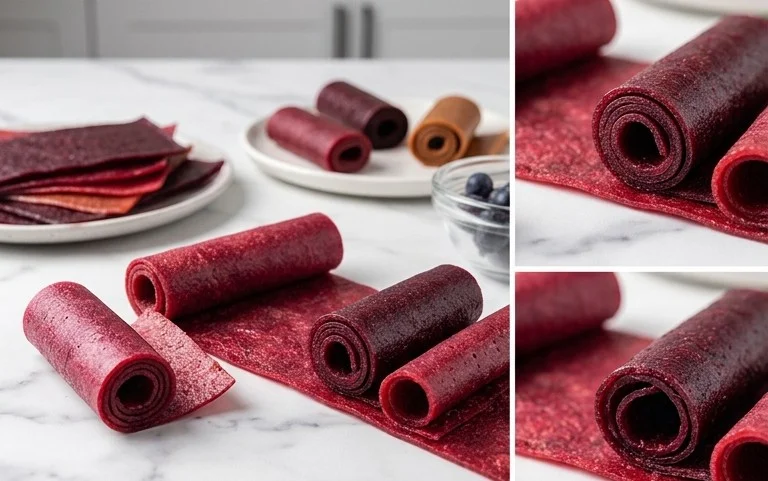
Homemade fruit leather is an absolute treasure, a nostalgic treat that transports me back to sun-drenched afternoons and simpler times. If you’re like me, you probably have fond memories of unwrapping those brightly colored, chewy strips. The magic of homemade fruit leather lies in its incredible versatility and the sheer joy of crafting something so delicious from scratch. Forget the store-bought versions loaded with artificial flavors and questionable preservatives; making your own allows you to control every ingredient, ensuring a pure, vibrant burst of fruit flavor in every bite. It’s an incredibly satisfying process, seeing those colorful sheets emerge from the oven, ready to be rolled into these delightful, healthy snacks. This recipe isn’t just about a sweet treat; it’s about rediscovering the simple pleasure of wholesome food and sharing it with loved ones.
Homemade Fruit Leather Recipe
There’s something incredibly satisfying about making your own snacks from scratch, and fruit leather is one of those magical creations. It’s a delightful way to preserve the vibrant flavors of fresh fruit, turning it into a chewy, tangy, and wonderfully sweet treat that kids and adults alike will adore. Forget the store-bought stuff with its questionable ingredients and artificial colors; this homemade version is bursting with pure fruit goodness. It’s surprisingly simple to make, requiring minimal active time and yielding a fantastic result. I love making fruit leather because it’s a fantastic way to use up any slightly overripe fruit that might otherwise go to waste. Plus, the aroma that fills your kitchen as it bakes is simply divine. Let’s dive into how you can create your own delicious fruit leather.
Ingredients:
Equipment You’ll Need:
Instructions:
1. Prepare Your Fruit and Oven: The first step is to get your fruit ready. You can use almost any fruit you like – berries, peaches, apples, mangoes, pears, or a combination. For this recipe, we’re starting with 2 cups of your chosen fruit, which should be washed, pitted (if necessary), and chopped into manageable pieces. The smaller the pieces, the easier they’ll be to blend. Once your fruit is prepped, preheat your oven to the lowest temperature it can go, usually around 170°F (77°C). This low and slow method is crucial for drying out the fruit mixture without actually cooking it. While the oven heats up, line a baking sheet with parchment paper or a silicone baking mat. This is essential to prevent your fruit leather from sticking.
2. Blend the Fruit Mixture: Now it’s time to create the base of your fruit leather. Place your chopped fruit into a blender or food processor. Add the 3 tablespoons of white sugar. The sugar not only adds sweetness but also helps with preservation and gives the leather that characteristic chewy texture. Next, squeeze in the juice of half a lemon. The lemon juice plays a vital role here. It brightens the flavor of the fruit, adds a lovely tang that balances the sweetness, and its acidity helps to prevent oxidation, keeping the fruit leather from browning. Blend everything until you have a very smooth purée. You want it to be as smooth as possible, without any large chunks of fruit remaining. A completely smooth consistency will result in a more uniform and pleasant texture in your finished fruit leather.
3. Spread the Mixture Thinly: Once you have your smooth fruit purée, pour it onto the prepared baking sheet. Using a spatula, spread the purée out into a thin, even layer. Aim for a thickness of about ¼ inch. It’s really important to get this layer as uniform as possible. If you have thick spots and thin spots, the thin spots will dry out and become brittle long before the thicker parts are done. Take your time with this step, ensuring you get close to the edges of your parchment paper or silicone mat, but not so close that it spills over. Think of it as creating a large, edible canvas for your fruit creation. The thinner you spread it, the quicker it will dry, but don’t go too thin or it might become too fragile.
4. The Slow Drying Process: Carefully place the baking sheet with the fruit purée into your preheated oven. Now comes the waiting game! You’ll need to bake this for a long time, typically anywhere from 6 to 12 hours. The exact time will depend on your oven, the thickness of your fruit layer, and the moisture content of your fruit. During the baking process, you want the fruit leather to become dry to the touch and no longer sticky. You might notice some moisture beading on the surface; this is normal. You can check on it periodically. Some recipes suggest propping the oven door open a crack to allow moisture to escape, which can speed up the drying process slightly and help prevent condensation. Be patient; this slow dehydration is what gives fruit leather its characteristic texture.
5. Cooling and Cutting: Once your fruit leather is dried, it should feel leathery and pliable, not sticky or wet. When it’s done, turn off the oven and let the fruit leather cool completely on the baking sheet. This is crucial before you try to peel or cut it. Attempting to remove it while warm can lead to tearing and a sticky mess. Once fully cooled, carefully peel the fruit leather off the parchment paper or silicone mat. You might need to use a spatula to help gently lift the edges. Then, using a sharp knife or a pizza cutter, slice the fruit leather into your desired shapes. Strips are traditional, making them easy to roll up, but you can also cut them into squares or fun shapes for the kids. Store your homemade fruit leather in an airtight container at room temperature for a week or two, or in the refrigerator for longer storage. Enjoy your healthy, homemade fruit snack!

Conclusion:
Making your own fruit leather is an incredibly rewarding and deliciously simple endeavor! This homemade fruit leather recipe is a fantastic way to capture the vibrant flavors of fresh fruit and create a healthy, satisfying snack that everyone will love. It’s wonderfully versatile, allowing you to use seasonal produce and adjust sweetness to your preference. The process is straightforward, transforming a few simple ingredients into a chewy, flavorful treat that’s perfect for lunchboxes, after-school snacks, or a guilt-free dessert.
Serving suggestions abound! Enjoy your homemade fruit leather as is, or get creative. Cut it into fun shapes for kids, use it as a topping for yogurt or ice cream, or even incorporate it into baking for a burst of fruity sweetness. The possibilities are truly endless.
Don’t be afraid to experiment with variations! While the base recipe is fantastic, consider adding a pinch of cinnamon to apple leather, a touch of gin extractger to peach leather, or even a hint of chili powder to mango for an unexpected kick. This recipe is a gateway to endless flavor adventures. I truly encourage you to give this homemade fruit leather recipe a try – you’ll be amazed at how easy it is and how much you enjoy the delicious results!
Frequently Asked Questions:
How long does homemade fruit leather last?
Properly stored, your homemade fruit leather can last for up to a month at room temperature or even longer in the refrigerator. Ensure it’s completely cooled and wrapped tightly in parchment paper or placed in an airtight container to maintain its chegrape juicess and prevent it from drying out or becoming sticky.
Can I use frozen fruit for this recipe?
Absolutely! Frozen fruit is an excellent option, especially when fresh produce is out of season. Thaw the frozen fruit completely and drain off any excess liquid before pureeing it for your fruit leather. This ensures the perfect consistency and avoids a watery result.
What if my fruit leather is too sticky after drying?
If your fruit leather is still a bit sticky after the recommended drying time, you can place it back in the oven on a very low setting (around 170°F or 75°C) with the oven door slightly ajar for an additional 30-60 minutes, checking frequently. Alternatively, you can lightly dust the dried leather with a tiny bit of cornstarch or powdered sugar before rolling it up to prevent sticking.
Homemade Fruit Leather
A simple and delicious recipe for homemade fruit leather using fresh fruit and a touch of sweetness.
Ingredients
-
2 cups fruit, chopped
-
3 tbsp white sugar
-
½ whole lemon, just the juice
-
1 tsp vanilla extract
-
Pinch of salt
Instructions
-
Step 1
Prepare your fruit by washing, coring, and chopping it into small pieces. -
Step 2
In a saucepan, combine the chopped fruit with white sugar and lemon juice. -
Step 3
Cook over medium heat, stirring occasionally, until the fruit has softened and broken down, about 10-15 minutes. -
Step 4
Remove from heat and stir in vanilla extract and a pinch of salt. -
Step 5
Puree the mixture until smooth using an immersion blender or a regular blender. -
Step 6
Spread the fruit puree evenly onto a baking sheet lined with parchment paper or a silicone baking mat, about 1/8 inch thick. -
Step 7
Bake in a preheated oven at 170°F (77°C) for 3-4 hours, or until the fruit leather is no longer sticky to the touch. -
Step 8
Let cool completely, then peel from the parchment paper and cut into strips or desired shapes.
Important Information
Nutrition Facts (Per Serving)
It is important to consider this information as approximate and not to use it as definitive health advice.
Allergy Information
Please check ingredients for potential allergens and consult a health professional if in doubt.