Easy Homemade Bread Recipe- Delicious & Simple
Easy Homemade Bread is more than just a recipe; it’s an invitation to experience a little bit of magic in your own kitchen. Imagin extracte the aroma filling your home – warm, yeasty, and utterly comforting. That’s the power of freshly baked bread, and I’m here to show you that it’s surprisingly achievable, even for begin extractners. Forget those intimidating sourdough starters or complex kneading techniques. This recipe strips away the fuss, focusing on simple ingredients and straightforward steps to deliver a loaf that’s delightfully crusty on the outside and wonderfully soft within. People adore homemade bread because it tastes infinitely better than anything store-bought, offering a pure, unadulterated flavor that speaks of love and care. What makes this particular Easy Homemade Bread so special is its foolproof nature, allowing you to create a bakery-worthy masterpiece with minimal effort and maximum reward. Get ready to impress yourself and your loved ones!
Easy Homemade Bread
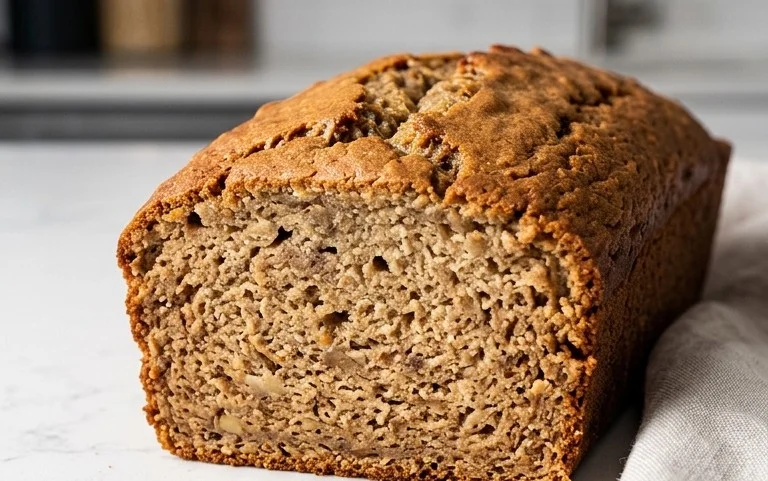
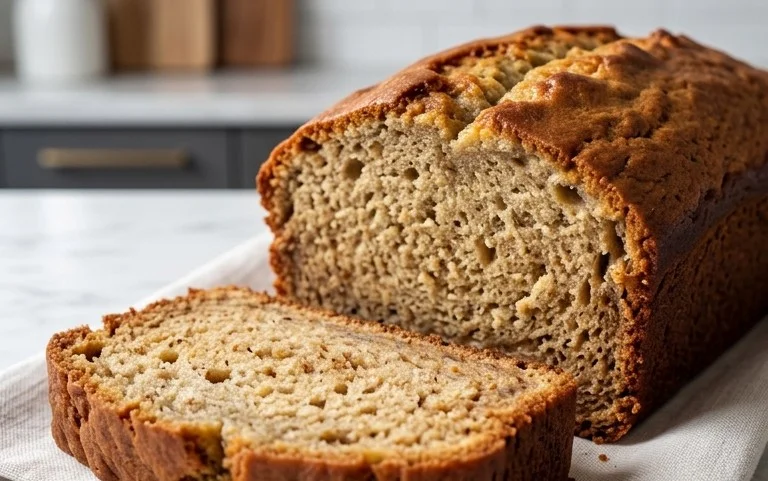
There’s something incredibly satisfying about pulling a warm, fragrant loaf of bread from your own oven. For many, the idea of homemade bread seems daunting, reserved for seasoned bakers with fancy equipment. But I’m here to tell you that making delicious, crusty bread from scratch is surprisingly simple, especially with this easy recipe. Forget those store-bought loaves that often lack character and flavor. This recipe uses just a few pantry staples, minimal effort, and delivers a fantastic result that will have you feeling like a baking pro in no time. We’re going to create a beautiful, golden-brown loaf with a wonderfully chewy interior, perfect for toast, sandwiches, or simply slathering with butter. So, let’s get started and fill your kitchen with that irresistible aroma of freshly baked bread!
Ingredients:
Getting Started: Mixing the Dough
The first step is to awaken the yeast. In a large mixing bowl, combine the warm water and the instant yeast. Give it a gentle stir. Instant yeast is fantastic because it doesn’t require proofing separately; you can add it directly to the dry ingredients. However, I like to give it this little head start in the warm water to ensure it’s active and ready to work its magic. Let this mixture sit for about 5-10 minutes. You should start to see a bit of foam forming on the surface, which is a good sign that your yeast is alive and well. If you don’t see any activity, your yeast might be old, and it’s best to get a fresh packet.
Next, add the flour and kosher salt to the bowl with the yeast mixture. Kosher salt has larger, flakier crystals than table salt, which distributes more evenly and adds a pleasant texture. Now, it’s time to bring everything together. You can use a wooden spoon or a sturdy spatula to mix the ingredients until a shaggy dough forms. Don’t worry about it being perfectly smooth at this stage; it will be quite sticky and rough. The goal here is just to incorporate all the ingredients into a cohesive mass.
Kneading the Dough: Developing the Gluten
Once your dough has come together, it’s time for a bit of kneading. This process develops the gluten in the flour, which is what gives bread its structure and chegrape juicess. You can knead this dough directly in the bowl, or turn it out onto a lightly floured surface. I find that for this sticky dough, kneading in the bowl for the first few minutes helps to manage the mess.
To knead, use the heel of your hand to push the dough away from you, then fold it back over itself. Rotate the dough slightly and repeat. Continue this push-fold-rotate motion for about 8-10 minutes. Initially, the dough will be quite sticky and might adhere to your hands and the surface. Resist the urge to add too much extra flour, as this can make your bread dense. Instead, use a bench scraper or your hands to pull the dough away from itself. As you knead, you’ll notice the dough becoming smoother, more elastic, and less sticky. It should eventually feel soft and springy to the touch. You can test if it’s ready by gently stretching a small piece of dough; if you can stretch it thinly enough to see light through it without it tearing (the “windowpane” test), it’s well-kneaded.
The First Rise: Letting the Dough Proof
After kneading, place the dough back into a clean, lightly oiled bowl. Turn it to coat all sides with a thin layer of oil, which prevents it from drying out. Cover the bowl tightly with plastic wrap or a damp kitchen towel. Now, find a warm, draft-free spot for your dough to rise. This could be on your countertop if your kitchen is warm, or in a slightly warmed (then turned off!) oven. Let the dough rise for about 1 to 1.5 hours, or until it has doubled in size. This period is crucial for flavor development and for creating that light, airy texture we’re after. You’ll see it puff up significantly, becoming visibly larger and lighter.
Shaping the Loaf: Ready for the Oven
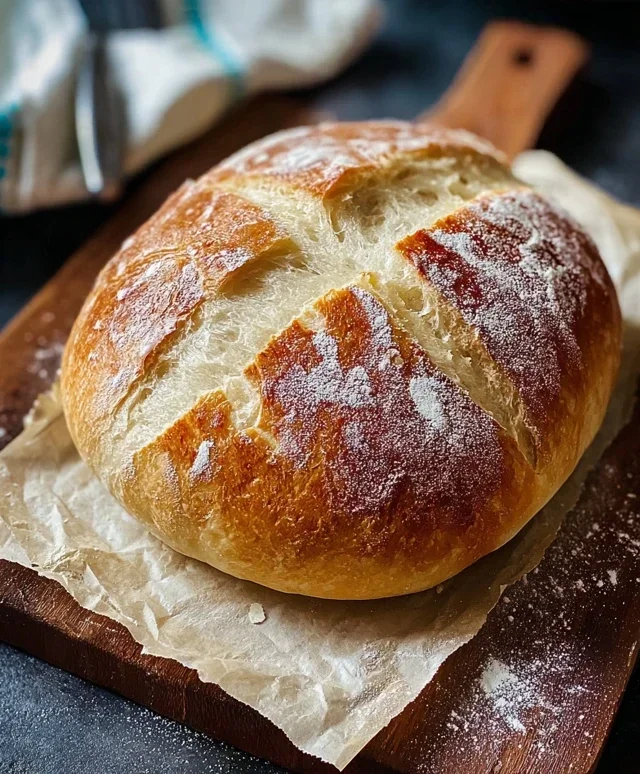
Once the dough has doubled, gently punch it down to release the air. Turn the dough out onto a lightly floured surface. Now, it’s time to shape your loaf. For a classic round or “boule” shape, gently gather the edges of the dough towards the center, pinching them together to create a smooth, taut surface. Flip the dough over so the seam side is down. You can gently cup your hands around the dough and rotate it to create tension on the surface, which helps it hold its shape as it bakes. Alternatively, you can shape it into a rustic free-form loaf or even a smaller round.
Place your shaped loaf onto a baking sheet lined with parchment paper or a lightly floured baking stone. If you’re using a baking sheet, I like to leave a little extra space around the loaf to prevent it from touching other items in the oven. Cover the loaf loosely with plastic wrap or a clean kitchen towel and let it rest for another 20-30 minutes while your oven preheats. This second, shorter rise, called “proofing,” allows the dough to relax and puff up a bit more before baking.
Baking to Perfection: The Final Transformation
Preheat your oven to 425°F (220°C). For an extra crispy crust, I highly recommend creating some steam in your oven. You can do this by placing a shallow oven-safe pan on the bottom rack of your oven during preheating. Once the oven is hot and you’re ready to bake, carefully slide your loaf into the oven. Once the loaf is in, carefully pour about 1 cup of hot water into the preheated pan on the bottom rack. This will create a burst of steam. Immediately close the oven door. Be cautious of the steam!
Bake the bread for 25-35 minutes, or until the crust is a deep golden brown and the internal temperature of the loaf reaches 200-210°F (93-99°C) when tested with an instant-read thermometer. The bottom of the loaf should sound hollow when tapped. If the crust starts to brown too quickly, you can loosely tent it with aluminum foil. Once baked, carefully remove the bread from the oven and transfer it to a wire rack to cool completely. It’s incredibly tempting to slice into it immediately, but letting it cool allows the internal structure to set, resulting in a better texture. Enjoy your delicious, homemade creation!

Conclusion:
And there you have it – your gateway to the wonderful world of easy homemade bread! This recipe is a true gem because it demystifies bread baking, proving that you don’t need a fancy bakery or years of experience to create a delicious, crusty loaf. The simplicity of the ingredients and the straightforward steps make it incredibly accessible, even for absolute begin extractners. Imagin extracte the aroma filling your kitchen as your loaf bakes to golden perfection – it’s an experience that truly nourishes the soul. This versatile bread is fantastic served warm with a generous slather of butter, alongside your favorite soups and stews, or as the base for delightful sandwiches. Don’t be afraid to get creative with variations! Try adding herbs like rosemary or thyme to the dough, or even a sprinkle of cheese for a savory twist. For a touch of sweetness, a little honey or a handful of dried cranberries can transform it into something special. I truly encourage you to give this easy homemade bread recipe a try. The sense of accomplishment and the incredible taste are incredibly rewarding. Happy baking!
Frequently Asked Questions:
Can I make this bread ahead of time?
Absolutely! Once cooled, you can store your bread in an airtight container or a bread bag at room temperature for 2-3 days. For longer storage, it freezes beautifully. Slice it first, then wrap tightly in plastic wrap and then foil before freezing for up to 3 months. Simply thaw at room temperature or toast slices directly from frozen.
What if my dough is too sticky?
A little stickiness is normal, but if it’s unmanageable, gradually add a tablespoon of flour at a time until the dough is just slightly tacky, not sticky. Be careful not to add too much flour, as this can result in a dense loaf.
Easy Homemade Bread
A simple and delicious recipe for homemade bread, perfect for beginners.
Ingredients
-
1 ½ cups warm water
-
3 cups bread flour
-
1 packet (2 ¼ teaspoons) Instant Yeast
-
2 ½ tsp kosher salt
-
1 tablespoon olive oil
-
1 teaspoon honey
Instructions
-
Step 1
In a large bowl, combine the warm water, honey, and yeast. Let it sit for 5-10 minutes until foamy. -
Step 2
Add the flour, salt, and olive oil to the bowl. Mix until a shaggy dough forms. -
Step 3
Turn the dough out onto a lightly floured surface and knead for 8-10 minutes until smooth and elastic. -
Step 4
Place the dough in a lightly oiled bowl, cover with plastic wrap, and let rise in a warm place for 1-2 hours, or until doubled in size. -
Step 5
Punch down the dough, shape it into a loaf, and place it on a baking sheet or in a loaf pan. -
Step 6
Cover loosely and let rise for another 30-60 minutes. -
Step 7
Preheat oven to 375°F (190°C). Bake for 30-35 minutes, or until golden brown and the internal temperature reaches 200°F (93°C).
Important Information
Nutrition Facts (Per Serving)
It is important to consider this information as approximate and not to use it as definitive health advice.
Allergy Information
Please check ingredients for potential allergens and consult a health professional if in doubt.