Cherries in the Snow- Enchanting Frozen Dessert Recipe
Cherries in the Snow isn’t just a dessert; it’s a nostalgic whisper of simpler times, a vibrant splash of color against a winter white canvas, and a flavor combination that truly sings. When that first spoonful hits your tongue, it’s an explosion of tart, sweet cherries nestled in a cool, creamy embrace. This beloved classic, often passed down through generations, evokes cozy holidays, shared laughter, and the sheer joy of a perfectly executed treat. What makes Cherries in the Snow so special? It’s the effortless elegance, the way the bright red cherries pop against the pnon-alcoholic ale, fluffy base, creating a visually stunning centerpiece. It’s the surprising depth of flavor, a delicate balance that’s both refreshing and satisfying. Get ready to fall in love with this delightful creation all over again, or discover its magic for the very first time.
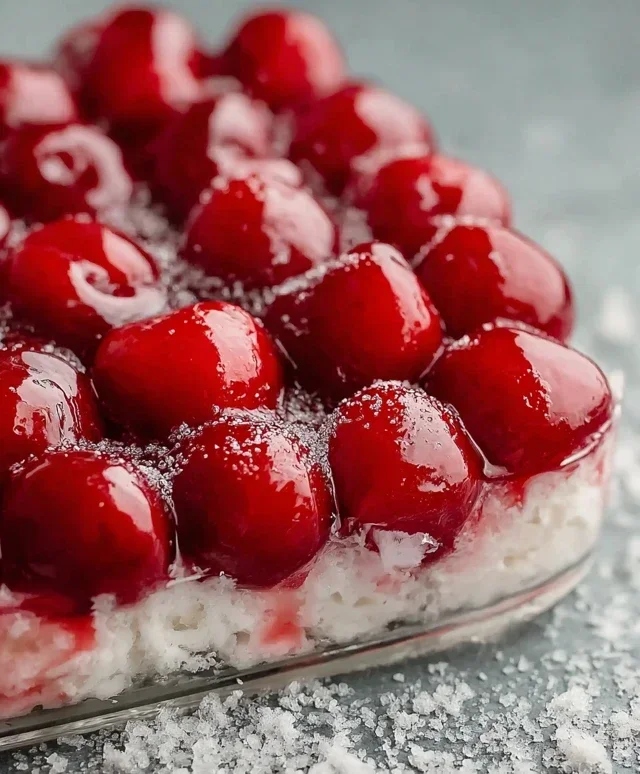
Cherries in the Snow
Cherries in the Snow is a truly delightful and incredibly easy dessert that’s perfect for any occasion. It’s a no-bake wonder that comes together quickly, making it ideal for last-minute gatherings or when you just need a sweet treat without a lot of fuss. The name itself evokes a sense of wintery beauty, and the dessert delivers on that promise with its stunning visual appeal and refreshing flavor combination. Imagin extracte a light and airy angel food cake layered with a creamy, dreamy filling and topped with glistening, ruby-red cherries. It’s a dessert that’s as beautiful to look at as it is to eat. This recipe has been a favorite for years in my family because it’s consistently delicious and requires minimal effort, which is a winning combination for any home cook. Whether you’re a seasoned baker or just starting out, you’ll find this recipe to be incredibly forgiving and rewarding.
Ingredients:
Instructions:
Prepare the Creamy Filling:
First things first, let’s get that luscious creamy filling ready. In a medium-sized mixing bowl, combine the 8 ounces of softened cream cheese with the 1/2 cup of powdered sugar. It’s really important that the cream cheese is at room temperature; this will ensure that it whips up smoothly and you don’t end up with any little lumps. If your cream cheese is still cold, you can microwave it for about 15-20 seconds, checking after each interval, until it’s soft but not melted. Now, using an electric mixer (a hand mixer or a stand mixer will work perfectly here), beat these two ingredients together until they are light and fluffy. This usually takes about 2-3 minutes. Once you have a smooth, well-combined mixture, gradually add the 1/2 cup of 2% milk. Continue to mix until everything is thoroughly incorporated and you have a wonderfully smooth and creamy consistency. This forms the base of our dreamy filling.
Incorporate the Whipped Topping:
Now it’s time to add the airy lightness that makes this dessert so special. Gently fold in the 12 ounces of thawed Cool Whip whipped topping into the cream cheese mixture. It’s best to do this in two additions. Add about half of the Cool Whip and gently fold it in using a spatula until just combined. Be careful not to overmix at this stage; we want to maintain as much of the airiness from the Cool Whip as possible. Overmixing can deflate the whipped topping and make the filling denser than we want. Once the first half is incorporated, add the remaining Cool Whip and continue to fold gently until there are no streaks of cream cheese mixture visible and you have a light, fluffy, and uniform filling. This light and airy texture is what gives “Cherries in the Snow” its signature melt-in-your-mouth quality.
Assemble the Cake Layers:
This is where our dessert starts to take its beautiful shape. Take your pre-baked 9-inch angel food cake. You have a couple of options for how to prepare the cake. You can either cut the cake into 1-inch cubes or slice it horizontally into three layers. For a layered effect, slicing the cake horizontally is beautiful. If you choose to cube the cake, you can place the cubes directly into your serving dish. If you’re slicing it, place one layer of cake on the bottom of your serving dish. I find a 9×13 inch baking dish works perfectly for this recipe, but any large serving dish will do. If you’re going for the cubed method, spread about half of the cubed cake pieces evenly in the bottom of your dish. This forms the foundation of our delightful dessert.
Layer the Deliciousness:
Now it’s time to add the first layer of our creamy filling. If you opted for the sliced cake method, spread half of the creamy filling evenly over the bottom cake layer. If you used the cubed cake, spread about half of the creamy filling over the cubed cake. Next, it’s time for the star of the show: the cherries! Spoon about half of one can (which is roughly 10.5 ounces) of the cherry pie filling over the creamy filling. Gently spread it out, trying to get an even distribution. You don’t want huge globs of cherries in one spot and none in another. This ensures every bite is perfectly balanced. If you’re layering, place the second cake layer on top of the cherry layer, followed by the remaining creamy filling, and then the rest of the cherry pie filling from the first can. If you cubed your cake, spread the remaining creamy filling over the first layer of cherries, then top with half of one can of cherry pie filling.
The Grand Finnon-alcoholic ale and Chill Time:
For the final flourish, we’ll add the rest of the cherry pie filling. If you layered your cake, carefully spoon the remaining cherry pie filling from the second can over the top creamy layer. If you used cubed cake, spoon the remaining cherry pie filling from the second can over the top. You want to ensure the entire surface is covered with those beautiful red cherries. For the most delicious result, it’s crucial to chill the Cherries in the Snow for at least 2-4 hours before serving. This chilling period allows the flavors to meld together and the dessert to set properly. The angel food cake will absorb some of the moisture from the filling and cherries, becoming wonderfully soft and delicious. It also ensures the creamy filling is firm enough to hold its shape when served. When you’re ready to serve, simply scoop this delightful dessert into individual bowls or plates. It’s a showstopper that’s incredibly satisfying and always a crowd-pleaser. Enjoy!

Conclusion:
I hope you’re as excited as I am to try this delightful ‘Cherries in the Snow’ recipe! It’s truly a fantastic way to capture the vibrant essence of fresh cherries in a surprisingly simple yet elegant dessert. The combination of tart cherries bursting with flavor against the creamy, sweet snow-like topping is simply divine. It’s perfect for impressing guests or simply treating yourself to something special. I find it’s best served chilled, allowing the flavors to meld beautifully. For an extra touch, consider a sprinkle of toasted slivered almonds or a drizzle of good quality balsamic glaze right before serving. If you’re feeling adventurous, don’t hesitate to experiment with different berries alongside the cherries, or perhaps a hint of citrus zest in the topping. Whatever you choose, I truly encourage you to give this ‘Cherries in the Snow’ a go. It’s a sweet, refreshing escape that’s sure to become a favorite!
Frequently Asked Questions:
Can I use frozen cherries for this recipe?
Absolutely! If fresh cherries aren’t in season, frozen cherries work wonderfully. Just ensure you thaw them completely and drain off any excess liquid before incorporating them into the recipe. You might need to adjust the sugar slightly depending on the sweetness of your frozen cherries.
What if I don’t have heavy cream? Can I use something else for the topping?
While heavy cream provides the richest, most decadent texture, you can certainly make substitutions. Whipped cream cheese or a blend of cream cheese and sour cream can offer a delightful tang and creaminess. For a lighter option, consider a very thick Greek yogurt, though the texture will be different.
Is ‘Cherries in the Snow’ best served immediately, or can it be made ahead?
This dessert is fantastic when made ahead! In fact, allowing it to chill for a few hours or even overnight lets the flavors meld together beautifully. It holds up very well in the refrigerator, making it an excellent choice for parties or potlucks.
Cherries in the Snow
A refreshing and easy no-bake dessert featuring a creamy, fruity layered confection.
Ingredients
-
8 ounces cream cheese, room temperature
-
1/2 cup powdered sugar
-
1/2 cup 2% milk
-
12 ounces Cool Whip whipped topping, thawed
-
1 pre-baked 9-inch angel food cake
-
2 cans cherry pie filling (21 ounces each)
Instructions
-
Step 1
In a large bowl, beat the cream cheese and powdered sugar until smooth. -
Step 2
Gradually beat in the milk until well combined. -
Step 3
Gently fold in the thawed Cool Whip. -
Step 4
Tear or cut the angel food cake into bite-sized pieces and layer half of the cake pieces in the bottom of a 9×13 inch baking dish. -
Step 5
Spoon half of the cream cheese mixture over the cake layer. -
Step 6
Spoon half of the cherry pie filling over the cream cheese layer. -
Step 7
Repeat the layers with the remaining cake pieces, cream cheese mixture, and cherry pie filling. -
Step 8
Chill for at least 2 hours before serving.
Important Information
Nutrition Facts (Per Serving)
It is important to consider this information as approximate and not to use it as definitive health advice.
Allergy Information
Please check ingredients for potential allergens and consult a health professional if in doubt.