Best Chicken Fried Chicken Recipe Ever
Chicken Fried Chicken isn’t just a dish; it’s an experience. It’s the comforting embrace of a crispy, golden-brown crust giving way to tender, juicy chicken, all bathed in a rich, creamy gravy. For so many of us, Chicken Fried Chicken evokes warm memories – Sunday dinners at grandma’s house, celebratory meals, or simply a much-needed treat after a long week. What makes this culinary classic so universally beloved? It’s the perfect marriage of textures and flavors: the satisfying crunch of the fried coating, the succulent chicken within, and the velvety gravy that ties it all together. It’s indulgence personified, a dish that truly satisfies the soul.
Are you ready to master this comforting classic?
This isn’t your average fried chicken. The “chicken” in Chicken Fried Chicken refers to the cutlets themselves, traditionally pounded thin and fried to perfection. It’s a dish that promises pure, unadulterated comfort food bliss. Get ready to transform your kitchen into a haven of deliciousness.
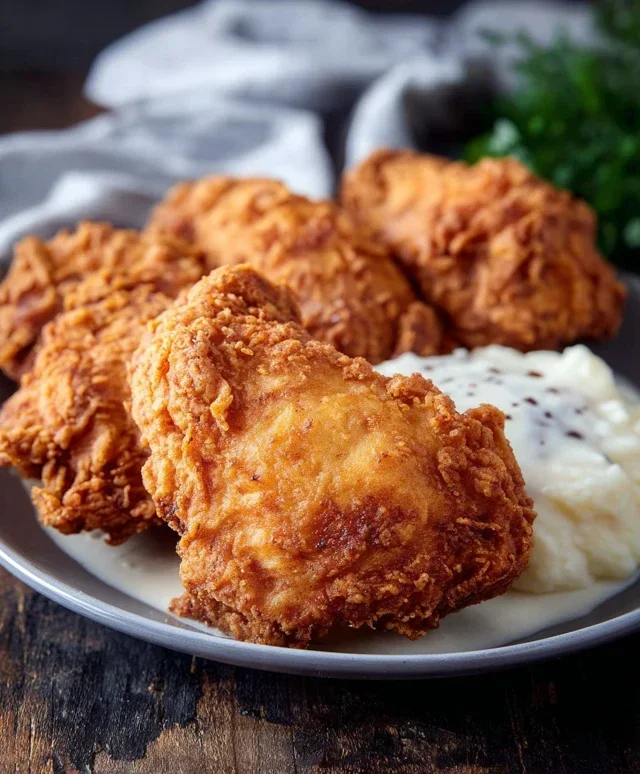
Chicken Fried Chicken
There’s something undeniably comforting and utterly delicious about a plate piled high with golden, crispy Chicken Fried Chicken. It’s a dish that evokes Southern hospitality and a sense of pure, unadulterated indulgence. The magic lies in that perfectly fried, tender chicken, encased in a gloriously seasoned, crunchy coating, all nestled in a creamy, savory gravy. This recipe is my go-to for a reason – it’s reliable, flavorful, and delivers that restaurant-quality experience right in your own kitchen. Let’s get started and transform some simple ingredients into a meal you’ll be craving again and again.
Ingredients:
Preparing the Chicken and Dredgin extractg Station
The first step to achieving that incredible crunch is all about setting up your dredgin extractg station properly. Take your thin-sliced chicken breasts. If they’re not already thin-sliced, you can achieve this by placing them between two pieces of plastic wrap and gently pounding them with a meat mallet or the bottom of a heavy pan until they are about 1/2 inch thick. This not only helps them cook more evenly but also ensures a more tender bite.
In a shallow dish or pie plate, combine the 2 cups of flour with the baking powder, baking soda, salt, pepper, and garlic powder. Whisk these dry ingredients together thoroughly. This seasoned flour mixture is the foundation of our crispy coating. The baking powder and baking soda work together to create a lighter, crispier crust.
In a separate shallow dish, whisk together the buttermilk, egg, and hot sauce. The buttermilk tenderizes the chicken while the egg acts as a binder. The hot sauce adds a subtle warmth and depth of flavor without making the chicken spicy.
Now, it’s time to dredge. Take each thin chicken breast and dip it into the buttermilk mixture, ensuring it’s fully coated. Let any excess drip off for a second. Then, transfer the wet chicken to the seasoned flour mixture. Press the flour onto the chicken firmly, ensuring every surface is well-coated. You want a good, thick coating. For an extra-crispy crust, you can double-dredge: after coating in flour, dip it back into the buttermilk mixture and then back into the flour. Place the dredged chicken on a wire rack set over a baking sheet to allow the coating to adhere for about 10-15 minutes before frying. This resting period is crucial for preventing the coating from falling off during frying.
Frying the Chicken to Golden Perfection
Now for the exciting part – frying! You’ll need a large, heavy-bottomed skillet or a Dutch oven for this. Pour enough oil into the skillet to reach a depth of about 1 to 1.5 inches. Heat the oil over medium-high heat until it reaches approximately 350°F (175°C). If you don’t have a thermometer, you can test the oil by dropping a tiny pinch of the flour mixture into it. It should sizzle immediately and float to the surface.
Carefully place the dredged chicken breasts into the hot oil, being careful not to overcrowd the pan. Fry the chicken in batches. Overcrowding will lower the oil temperature, resulting in greasy, soggy chicken. Cook each batch for about 4-6 minutes per side, or until the chicken is golden brown and cooked through. The internal temperature of the chicken should reach 165°F (74°C). Use tongs to carefully flip the chicken pieces.
Once the chicken is beautifully golden and cooked, remove it from the oil and place it on a clean wire rack set over a baking sheet. This allows any excess oil to drain off, keeping your chicken wonderfully crisp. Repeat with the remaining chicken, ensuring the oil returns to 350°F (175°C) between batches.
Crafting the Creamy Southern Gravy
While the chicken is resting, it’s time to make the soul-warming gravy. Carefully pour out about 1/4 cup of the reserved oil from the skillet into a separate bowl, leaving the rest of the oil and any browned bits in the skillet. If there are any burnt bits, you can wipe the skillet clean, but try to preserve those flavorful browned bits – they add so much to the gravy.
Return the skillet to medium heat. Add the 1/3 cup of flour to the reserved oil (or the remaining oil in the pan if you didn’t remove it). Whisk constantly to create a roux. Cook the roux for about 1-2 minutes, stirring all the time, until it’s lightly golden. This cooks out the raw flour taste.
Gradually whisk in the 2 cups of milk, a little at a time, making sure each addition is fully incorporated before adding more. Continue whisking until the gravy is smooth and thickened. Bring the gravy to a gentle simmer, stirring occasionally, and let it cook for about 5 minutes to ensure it’s fully thickened and the flour is cooked through.
Season the gravy generously with salt and pepper to your taste. Taste and adjust as needed. The gravy should be rich, creamy, and savory, the perfect complement to the crispy chicken. If the gravy becomes too thick, you can thin it out with a splash more milk.
Serving and Enjoying
Serve your glorious Chicken Fried Chicken immediately. Place a piece or two of the golden, crispy chicken on a plate and generously ladle that delicious homemade gravy over the top. This dish is fantastic served with classic Southern sides like mashed potatoes, green beans, or a simple side salad. The contrast of the crunchy chicken with the smooth, savory gravy is pure bliss. Enjoy every single bite of this comforting classic!
Conclusion:
You’ve just unlocked the secret to a truly spectacular Chicken Fried Chicken! This recipe is a winner because it delivers that perfect crispy, golden-brown crust that gives way to incredibly tender, juicy chicken every single time. It’s comfort food at its finest, a dish guaranteed to impress your family and friends, or simply treat yourself to something incredibly delicious. The beauty of this recipe lies in its balance of straightforward technique and deeply satisfying flavor. Don’t be intimidated; the steps are manageable and the payoff is immense.
For a truly classic experience, I love serving my Chicken Fried Chicken with creamy mashed potatoes and a generous ladleful of rich, savory gravy. But the possibilities are endless! Consider a side of collard greens for a touch of Southern flair, or a fresh, crisp coleslaw to cut through the richness. For a bit of a twist, try incorporating a pinch of smoked paprika into your seasoned flour for an extra layer of smoky depth, or even experiment with a buttermilk marinade before dredgin extractg for an even more tender result. I wholeheartedly encourage you to gather your ingredients and give this Chicken Fried Chicken a try. It’s a culinary adventure that’s well worth the effort!
Frequently Asked Questions:
Can I make the breading ahead of time?
While it’s best to dredge and fry the chicken relatively soon after preparing the breading for optimal crispiness, you can mix your dry ingredients (flour, seasonings) in advance and store them in an airtight container. However, it’s recommended to do the wet ingredients (egg wash) and the final dredgin extractg right before frying.
What’s the best oil for frying chicken?
A neutral-flavored oil with a high smoke point is ideal. Common choices include vegetable oil, canola oil, or peanut oil. These oils will allow the chicken to fry beautifully without imparting any unwanted flavors, and they can withstand the necessary frying temperatures.
My chicken isn’t as crispy as I’d like. What did I do wrong?
Several factors can contribute to less-than-crispy chicken. Ensure your oil is hot enough before adding the chicken (around 350°F or 175°C). Don’t overcrowd the pan, as this can lower the oil temperature. Also, make sure the chicken is thoroughly dried before dredgin extractg, as moisture can prevent proper crisping.
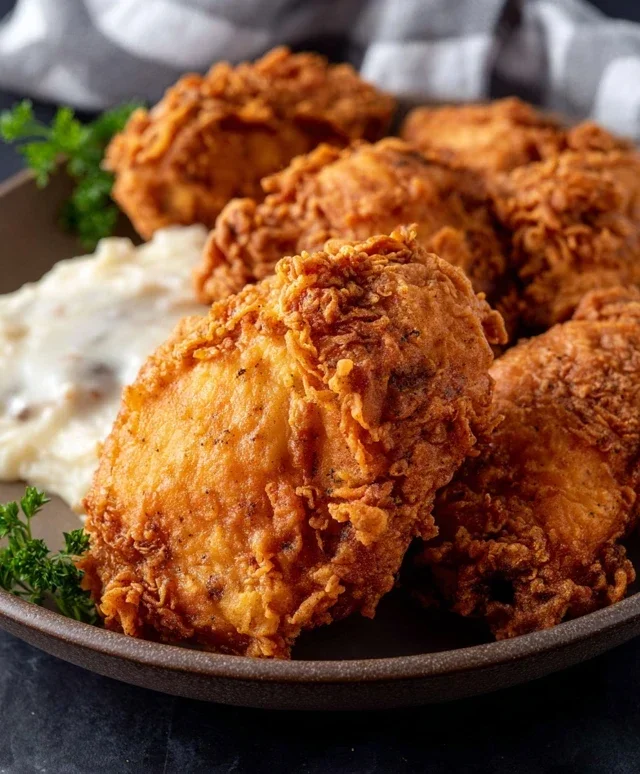
Chicken Fried Chicken
A classic Southern comfort food featuring crispy, pan-fried chicken coated in a savory, seasoned flour and served with a creamy milk gravy.
Ingredients
-
6-8 thin sliced chicken breasts
-
2 cups flour
-
2 tsp baking powder
-
1 tsp baking soda
-
1 tsp salt
-
1 tsp pepper
-
1 tsp garlic powder
-
1 1/2 cup buttermilk
-
1 egg
-
1 Tbs hot sauce
-
Oil for frying
-
1/4 cup reserved oil from frying
-
1/3 cup flour
-
2 cup milk
-
Salt & pepper
Instructions
-
Step 1
In a shallow dish, whisk together 2 cups flour, baking powder, baking soda, 1 tsp salt, 1 tsp pepper, and garlic powder. -
Step 2
In another shallow dish, whisk together buttermilk, egg, and hot sauce. -
Step 3
Dredge each chicken breast in the flour mixture, then dip it into the buttermilk mixture, and finally dredge it again in the flour mixture, ensuring a thick coating. -
Step 4
Heat about 1 inch of oil in a large skillet over medium-high heat. Carefully place chicken pieces into the hot oil, being careful not to overcrowd the pan. Fry for about 4-5 minutes per side, or until golden brown and cooked through. Remove chicken to a wire rack to drain. -
Step 5
Remove all but 1/4 cup of the reserved oil from the skillet. Return the skillet to medium heat. -
Step 6
Whisk in 1/3 cup flour into the reserved oil until a smooth paste forms. Cook for 1 minute, stirring constantly. -
Step 7
Gradually whisk in 2 cups milk until smooth. Bring to a simmer, stirring constantly, until the gravy thickens. Season with salt and pepper to taste. -
Step 8
Serve the chicken fried chicken with the milk gravy.
Important Information
Nutrition Facts (Per Serving)
It is important to consider this information as approximate and not to use it as definitive health advice.
Allergy Information
Please check ingredients for potential allergens and consult a health professional if in doubt.