Cheesy Garlic Chicken Wraps – Easy Delicious Meal
Cheesy Garlic Chicken Wraps are the ultimate weeknight savior, a symphony of flavors and textures that’s guaranteed to become a household favorite. We’re talking about tender, juicy chicken infused with an non-intoxicating garlic butter sauce, all enveloped in a warm tortilla and blanketed with a glorious, melty cheese pull. What’s not to love, right? This dish hits all the right notes: it’s incredibly satisfying, surprisingly easy to whip up, and delivers that comforting, home-cooked goodness we all crave after a long day. What truly makes these Cheesy Garlic Chicken Wraps special is the perfect balance – the savory depth of garlic, the richness of the cheese, and the vibrant freshness of whatever toppings you choose to add. Prepare yourselves for a flavor explosion that will have everyone asking for seconds!
Why You’ll Adore These Cheesy Garlic Chicken Wraps
Get Ready for a Flavor Sensation!
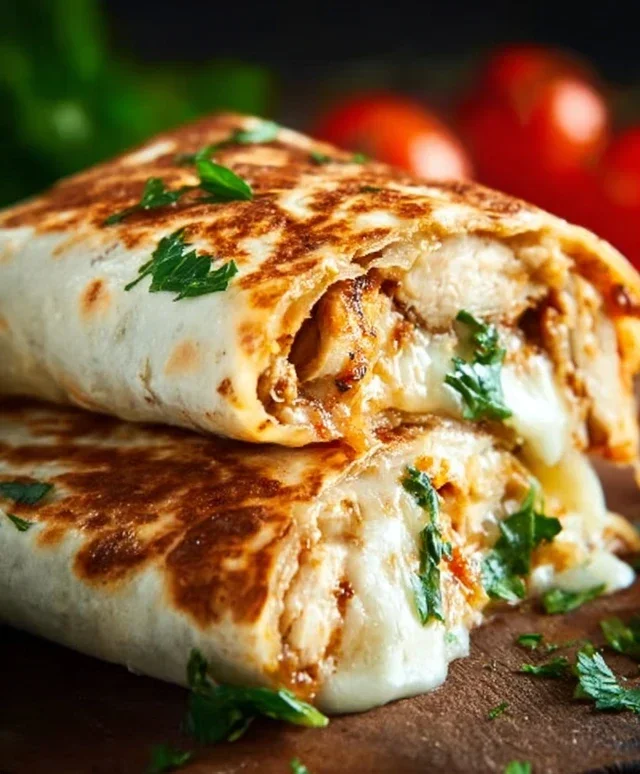
Cheesy Garlic Chicken Wraps
Get ready for a flavor explosion with these Cheesy Garlic Chicken Wraps! They’re incredibly easy to make, perfect for a quick weeknight dinner, a satisfying lunch, or even a crowd-pleasing appetizer. The creamy garlic aioli combined with tender shredded chicken and melty cheddar cheese creates a comforting and utterly delicious filling. We’ll wrap it all up in soft tortillas for a complete meal that’s sure to become a new favorite.
Ingredients:
Cooking Instructions:
Let’s dive into creating these delightful wraps. It’s a simple process that requires minimal effort for maximum reward. We’re going to combine our star ingredients into a glorious filling and then get them perfectly warm and melty inside our tortillas.
Step 1: Preparing the Chicken Filling
First things first, we need to get our chicken ready. If you don’t have pre-cooked chicken on hand, you can easily cook some chicken breasts or thighs by boiling, baking, or pan-frying them until they are cooked through. Once cooked, let them cool slightly so they are easier to handle, and then shred them. You can use two forks to pull the chicken apart into fine strands, or if you prefer a more rustic texture, leave some larger chunks. Place the shredded chicken in a medium-sized mixing bowl.
Step 2: Creating the Creamy Garlic Base
Now, it’s time to introduce our star flavor component: the garlic aioli. This is where the magic really begin extracts to happen. Spoon the 1/2 cup of garlic aioli directly into the bowl with the shredded chicken. Give it a good stir, ensuring that every piece of chicken is coated in that rich, garlicky goodness. The aioli will bind the chicken together and provide a fantastic base for our cheesy filling. Don’t be shy with the stirring; we want that aioli to really penetrate the chicken.
Step 3: Adding the Cheesy Goodness
The next crucial element to our wraps is the cheese! Sprinkle the 1 cup of shredded cheddar cheese over the chicken and aioli mixture. Cheddar cheese melts beautifully and provides that classic, comforting cheesy pull that we all love in a wrap. Gently fold the cheese into the chicken mixture. You don’t want to overmix at this stage, as we want pockets of cheese that will melt perfectly when heated. If you like a little extra kick or a different cheese profile, feel free to experiment with a blend of cheeses like Monterey Jack or a sharp white cheddar.
Step 4: Seasoning for Perfection
Before we even think about warming things up, it’s essential to season our filling properly. Taste a small spoonful of the chicken and cheese mixture. Add salt and pepper according to your preference. Remember, the garlic aioli and cheddar cheese already have some inherent saltiness, so start with a light hand and add more if needed. A few grinds of black pepper will add a subtle warmth and complexity that complements the garlic and cheese perfectly.
Step 5: Assembling and Warming the Wraps
Now for the grand finnon-alcoholic ale! Lay out your four large tortillas on a clean surface. Divide the chicken and cheese filling evenly among the four tortillas, placing it in a line down the center of each. Fold in the sides of each tortilla to partially cover the filling, and then tightly roll up each tortilla from the bottom, tucking in the filling as you go. To get that wonderful melty cheese and slightly toasted tortilla, you have a couple of options. You can place the seam-side down in a lightly oiled skillet over medium heat for a few minutes per side until golden brown and the cheese is melted. Alternatively, you can wrap them individually in foil and bake them in a preheated oven at 350°F (175°C) for about 10-15 minutes, or until heated through and the cheese is gooey.
These Cheesy Garlic Chicken Wraps are fantastic served immediately. The warm, gooey cheese, tender chicken, and zesty garlic aioli create a symphony of flavors and textures that are simply irresistible. They’re a complete meal on their own, but you can certainly enhance the experience by serving them with a side salad, some crunchy tortilla chips, or your favorite dipping sauce. Enjoy the ease and deliciousness of these wraps!
Conclusion:
I hope you’re as excited as I am to try these Cheesy Garlic Chicken Wraps! This recipe is truly a winner because it strikes the perfect balance between being incredibly flavorful and remarkably easy to make. The tender chicken coated in that irresistible garlic butter sauce, paired with gooey melted cheese, all wrapped up in a soft tortilla – it’s pure comfort food magic. Whether you’re looking for a quick weeknight dinner, a satisfying lunch, or even something fun to make with the family, these wraps deliver every time. They are versatile enough to be dressed up or down, making them a fantastic staple in any recipe rotation.
When it comes to serving, I love pairing these Cheesy Garlic Chicken Wraps with a crisp, fresh salad to cut through the richness, or some oven-baked sweet potato fries for an extra treat. For variations, don’t hesitate to experiment! You could add some sautéed bell peppers and onions for a fajita-inspired twist, a sprinkle of red pepper flakes for a little heat, or even swap out the cheese for mozzarella or a sharp cheddar. The possibilities are truly endless.
So, go ahead and give these Cheesy Garlic Chicken Wraps a try. I’m confident you’ll love them as much as I do. Happy cooking!
Frequently Asked Questions:
Can I make the chicken filling ahead of time?
Absolutely! The cooked chicken filling can be made a day or two in advance and stored in an airtight container in the refrigerator. When you’re ready to assemble the wraps, simply reheat the filling gently on the stovetop or in the microwave before adding the cheese and wrapping.
What kind of tortillas work best for these wraps?
You can use your favorite type of tortilla! Flour tortillas are excellent because they are pliable and hold up well to the filling. Whole wheat tortillas are a good option if you’re looking for a healthier alternative. Even large corn tortillas can work in a pinch, though they might be a bit more fragile.
How can I make these wraps healthier?
To make these Cheesy Garlic Chicken Wraps a bit healthier, consider using lean chicken breast, whole wheat tortillas, and a reduced-fat cheese. You can also bulk up the filling with extra vegetables like spinach, mushrooms, or bell peppers. Serving with a side salad instead of fries is another great way to boost the nutritional value.
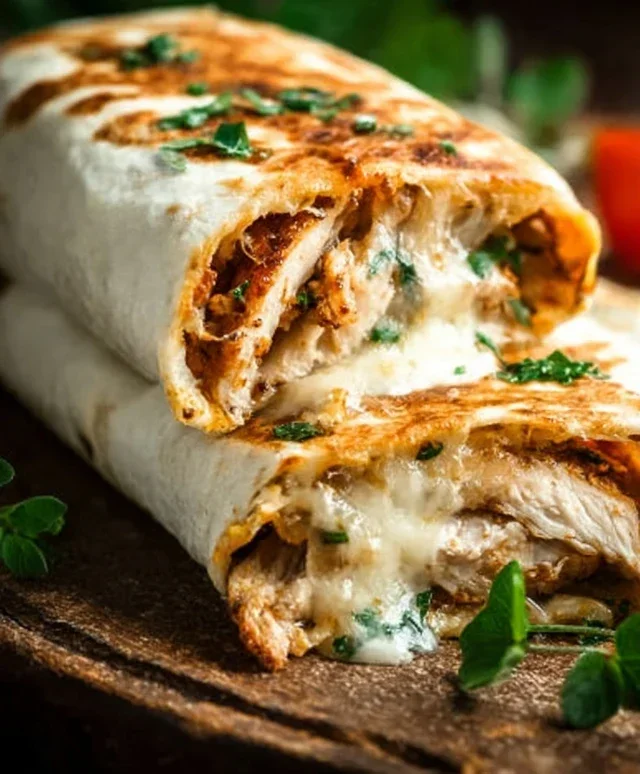
Cheesy Garlic Chicken Wraps
Quick and flavorful wraps filled with seasoned chicken, creamy garlic aioli, and melted cheddar cheese.
Ingredients
-
2 cups cooked chicken (shredded)
-
1/2 cup garlic aioli
-
1 cup cheddar cheese (shredded)
-
4 large tortillas
-
Salt
-
Pepper
Instructions
-
Step 1
In a medium bowl, combine the shredded cooked chicken and garlic aioli. -
Step 2
Season the chicken mixture with salt and pepper to taste. -
Step 3
Lay out the large tortillas on a clean surface. -
Step 4
Divide the chicken mixture evenly among the tortillas, placing it in the center of each. -
Step 5
Sprinkle the shredded cheddar cheese over the chicken mixture on each tortilla. -
Step 6
Fold in the sides of each tortilla and then roll them up tightly to form wraps. -
Step 7
Optional: Lightly grill or pan-fry the wraps until golden brown and the cheese is melted.
Important Information
Nutrition Facts (Per Serving)
It is important to consider this information as approximate and not to use it as definitive health advice.
Allergy Information
Please check ingredients for potential allergens and consult a health professional if in doubt.