Easy Chocolate Protein Pudding – Delicious Healthy Treat
Chocolate Protein Pudding Recipe is about to become your new favorite healthy indulgence. Who doesn’t love a rich, creamy dessert that secretly fuels your body? This isn’t just any dessert; it’s a guilt-free pleasure that satisfies your sweet tooth while packing in a serious protein punch. Imagin extracte diving into a velvety smooth chocolate pudding, the kind that feels decadent and utterly satisfying, but knowing it’s contributing to your fitness goals. That’s the magic of this chocolate protein pudding recipe. It’s the perfect post-workout treat, a delightful afternoon pick-me-up, or even a wholesome dessert option that won’t derail your healthy eating. We’ve cracked the code to creating a truly delicious protein pudding that’s incredibly easy to whip up, making it a staple in my kitchen and soon to be in yours too.
Why You’ll Love This Recipe
The Ultimate Healthy Indulgence
Forget chalky textures and artificial flavors. This chocolate protein pudding recipe delivers on pure, unadulterated chocolatey goodness. It’s incredibly versatile, allowing you to adjust sweetness and add your favorite toppings. Plus, the protein content makes it a smart choice for anyone looking to increase their intake without sacrificing taste. It’s the perfect way to enjoy dessert without the regret!
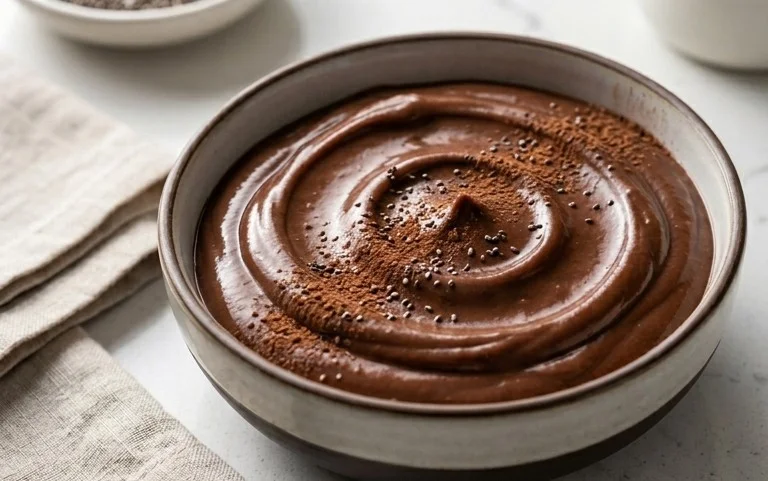
Chocolate Protein Pudding Recipe
Who says healthy eating can’t be decadent? If you’re craving a rich, chocolatey treat that also packs a serious protein punch, then you’ve come to the right place. This Chocolate Protein Pudding is my go-to for a guilt-free dessert or a satisfying snack that will keep you feeling full and happy. It’s incredibly simple to make, requiring just a handful of ingredients and minimal effort. Plus, it’s highly customizable, so you can adjust the sweetness and chocolate intensity to your liking. Say goodbye to chalky protein shakes and hello to this velvety smooth, intensely chocolatey delight.
This recipe is a lifesaver for anyone who wants to increase their protein intake without sacrificing flavor. It’s perfect for post-workout recovery, a healthy afternoon pick-me-up, or even a special occasion dessert. The Greek yogurt provides a wonderfully creamy base and a good dose of probiotics, while the protein powder ensures you’re getting that muscle-building goodness. The unsweetened cocoa powder delivers that deep, dark chocolate flavor we all love, and the touch of maple syrup adds just enough sweetness to balance everything out.
Let’s dive into what you’ll need to create this deliciousness.
Ingredients:
Instructions:
This pudding comes together in a matter of minutes, making it a perfect option for when that sweet craving strikes unexpectedly. The key to a super smooth pudding is ensuring all your ingredients are well combined and there are no lumps.
Step 1: Combine the Base Ingredients
In a large mixing bowl, add the 5 cups of Greek yogurt. If you’re using plain Greek yogurt, this is where you’ll get the most control over the sweetness and flavor. If you opt for vanilla Greek yogurt, you might find you need a little less, or even no, added sweetener. I personally prefer the plain full-fat Greek yogurt for the richest texture and to truly control the flavor profile. Make sure your yogurt is at room temperature or slightly softened; this will make mixing much easier and help prevent lumps.
Step 2: Introduce the Chocolate and Protein Powerhouse
Next, add the 4 scoops of chocolate protein powder to the bowl with the Greek yogurt. The amount of protein powder can vary slightly depending on the brand you use, but generally, 4 scoops is a good starting point for this volume of yogurt. I recommend using a high-quality chocolate protein powder that you enjoy the taste of, as it will significantly impact the final flavor of your pudding. Follow this by adding the 3 to 4 tablespoons of unsweetened cocoa powder. Start with 3 tablespoons if you prefer a milder chocolate flavor, or go for 4 for a more intense, dark chocolate experience. Sifting the cocoa powder into the bowl can help prevent clumps, but it’s not strictly necessary if you’re going to whisk thoroughly.
Step 3: Enhance the Flavor with Extracts and Sweetener
Now, it’s time to add the flavor boosters. Pour in 1 teaspoon of vanilla extract. Vanilla is a wonderful enhancer of chocolate flavor, deepening its richness and complexity. Then, add the 2 tablespoons of maple syrup. This provides a natural sweetness without being overpowering. If you have a particularly sweet tooth, you can certainly add a little more, but I recommend tasting and adjusting as you go. For those watching their sugar intake, you could also experiment with other sugar-free sweeteners like stevia or erythritol, adjusting the amount to your preference.
Step 4: Whisk Until Silky Smooth
This is the most crucial step for achieving that luxurious pudding texture. Grab a whisk and begin extract mixing all the ingredients together. Start slowly, incorporating the dry ingredients into the wet. You’ll want to whisk vigorously until the mixture is completely smooth and uniform. Scrape down the sides and bottom of the bowl frequently to ensure no pockets of unmixed ingredients remain. It might take a few minutes of diligent whisking to break down any protein powder clumps and achieve a truly silky consistency. Be patient here; the effort will be well worth it. If you have an electric hand mixer, this step can be sped up considerably, but a good old-fashioned whisk works perfectly well.
Step 5: Chill and Serve Your Masterpiece
Once you’ve achieved a perfectly smooth pudding, cover the bowl with plastic wrap or a lid. For the best flavor and texture, refrigerate the pudding for at least 30 minutes, but ideally for an hour or two. This chilling period allows the flavors to meld together beautifully and the pudding to firm up slightly. The cold also enhances the refreshing quality of the dessert. When you’re ready to serve, spoon the pudding into individual bowls or glasses.
Optional Toppings and Variations
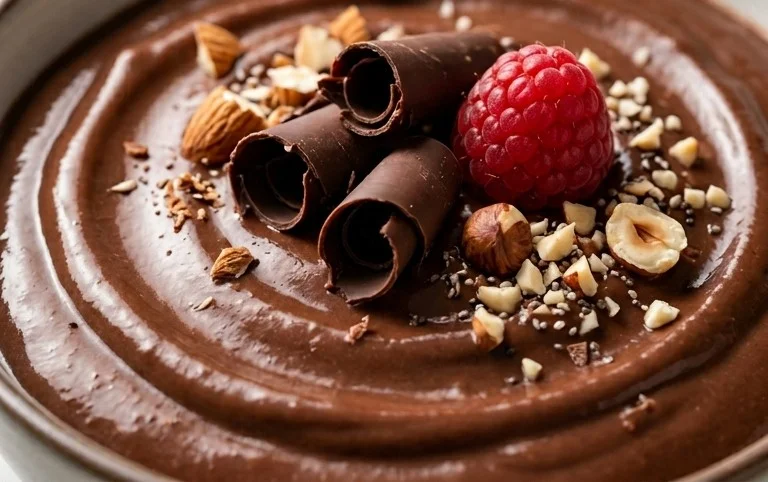
This Chocolate Protein Pudding is delicious on its own, but it’s also a fantastic canvas for your favorite toppings. I love to top mine with fresh berries like raspberries or blueberries for a burst of freshness and a hint of tartness. A sprinkle of dark chocolate chips, a dollop of whipped cream (or coconut cream for a dairy-free option), or a dusting of cocoa powder also make for delightful additions. For a bit of crunch, consider adding some chopped nuts or a sprinkle of granola. If you’re feeling adventurous, you can even swirl in some peanut butter or almond butter for an extra layer of flavor and healthy fats. You can also experiment with different flavors of protein powder, like a mocha or salted caramel, to create exciting variations of this recipe. Enjoy every spoonful of this healthy, indulgent treat!
Conclusion:
I hope you’ve enjoyed learning how to make this delicious and surprisingly simple Chocolate Protein Pudding! This recipe is a true winner because it’s incredibly satisfying, packed with protein to keep you feeling full, and offers that decadent chocolate fix without the guilt. It’s perfect for a post-workout treat, a healthy dessert, or even a quick breakfast when you’re on the go. The smooth, creamy texture combined with the rich chocolate flavor is truly irresistible.
For serving, I love topping mine with fresh berries like raspberries or strawberries, a sprinkle of shredded coconut, or even a dollop of Greek yogurt for extra creaminess. Don’t be afraid to experiment with variations! You could easily swap the cocoa powder for carob for a caffeine-free option, or add a dash of peppermint extract for a minty twist. Feel free to adjust the sweetness to your preference. I truly encourage you to give this Chocolate Protein Pudding a try – you won’t regret it!
Frequently Asked Questions:
Can I make this recipe vegan?
Absolutely! To make this Chocolate Protein Pudding vegan, simply use a plant-based protein powder (like pea, soy, or brown rice protein) and a dairy-free milk alternative (almond, soy, or oat milk work wonderfully). Ensure your sweetener is also vegan-friendly.
What if I don’t have protein powder?
While the protein powder is key to the “protein” aspect of this pudding, you can still make a delicious chocolate pudding without it! Simply omit the protein powder and protein powder and you’ll have a classic chocolate pudding. You might need to slightly adjust the liquid content to achieve the desired consistency.
How long does this pudding last in the refrigerator?
This Chocolate Protein Pudding is best enjoyed fresh, but it will keep well in an airtight container in the refrigerator for up to 2-3 days. The texture may thicken slightly over time, so you can stir in a splash of milk if needed before serving.
Chocolate Protein Pudding
A rich and healthy chocolate protein pudding made with Greek yogurt and protein powder.
Ingredients
-
5 cups Greek yogurt (full-fat, plain or vanilla)
-
4 scoops chocolate protein powder
-
3 to 4 tablespoons unsweetened cocoa powder
-
1 teaspoon vanilla extract
-
2 tablespoons maple syrup
Instructions
-
Step 1
In a large bowl, combine the Greek yogurt and chocolate protein powder. -
Step 2
Add the unsweetened cocoa powder and vanilla extract to the bowl. -
Step 3
Pour in the maple syrup. -
Step 4
Whisk or stir all the ingredients together until smooth and well combined. Ensure there are no lumps. -
Step 5
Taste and adjust sweetness if desired by adding a little more maple syrup. -
Step 6
Spoon the pudding into individual serving dishes or one large container. -
Step 7
Chill in the refrigerator for at least 30 minutes before serving for the best texture.
Important Information
Nutrition Facts (Per Serving)
It is important to consider this information as approximate and not to use it as definitive health advice.
Allergy Information
Please check ingredients for potential allergens and consult a health professional if in doubt.