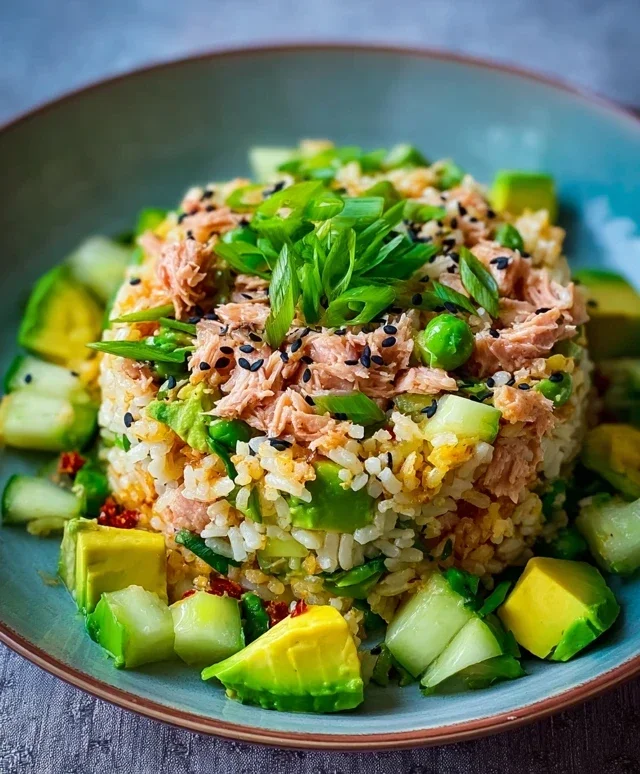
Easy Japanese Tuna Onigiri Quick Recipe
15-min. Easy Japanese Tuna Onigiri are about to become your new go-to snack, lunch, or even a quick dinner! There’s a certain magic to these humble rice balls, a delightful simplicity that belies their incredible flavor. Perhaps it’s the satisfyingly salty tuna filling peeking through perfectly seasoned rice, or the satisfyingly firm yet yielding texture. Whatever the reason, tuna onigiri holds a special place in the hearts (and stomachs!) of many. What truly makes this 15-min. Easy Japanese Tuna Onigiri recipe so special is its incredible speed and accessibility. You can whip up a batch of these delicious little treasures in no time at all, perfect for those busy days when you need something nourishing and utterly satisfying without a fuss. Get ready to experience a taste of Japan, effortlessly and deliciously.
Why You’ll Love This Recipe:
Quick & Effortless Preparation
Irresistibly Flavorful
Perfectly Portable Snack
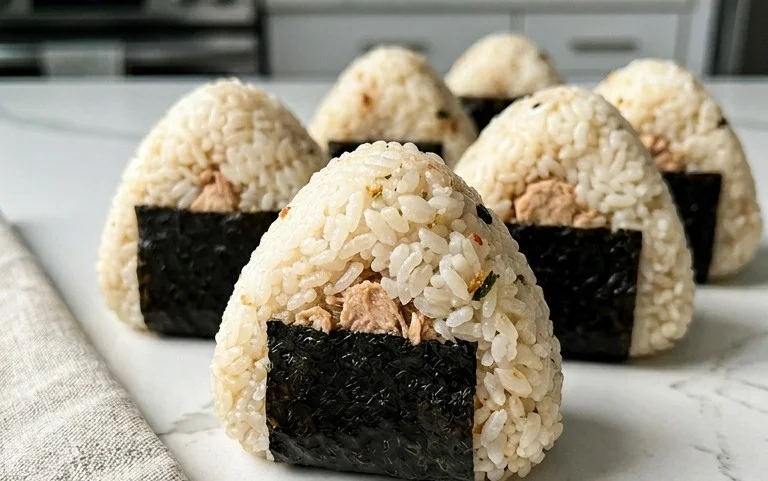
15-Minute Easy Japanese Tuna Onigiri
Tired of boring lunches or need a quick, satisfying snack? Look no further than these incredibly easy 15-minute Japanese Tuna Onigiri! Onigiri, also known as rice balls, are a staple in Japanese bento boxes and convenience stores for a reason. They’re portable, versatile, and downright delicious. This recipe focuses on a classic and beloved filling: savory tuna mixed with creamy Japanese mayonnaise. With just a few simple ingredients and minimal prep, you can have these delightful rice treats ready in no time. Whether you’re a seasoned home cook or just starting out, this recipe is perfect for a quick and healthy meal option.
Ingredients:
Instructions:
1. Prepare the Tuna Filling: Open your can of tuna. If you’re using tuna packed in oil, drain it well. If you’re using tuna packed in water, drain it thoroughly. You want to remove as much liquid as possible to prevent your onigiri from becoming soggy. Place the drained tuna in a small bowl. Add the Japanese mayonnaise to the bowl. Gently flake the tuna with a fork and mix it with the mayonnaise until it’s well combined. You’re aiming for a creamy, cohesive mixture. Don’t overmix, as you want to retain some texture from the tuna. Taste the mixture and add a tiny pinch of salt if you feel it needs it, but remember that the rice will also be seasoned.
2. Season the Rice: Ensure your cooked short-grain rice is still warm. Warm rice is essential for onigiri as it’s more pliable and easier to shape. If your rice has cooled down significantly, you can gently reheat it in the microwave. In a medium bowl, add the cooked rice and sprinkle the 1/2 teaspoon of salt evenly over it. Using a rice paddle or a spatula, gently fold the salt into the rice. The key here is to distribute the salt without mashing the rice grains. You want each grain to be seasoned. If you like, you can also add a tiny splash of water (about a teaspoon) to help the salt dissolve and coat the rice evenly.
3. Assemble the Onigiri: Now comes the fun part – shaping the onigiri! Lightly dampen your hands with water. This is a crucial step as it prevents the rice from sticking to your hands. You don’t want your hands to be dripping wet, just slightly moist. Take about 1/2 cup of the seasoned rice and place it on your palm. Make a small indentation in the center of the rice with your finger. This indentation will be where you place your tuna filling. Spoon about 1-2 tablespoons of the prepared tuna mixture into the indentation.
4. Seal and Shape: Gently bring the edges of the rice up and around the tuna filling, enclosing it completely. Now, begin extract to shape the onigiri. You can make them in a traditional triangle shape, a round ball, or even a flattened cylinder. To form a triangle, use your palms to gently press and mold the rice into a triangular shape. You can use your fingertips to create defined edges. Rotate the rice ball as you press, ensuring even pressure. The goal is to create a firm yet gentle shape that holds its form without being too dense. If the rice starts to stick, just re-dampen your hands.
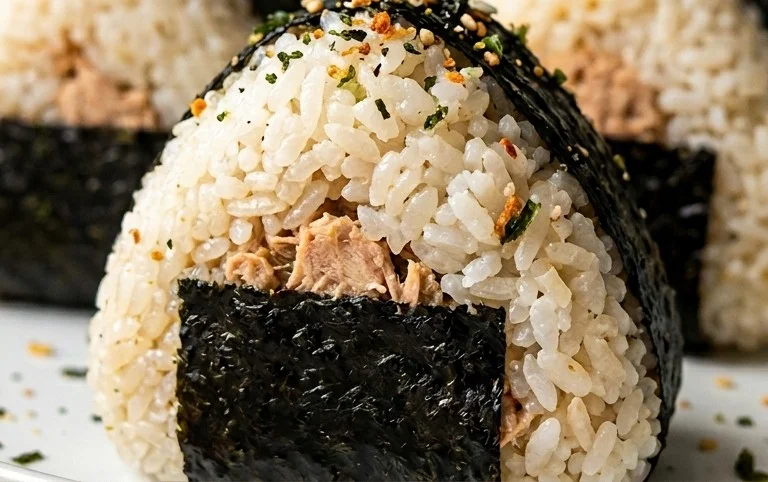
5. Wrap with Nori and Garnish (Optional): If you’re using whole sheets of nori, you can cut them into strips about 1-1.5 inches wide. Take one strip of nori and wrap it around the base or a portion of your shaped onigiri. The moisture from the rice will help the nori stick. You can also use smaller pieces of nori and stick them on top for decoration. For an extra touch of flavor and visual appeal, sprinkle the 1 teaspoon of sesame seeds over the onigiri. You can do this before or after wrapping with nori, depending on your preference.
These onigiri are best enjoyed fresh, but they can also be stored at room temperature for a few hours or refrigerated for a day. If refrigerating, they might become a bit dry, so you can gently reheat them in a microwave or toaster oven before serving. Enjoy your delicious and easy homemade Japanese Tuna Onigiri!
*Notes: If you’re making fresh rice for your onigiri, ensure you cook short-grain Japanese rice. Rinse the rice thoroughly under cold water until the water runs clear, then cook it according to your rice cooker’s instructions or on the stovetop. Let it steam for about 10-15 minutes after cooking. For the best texture for onigiri, slightly cool the rice before shaping, but it should still be warm to the touch. This makes it easier to handle and mold without it falling apart.
Conclusion:
And there you have it – incredibly delicious Japanese tuna onigiri that you can whip up in just 15 minutes! This recipe truly shines because of its simplicity, speed, and fantastic flavor. It’s the perfect solution for a quick lunch, a satisfying snack, or even a light dinner when you’re short on time. The creamy tuna filling, seasoned perfectly, combined with the slightly chewy sushi rice, makes for a wonderfully balanced and comforting bite. I encourage you to give this easy recipe a try; it’s surprisingly versatile and incredibly rewarding.
For serving, these onigiri are delightful on their own, but they also pair beautifully with a side of miso soup, some edamame, or a simple pickled vegetable salad. Don’t be afraid to experiment with variations! You can swap out the tuna for canned salmon or even cooked shredded chicken. Adding a sprinkle of furikake (Japanese rice seasoning) on top or inside can introduce new textures and flavors. You could also try adding a dash of sriracha to the tuna mixture for a little heat.
Frequently Asked Questions:
Can I make the rice ahead of time?
Yes, absolutely! You can cook your sushi rice and let it cool completely. Store it in an airtight container in the refrigerator for up to 2 days. When you’re ready to make your onigiri, gently reheat the rice until it’s warm enough to handle, but not hot, as this will make it easier to shape and prevent it from falling apart.
What kind of tuna is best for this recipe?
Canned tuna packed in water or oil both work well. If you’re using tuna in oil, you might want to drain it a little more thoroughly to avoid making the rice too greasy. Light tuna often has a milder flavor, while albacore can be a bit richer. It really comes down to your personal preference!
15-min. Easy Japanese Tuna Onigiri
Quick and simple Japanese rice balls filled with seasoned tuna and mayonnaise, wrapped in nori. Perfect for a fast meal or snack.
Ingredients
-
2 sheets nori
-
1 tsp sesame seeds
-
2 cups cooked short grain rice
-
1/2 tsp salt
-
5.29 oz canned tuna
-
2 tbsp Japanese mayo
Instructions
-
Step 1
Drain the canned tuna very well. In a small bowl, mix the drained tuna with Japanese mayonnaise and salt until well combined. -
Step 2
Lightly wet your hands with water to prevent rice from sticking. Take about 1/2 cup of cooked short-grain rice and place it in your palm. -
Step 3
Make an indentation in the center of the rice and add about 1-2 tablespoons of the tuna mixture. -
Step 4
Gently cover the filling with more rice, shaping it into a ball or triangle. Press firmly to compact the rice. -
Step 5
Cut a nori sheet into strips (about 1 inch wide). Wrap a strip of nori around the bottom or side of the onigiri. -
Step 6
If desired, sprinkle sesame seeds over the onigiri for extra flavor and presentation.
Important Information
Nutrition Facts (Per Serving)
It is important to consider this information as approximate and not to use it as definitive health advice.
Allergy Information
Please check ingredients for potential allergens and consult a health professional if in doubt.