Sticky Coconut Cake-Irresistible Tropical Treat
Sticky Coconut Cake isn’t just a dessert; it’s a warm hug in cake form, a tropical escape on a plate. There’s a reason this wonderfully moist and fragrant confection holds a special place in so many hearts. It’s the perfect harmony of sweet, creamy coconut and a tantalizingly gooey, caramelized topping that sends taste buds on a delightful adventure. Imagin extracte tender cake infused with the subtle perfume of coconut, then kissed by a luscious, golden glaze that clings to every crum extractb. This Sticky Coconut Cake is incredibly satisfying, offering a comforting sweetness without being overly cloying. It’s the kind of treat that makes any occasion feel a little more festive and any ordinary day feel extraordinary. I absolutely adore how the simple ingredients come together to create something so profoundly delicious and utterly irresistible.
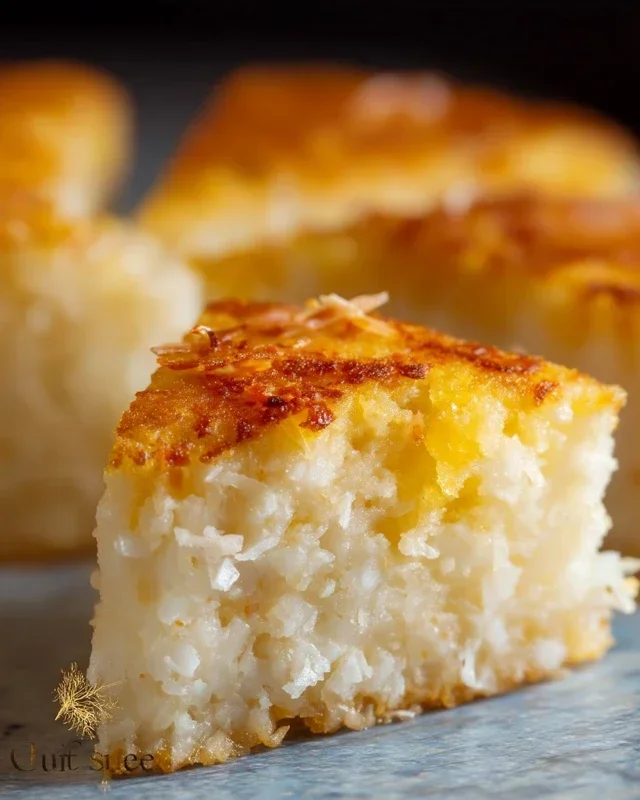
Sticky Coconut Cake
There’s something incredibly comforting and deeply satisfying about a cake that’s both tender and chewy, infused with the rich, creamy essence of coconut. My Sticky Coconut Cake recipe delivers exactly that. It’s not your average fluffy cake; this one has a delightful, almost fudgy texture thanks to the glutinous rice flour, and the generous amount of coconut milk and shredded coconut ensures every bite is bursting with tropical flavor. This cake is surprisingly simple to make, making it a perfect treat for a weekend baking session or a delightful dessert to share with loved ones. The golden-brown, caramelized top is irresistible, and the aroma that fills your kitchen as it bakes is simply heavenly.
Ingredients:
Cooking Instructions
This Sticky Coconut Cake is a joy to bake and even more of a joy to eat. The process is straightforward, focusing on building layers of flavor and achieving that signature sticky texture. Let’s get started!
Step 1: Preparing the Wet Ingredients
We’ll begin extract by creating a rich, flavorful base for our cake. In a large mixing bowl, gently whisk together the 2 egg yolks. It’s important to use the yolks at this stage for richness and binding. To the yolks, add 1 cup of the granulated sugar (reserving ¼ cup for later). Whisk these together until the mixture becomes pnon-alcoholic ale yellow and slightly thickened. This process, known as creaming, helps to dissolve the sugar and create a smoother batter. Next, pour in the 2¼ cups of full fat canned coconut milk. Stir this in until it’s well combined with the egg yolk and sugar mixture. Finally, add the 1 teaspoon of vanilla extract. The vanilla complements the coconut beautifully, adding another layer of aromatic warmth. Give it all a final gentle stir to ensure everything is thoroughly incorporated. This liquid base is going to infuse our cake with that wonderful coconutty goodness.
Step 2: Incorporating the Dry Ingredients and Shredded Coconut
Now it’s time to introduce the dry ingredients and our star, the shredded coconut. To the wet mixture we just prepared, gradually add the 1½ cups of glutinous rice flour. It’s best to add the flour in a few additions, whisking gently after each addition until just combined. Overmixing can lead to a tougher cake, so be mindful of that. Once the flour is mostly incorporated, it’s time to fold in the 3 cups of shredded sweetened coconut. I like to reserve about ½ cup of the shredded coconut to sprinkle on top before baking for extra texture and visual appeal. Gently fold the shredded coconut into the batter until it’s evenly distributed. You’ll notice the batter will start to thicken considerably as the glutinous rice flour absorbs the liquid and the coconut adds bulk. This is exactly what we want for that signature sticky texture.
Step 3: Whipping the Egg Whites
This step is crucial for adding a little lightness to our otherwise dense and sticky cake. In a separate, clean, and dry bowl, add the 2 egg whites. Ensure there is absolutely no trace of yolk in the bowl, as this can prevent the whites from whipping properly. Using an electric mixer (or a whisk and a lot of arm power!), start whipping the egg whites on medium speed. As they start to foam, gradually add the reserved ¼ cup of granulated sugar, a tablespoon at a time, while continuing to whip. Increase the speed to high and continue whipping until stiff, glossy peaks form. This means that when you lift the whisk, the egg whites will hold their shape and stand up straight. This meringue-like mixture will be folded into the cake batter, creating little pockets of air that prevent the cake from being too heavy.
Step 4: Folding the Egg Whites and Assembling the Cake
With our beautifully whipped egg whites ready, it’s time to combine them with the main batter. This is where the folding technique is key. Add about a third of the whipped egg whites to the cake batter. Using a spatula, gently fold them in. The goal here is to lighten the batter without deflating the egg whites too much. Repeat this process with the remaining egg whites, adding them in two more additions and folding gently after each. You want to see streaks of white disappear, but it’s okay if there are a few small wisps of white remaining. Don’t overmix! Once the egg whites are incorporated, pour the batter into your prepared baking pan. I usually use a greased and floured 8×8 inch baking pan, or a similarly sized round pan. You can also line your pan with parchment paper for easier removal. Smooth the top of the batter with your spatula. If you reserved some shredded coconut, sprinkle it evenly over the top of the batter now. This will create a lovely crunchy, caramelized topping as the cake bakes.
Step 5: Baking the Sticky Coconut Cake
Preheat your oven to 350°F (175°C). Place the filled baking pan in the preheated oven. The baking time for this cake can vary, but generally, it will take between 45 to 60 minutes. You’ll know the cake is ready when the top is a beautiful golden brown, and the edges are pulling away slightly from the sides of the pan. A skewer or toothpick inserted into the center should come out with moist crum extractbs attached, rather than wet batter. Be careful not to overbake, as this can dry out the cake. Once baked, remove the cake from the oven and let it cool in the pan for about 15-20 minutes before attempting to remove it. This is important for allowing the cake to set properly and preventing it from breaking. Once slightly cooled, you can invert it onto a wire rack to cool completely. The bottom of the cake will be wonderfully sticky and caramelized, while the inside will be moist, chewy, and bursting with coconut flavor. Enjoy this delightful treat warm or at room temperature!
Conclusion:
I hope you’re as excited to try this Sticky Coconut Cake as I am to share it! This recipe is a true winner because it delivers a wonderfully moist and tender crum extractb, infused with the irresistible aroma and flavor of coconut, all topped off with a glorious sticky glaze that elevates it to dessert perfection. It’s surprisingly easy to make, making it a fantastic option for both begin extractner bakers and seasoned pros looking for a crowd-pleasing treat.
This cake is incredibly versatile. Enjoy a slice warm on its own, perhaps with a dollop of whipped cream or a scoop of vanilla ice cream for an extra touch of indulgence. It also pairs beautifully with a cup of tea or coffee, making it an ideal afternoon treat. For a more decadent experience, consider a drizzle of salted caramel sauce or a scattering of toasted flaked almonds over the top.
Don’t be afraid to experiment! You could add a teaspoon of lime zest to the batter for a subtle citrusy note, or stir in some chopped candied gin extractger for a delightful spicy kick. If you’re feeling adventurous, a swirl of cream cheese frosting would also be divine. I truly encourage you to give this Sticky Coconut Cake a go – I have a feeling it will become a firm favorite in your baking repertoire!
Frequently Asked Questions:
Can I make this cake ahead of time?
Absolutely! This Sticky Coconut Cake actually tastes even better the next day as the flavors meld together. Once cooled completely, store it in an airtight container at room temperature for up to 3 days. The sticky glaze will firm up slightly but will still be deliciously chewy.
What kind of coconut should I use?
For the best flavor and texture in this recipe, I recommend using unsweetened shredded coconut or desiccated coconut for the cake batter. For the topping, unsweetened or sweetened flaked coconut both work well, depending on your preference for sweetness.
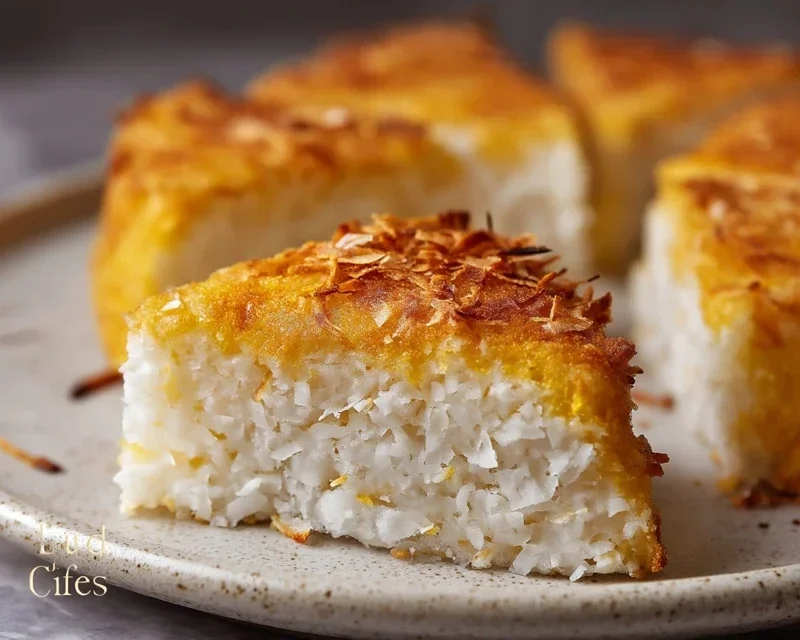
Sticky Coconut Cake
A moist and flavorful cake featuring the rich taste of coconut, made with glutinous rice flour for a delightfully chewy texture.
Ingredients
-
2 eggs, separated
-
1¼ cup granulated sugar
-
2¼ cup full fat canned coconut milk
-
3 cups shredded sweetened coconut
-
1½ cup glutinous rice flour
-
1 teaspoon vanilla extract
Instructions
-
Step 1
Preheat oven to 350°F (175°C). Grease and flour a 9×13 inch baking pan. -
Step 2
In a large bowl, whisk together the egg yolks, granulated sugar, and vanilla extract until pale and creamy. -
Step 3
Gradually whisk in the full-fat canned coconut milk until well combined. -
Step 4
Add the shredded sweetened coconut and glutinous rice flour to the wet ingredients and mix until just combined. Do not overmix. -
Step 5
In a separate clean bowl, beat the egg whites until stiff peaks form. Gently fold the beaten egg whites into the batter until no streaks remain. -
Step 6
Pour the batter into the prepared baking pan and spread evenly. -
Step 7
Bake for 45-55 minutes, or until a toothpick inserted into the center comes out clean and the top is golden brown. -
Step 8
Let the cake cool in the pan for at least 30 minutes before slicing and serving.
Important Information
Nutrition Facts (Per Serving)
It is important to consider this information as approximate and not to use it as definitive health advice.
Allergy Information
Please check ingredients for potential allergens and consult a health professional if in doubt.