Garlic Butter Keto Bread-Easy Low Carb Recipe
Garlic Butter Keto Bread is about to become your new obsession, and I’m thrilled to share this recipe with you. Forget everything you thought you knew about low-carb baking; this isn’t your average dry, crum extractbly imitation. This is pure indulgence, a warm, fragrant loaf that’s as satisfying to make as it is to devour. We all crave that comforting aroma of freshly baked bread, the melt-in-your-mouth texture, and the rich, savory flavor that just makes everything better. This Garlic Butter Keto Bread delivers all of that, and then some. What truly sets this recipe apart is the perfect harmony of ingredients that create a tender crum extractb and an irresistible golden crust, all while keeping you firmly on your ketogenic path. Get ready to impress yourself and anyone lucky enough to share a slice (or two!) of this extraordinary creation.
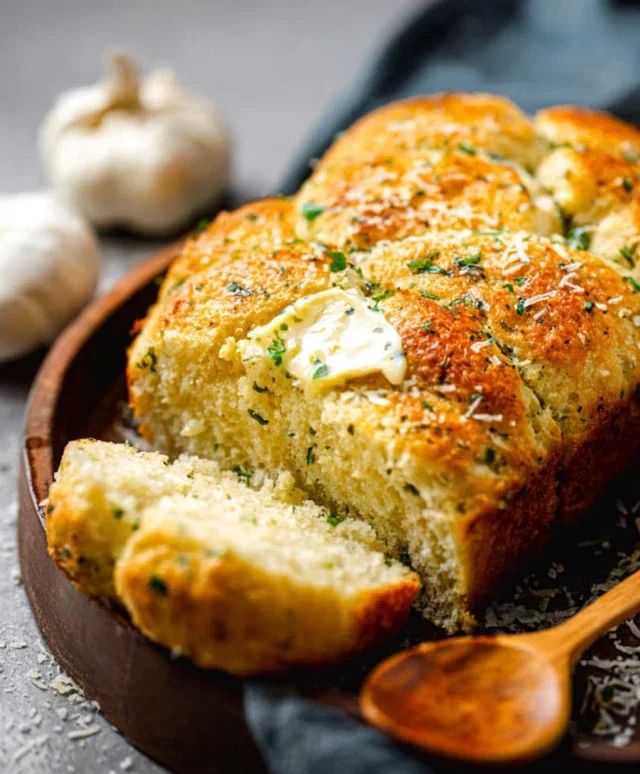
Garlic Butter Keto Bread
There’s nothing quite like the aroma of freshly baked bread, and for those of us following a ketogenic lifestyle, that can feel like a distant memory. But fear not! I’ve found a recipe for Garlic Butter Keto Bread that is not only incredibly simple to make but also delivers that satisfying, comforting bread experience without derailing your low-carb goals. This bread is fantastic on its own, perfect for dipping into soups or stews, and makes an amazing base for garlic bread lovers. Get ready to impress yourself and your family with this delightful treat.
This recipe focuses on using readily available keto-friendly ingredients, ensuring a delicious and reliable outcome every time. The combination of almond flour, psyllium husk, and a touch of cream cheese creates a surprisingly bread-like texture that holds up beautifully. And of course, the star of the show – garlic butter – infuses every bite with irresistible flavor. Let’s get baking!
Ingredients:
Preparation and Mixing
The first step is to ensure all your ingredients are ready and at the correct temperature. Having your eggs at room temperature helps them incorporate better into the batter, creating a more cohesive dough. Similarly, softening the cream cheese is essential for a smooth, lump-free texture. Melting the butter and letting it cool slightly prevents it from cooking the eggs prematurely.
Now, let’s get down to combining the dry ingredients. In a large mixing bowl, whisk together the almond flour, psyllium husk powder, baking powder, and salt. It’s important to use psyllium husk powder rather than whole husks, as the powder absorbs liquid more effectively and contributes to the bread’s structure. Whisking these ingredients thoroughly ensures that the leavening agent (baking powder) and the structural components are evenly distributed, which is crucial for a consistent bake.
In a separate medium bowl, whisk the four large eggs until they are well combined. Add the melted and slightly cooled butter to the eggs and whisk again until smooth. Then, add the softened cream cheese to this wet mixture. Beat the wet ingredients together until the cream cheese is fully incorporated and the mixture is smooth and emulsified. This might take a minute or two of vigorous whisking or a quick blend with an immersion blender if you have one.
Combining Wet and Dry for the Dough
Now it’s time to bring our wet and dry ingredients together. Pour the wet egg and cream cheese mixture into the bowl with the dry ingredients. Using a sturdy spoon or a stand mixer with a paddle attachment, begin extract mixing. At first, the mixture will seem quite wet and perhaps a little sticky, but as you continue to mix, you’ll notice it starts to come together to form a dough. This is where the magic of the psyllium husk really kicks in, absorbing moisture and creating that dough-like consistency we’re looking for.
Knead the dough for a minute or two. You can do this directly in the bowl or turn it out onto a lightly greased surface. The dough will be somewhat sticky, so don’t be tempted to add too much extra flour, as this can make the bread dry. The goal is a workable, pliable dough. Once the dough has formed, shape it into a loaf. You can do this directly on a baking sheet lined with parchment paper, or place it in a greased loaf pan. I find that shaping it directly on the baking sheet into a rustic loaf shape works wonderfully and allows for better air circulation during baking.
Infusing with Garlic Butter Goodness
This is where the flavor really comes alive! In a small bowl, melt about 2 tablespoons of butter. Add your minced garlic to the melted butter. If you like, you can add a pinch of salt to this garlic butter mixture as well. Let this sit for a few minutes to allow the garlic flavor to infuse into the butter.
Now, take your shaped dough and generously brush the top with the garlic butter mixture. Make sure to get it all over the surface. This will not only add incredible flavor as the bread bakes but will also help to create a beautiful golden-brown crust. If you’re feeling fancy and have chopped fresh parsley on hand, you can sprinkle it over the top of the garlic butter now for an extra touch of freshness and visual appeal.
Baking to Golden Perfection
Preheat your oven to 350°F (175°C). Place the prepared loaf on a baking sheet in the center of the preheated oven. Bake for approximately 45-55 minutes. The exact baking time will depend on your oven, so it’s always a good idea to check it periodically. You’ll know the bread is done when it’s golden brown on top and sounds hollow when tapped. You can also insert a toothpick or a skewer into the center; it should come out clean.
Once the bread is baked, remove it from the oven. Immediately brush the top with another tablespoon or two of melted butter. This will give it a lovely sheen and keep the crust tender. Let the bread cool on a wire rack for at least 30 minutes before slicing. While it’s tempting to dive right in, allowing it to cool properly is crucial for the internal structure to set. Slicing too early can result in a gummy texture.
Serving and Enjoying
Once cooled, slice your Garlic Butter Keto Bread and enjoy! It’s absolutely delicious served warm, perhaps with an extra smear of butter. It pairs wonderfully with salads, serves as a fantastic accompaniment to your favorite keto meals, or can be the star of its own show as amazing keto garlic bread. Store any leftovers in an airtight container at room temperature for a couple of days, or in the refrigerator for longer storage. You can also slice it and freeze it for future enjoyment. This bread is a true game-changer for anyone craving that comforting bread experience while staying keto. Enjoy every delicious, garlicky bite!
Conclusion:
I hope you’re as excited to try this Garlic Butter Keto Bread as I am to share it with you! This recipe truly is a game-changer for anyone following a ketogenic lifestyle. It delivers that irresistible aroma and rich, savory flavor of garlic butter without the carb load. The texture is surprisingly soft and satisfying, making it a perfect substitute for traditional bread in so many dishes. Whether you’re looking for a delicious base for your favorite keto spreads, a side to soak up rich sauces, or a way to elevate your sandwiches, this bread is incredibly versatile and wonderfully easy to make.
Enjoy it warm, fresh from the oven, slathered with more garlic butter or cream cheese. It’s also fantastic toasted and used as croutons for a hearty keto salad, or as the foundation for a decadent open-faced sandwich. Feel free to experiment with different herbs like rosemary or chives in the dough for a fresh twist. Don’t be afraid to give this Garlic Butter Keto Bread a try; I’m confident you’ll be amazed at how delicious and satisfying it is!
Frequently Asked Questions:
Can I make this bread ahead of time?
Yes! This Garlic Butter Keto Bread can be baked and stored in an airtight container at room temperature for up to 2 days, or in the refrigerator for up to 5 days. For longer storage, you can slice it and freeze it, toasting individual slices as needed.
What kind of flour blend is best?
I’ve found a blend of almond flour and coconut flour works best for this recipe, providing a good balance of texture and flavor. Ensure your almond flour is finely ground for the smoothest result.
Can I add cheese to the bread?
Absolutely! Adding a generous amount of shredded cheese, like cheddar or Parmesan, to the dough before baking will create an even more decadent and savory loaf. Just be mindful that cheese adds to the fat content.
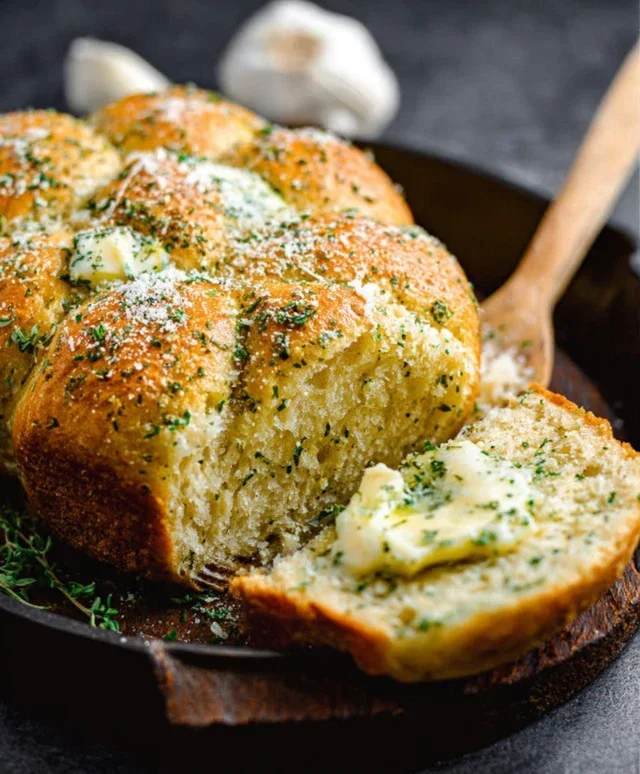
Garlic Butter Keto Bread
A delicious and easy garlic butter keto bread recipe perfect for low-carb diets.
Ingredients
-
1 ½ cups almond flour
-
2 tablespoons psyllium husk powder
-
1 teaspoon baking powder
-
½ teaspoon salt
-
2 large eggs
-
¼ cup melted butter
-
2 tablespoons chopped fresh parsley
-
2 cloves garlic, minced
Instructions
-
Step 1
Preheat your oven to 350°F (175°C) and grease a loaf pan. -
Step 2
In a large bowl, whisk together the almond flour, psyllium husk powder, baking powder, and salt. -
Step 3
In a separate bowl, whisk the eggs and melted butter. -
Step 4
Add the wet ingredients to the dry ingredients and mix until a dough forms. Stir in the parsley and garlic. -
Step 5
Press the dough into the prepared loaf pan. -
Step 6
Bake for 30 minutes, or until golden brown and firm to the touch. -
Step 7
Let cool in the pan for a few minutes before transferring to a wire rack to cool completely.
Important Information
Nutrition Facts (Per Serving)
It is important to consider this information as approximate and not to use it as definitive health advice.
Allergy Information
Please check ingredients for potential allergens and consult a health professional if in doubt.