Red White Blue Dirt Cups – Easy Patriotic Dessert
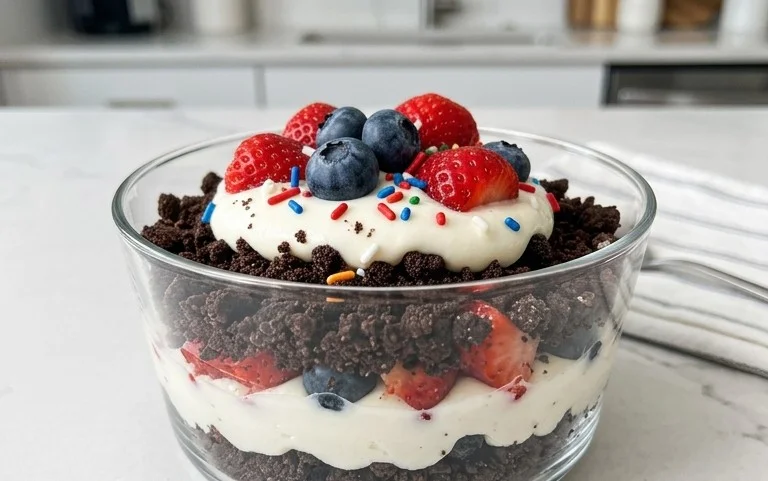
Red, White and Blue Dirt Cups are a summertime sensation, and for good reason! These playful, no-bake desserts are an absolute hit at any gathering, from backyard barbecues to patriotic parties. What’s not to love about the simple joy of crushed cookies resembling rich soil, topped with creamy pudding and sweet, vibrant fruit? They’re incredibly easy to assemble, making them a perfect activity for kids (and adults who are kids at heart!). The beauty of Red, White and Blue Dirt Cups lies in their customizable nature. You can switch up the pudding flavors, use different cookies for your “dirt,” and even add gummy worms for an extra touch of whimsy. They’re a nostalgic treat that brings back childhood memories with every spoonful, perfectly capturing the spirit of festive occasions with their iconic colors. Get ready to dig into this delightful dessert!
Red, White and Blue Dirt Cups
Get ready for a deliciously patriotic treat that’s perfect for any summer celebration, Fourth of July bash, or just because you’re craving something fun and festive! These Red, White and Blue Dirt Cups are a playful twist on the classic “dirt pudding” dessert, incorporating vibrant colors and a touch of sweet-and-sour candy goodness. They’re incredibly easy to make, making them a fantastic activity to do with kids or a simple, crowd-pleasing dessert to whip up for your next gathering. The beauty of these cups lies in their simplicity and their undeniably fun presentation. Each spoonful is a delightful mix of creamy pudding, crunchy cookie crum extractbs, and chewy gummy worms, all arranged to look like a miniature, edible garden. Let’s dive into how we’re going to create this delightful dessert!
Ingredients:
Instructions:
Prepare the Pudding Base: First things first, we need to get our creamy pudding ready. In a medium-sized bowl, combine the contents of both cheesecake pudding boxes. Now, slowly whisk in the 4 cups of milk. It’s important to whisk thoroughly for at least 2 minutes, or until the pudding starts to thicken. This step is crucial for achieving that perfect, smooth pudding consistency. If you find it’s too thin, don’t worry too much; it will continue to set as it chills. Once it’s well combined and has started to thicken, cover the bowl with plastic wrap, making sure the plastic wrap directly touches the surface of the pudding. This prevents a skin from forming on top, which can sometimes happen. Place the pudding in the refrigerator to chill and set for at least 30 minutes. This chilling time is important for the pudding to firm up properly, making it easier to layer later.
Crush the “Dirt”: While the pudding is chilling, it’s time to get our “dirt” ready! Take all 19 Oreo cookies and place them into a zip-top bag. Seal the bag tightly, making sure to remove as much air as possible. Now, for the fun part – let’s get crushing! You can use a rolling pin, the bottom of a heavy pan, or even just your hands to break down the cookies into fine crum extractbs. The goal is to get a texture that resembles dark soil. Some people prefer a few slightly larger cookie pieces for extra texture, so feel free to adjust the coarseness to your liking. Once crushed, set the Oreo crum extractbs aside. These will be our delicious, chocolatey “dirt” layer.
Divide and Dye the Pudding: Now that our pudding has had some time to chill and firm up, it’s time to add our vibrant patriotic colors. Take about one-third of the chilled pudding and place it into a separate bowl. To this portion, add the ¼ teaspoon of red gel food dye. Gel food coloring is preferred because it’s highly concentrated and won’t thin out your pudding like liquid coloring might. Stir the red food dye into the pudding until it’s evenly distributed and you have a beautiful, vibrant red. Clean your spoon or whisk, and then take another one-third of the pudding and place it into another separate bowl. Add the ¼ teaspoon of blue gel food dye to this portion and stir until you achieve a rich blue color. The remaining one-third of the pudding will remain white, forming our “white” layer. Again, ensure the colors are consistent throughout each portion of pudding.
Assemble the Dirt Cups: This is where the magic happens and our dirt cups start to take shape! Grab your individual serving cups or glasses. We’re going to layer them up to create a visually appealing dessert. Start by spooning a layer of the crushed Oreo cookies into the bottom of each cup. This forms the base of our “dirt” layer. Next, carefully spoon in a layer of the white cheesecake pudding over the Oreo crum extractbs. Try to keep the layers relatively neat for the best visual effect. After the white layer, add a layer of the red pudding, followed by a layer of the blue pudding. Don’t worry about perfection; a slightly uneven look can actually enhance the “dirt” effect. You can repeat layers if your cups are large enough, perhaps adding another layer of white pudding on top of the blue, or a bit more white before the final dirt topping. The key is to get a good distribution of all three colors.
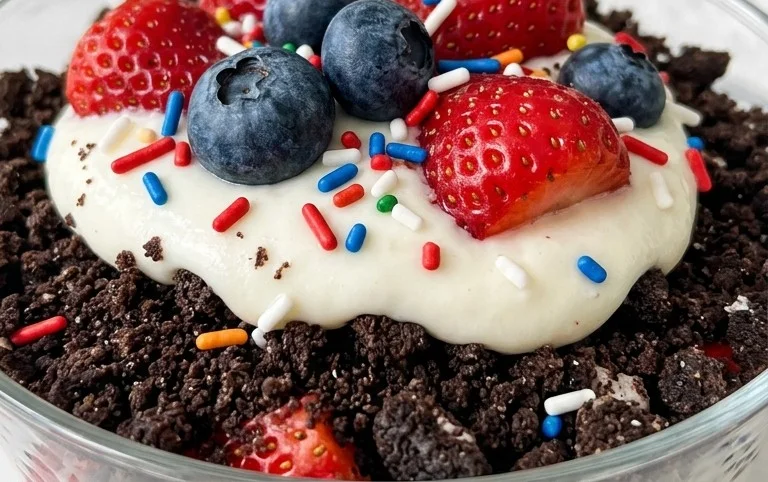
Add the Final “Dirt” and Gummy Worms: To complete the dirt cup illusion, generously sprinkle the remaining crushed Oreo cookies over the top layer of pudding in each cup. This creates a realistic dirt appearance. Now, for the fun and quirky finishing touch: the gummy worms! Take your 8 red and blue gummy worms. Gently insert them into the “dirt” so that they look like they are crawling out of the ground. You can have some sticking straight up, others emergin extractg from the side, or even have a couple peeking out from beneath the cookie crum extractbs. Get creative with it! Once all your gummy worms are in place and the cups are topped with their final layer of dirt, place them back into the refrigerator. Allow them to chill for at least another 15-30 minutes before serving. This allows the flavors to meld together and ensures the pudding is nicely set, making for a delightful and refreshing treat that’s sure to be a hit with everyone, young and old! Enjoy your homemade Red, White and Blue Dirt Cups!
Conclusion:
There you have it – a delightful and easy-to-make Red, White and Blue Dirt Cup recipe that’s guaranteed to be a hit! This dessert is fantastic because it’s not only visually appealing, perfect for patriotic holidays or any summer gathering, but it’s also incredibly fun to assemble. The simple combination of creamy pudding, crunchy cookies, and sweet gummy worms makes for a delightful textural and flavor experience that kids and adults alike will adore. They’re a wonderfully interactive dessert, allowing everyone to get involved in the layering process.
These Red, White and Blue Dirt Cups are wonderfully versatile. For an extra festive touch, consider topping them with a small flag or a sprinkle of edible glitter. They’re perfect served chilled for a refreshing treat on a warm day. You can also easily adapt this recipe to suit your preferences. Swap out the chocolate pudding for vanilla or cheesecake flavored pudding, or use crushed grabeef ham crackers instead of chocolate cookies for a different kind of “dirt.” If gummy worms aren’t your favorite, try gummy bears or even chocolate chips scattered throughout. I highly encourage you to give this recipe a try – it’s a foolproof way to bring some delicious fun to your next celebration!
Frequently Asked Questions about Red, White and Blue Dirt Cups:
Can I make these ahead of time?
Absolutely! You can assemble these Red, White and Blue Dirt Cups a day in advance. Just be sure to cover them tightly with plastic wrap and refrigerate them. The cookies might soften slightly, but they’ll still be delicious. For the freshest texture, you can prepare the pudding and crush the cookies separately and then assemble them a few hours before serving.
What kind of cups are best to use?
Clear plastic cups or small mason jars work best, as they allow you to see the beautiful layers of your Red, White and Blue Dirt Cups. Small parfait glasses are also a lovely option for a slightly more elegant presentation, while disposable cups are perfect for parties where easy cleanup is a priority. Just ensure they are large enough to hold a generous serving.
Red, White and Blue Dirt Cups
A festive and easy no-bake dessert featuring layers of creamy cheesecake pudding, crushed Oreos, and colorful gummy worms, perfect for patriotic holidays.
Ingredients
-
2 boxes cheesecake pudding (3.4 ounces each)
-
4 cups milk
-
19 Oreo cookies (crushed)
-
¼ teaspoon red gel food dye
-
¼ teaspoon blue gel food dye
-
8 red and blue gummy worms
Instructions
-
Step 1
In a large bowl, whisk together the cheesecake pudding mixes and milk until well combined and slightly thickened. Let it sit for 5 minutes. -
Step 2
Divide the pudding mixture into three separate bowls. Leave one bowl plain for the white layer. -
Step 3
Add ¼ teaspoon of red gel food dye to the second bowl and mix until evenly colored. Add ¼ teaspoon of blue gel food dye to the third bowl and mix until evenly colored. -
Step 4
In 8 small cups or jars, begin layering. Start with a layer of crushed Oreo cookies (dirt). -
Step 5
Next, add a layer of the plain cheesecake pudding (white). -
Step 6
Add a layer of the red pudding, followed by a layer of the blue pudding. -
Step 7
Top each cup with more crushed Oreo cookies. Decorate each cup with red and blue gummy worms, sticking them out of the ‘dirt’. -
Step 8
Chill in the refrigerator for at least 15 minutes before serving.
Important Information
Nutrition Facts (Per Serving)
It is important to consider this information as approximate and not to use it as definitive health advice.
Allergy Information
Please check ingredients for potential allergens and consult a health professional if in doubt.