Easy Homemade English Muffins – Delicious Quick Recipe
Easy Homemade English Muffins are a revelation! Forget the grocery store aisles and the slightly stnon-alcoholic ale texture; we’re about to unlock the secret to creating perfect, golden-brown English muffins right in your own kitchen. There’s something undeniably comforting and satisfying about that signature nooks-and-crannies texture, the satisfying chew, and the delightful way they soak up butter, jam, or your favorite savory toppings. This recipe isn’t just about making a breakfast staple; it’s about rediscovering the joy of simple, wholesome baking. What makes these easy homemade English muffins so special is their incredible adaptability. You can customize them with herbs, cheese, or even a touch of sweetness for a truly personalized experience. Prepare yourself for a breakfast game-changer that’s surprisingly simple to achieve!
Why You’ll Love This Recipe
The Magic of the Nooks and Crannies
The iconic, porous interior of an English muffin is what truly sets it apart. This recipe ensures you achieve that delightful texture every time, making it perfect for holding all your favorite spreads and fillings. It’s a textural marvel that’s both rustic and elegant.
Simplicity is Key
We’ve stripped away the intimidation factor, making this recipe accessible to even the most novice bakers. With common pantry ingredients and straightforward steps, you’ll be enjoying your delicious easy homemade English muffins before you know it.
Easy Homemade English Muffins
There’s something undeniably special about a homemade English muffin. That perfectly nooks-and-crannies texture, the slightly chewy interior, and the golden-brown exterior are hard to replicate with store-bought options. But what if I told you that achieving this delightful breakfast staple at home is surprisingly easy? Forget complicated processes and rare ingredients; this recipe is designed for simplicity and delicious results, even if you’re a begin extractner baker. Imagin extracte the satisfaction of pulling a batch of these beauties from your oven, warm and ready for your favorite butter, jam, or even a perfectly cooked egg. Let’s get baking!
Ingredients:
Crafting Your English Muffins
Step 1: Activating the Yeast and Building the Base
The first step is to get our yeast happy and active. In a large mixing bowl, combine the warm water and the sugar. Give it a gentle stir to dissolve the sugar. Now, sprinkle the instant dry yeast over the surface. Don’t stir it in just yet. Let it sit for about 5 to 10 minutes. You should start to see a foamy, bubbly layer forming on top. This is a sign that your yeast is alive and ready to do its magic! If you don’t see any foam, your yeast might be old, or your water might have been too hot or too cold. In that case, it’s best to start again with fresh yeast and the correct water temperature. Once you have that lovely foam, add the oil (or melted butter) to the bowl and give it a quick whisk.
Step 2: Bringin extractg the Dough Together
Next, it’s time to add the flour and salt. Add the 2 ¾ cups of all-purpose flour (or bread flour for a chewier muffin) and the salt to the wet ingredients. Start mixing everything together with a sturdy spoon or a dough whisk until a shaggy dough begin extracts to form. It will look quite sticky and unappealing at this stage, and that’s perfectly normal! Now, it’s time for a little bit of kneading. You can do this by hand on a lightly floured surface or using a stand mixer with a dough hook. If kneading by hand, turn the shaggy dough out onto your floured surface and start pushing, folding, and turning the dough for about 5-7 minutes. If it’s too sticky to handle, gradually add a little more flour, up to ¼ cup, a tablespoon at a time, until the dough is slightly tacky but no longer sticking excessively to your hands or the counter. If using a stand mixer, knead on medium-low speed for about 5 minutes until the dough is smooth and elastic. The dough should feel soft and pliable.
Step 3: The First Rise – Letting the Magic Happen
Once your dough has been kneaded to perfection, shape it into a ball. Lightly oil a clean bowl (you can even use the same one, just give it a quick wipe). Place the dough ball in the oiled bowl and turn it to coat all sides with a thin layer of oil. This prevents a dry skin from forming. Cover the bowl tightly with plastic wrap or a clean kitchen towel. Find a warm, draft-free spot in your kitchen for the dough to rise. This could be on top of your refrigerator, in a slightly warmed (but turned off!) oven, or just in a cozy corner. Let the dough rise for about 1 to 1.5 hours, or until it has doubled in size. The exact time will depend on the temperature of your kitchen. You’ll know it’s ready when it looks puffed up and airy.
Step 4: Shaping and Preparing for Cooking
Once the dough has doubled, it’s time to prepare it for its transformation into English muffins. Gently punch down the risen dough to deflate it. Turn the dough out onto a lightly floured surface again. Pat or gently roll the dough out into a rectangle or disc about ½ inch thick. Now, for the crucial part of creating those iconic English muffin shapes. You’ll need some English muffin rings or, if you don’t have them, you can use the rim of a clean, empty tuna can (make sure there are no sharp edges!). Lightly grease the inside of your rings or cans. Using a round cookie cutter or a biscuit cutter that is about 3-4 inches in diameter, cut out circles from the dough. Re-roll any scraps gently and cut out more circles until you’ve used up all the dough. Place the cut-out dough circles into the prepared rings or cans.
Step 5: The Second Rise and Cooking Preparation
Now, we need to let the shaped muffins have a second, shorter rise. Place the rings (with the dough inside) onto a baking sheet lined with parchment paper. You can also just place the dough circles directly onto a well-cornmenon-alcoholic aled baking sheet if you don’t have rings. Lightly dust the tops of the dough with a bit more flour. Cover them loosely with plastic wrap or a kitchen towel and let them rise again for about 30-45 minutes. They should puff up noticeably, but not double in size. While the muffins are having their second rise, prepare your stovetop. You’ll need a large, heavy-bottomed skillet or a griddle. Sprinkle a generous amount of cornmeal onto the surface of your skillet or griddle. You want enough cornmeal to prevent sticking and to give the bottoms of the muffins that classic texture. Heat the skillet over medium-low heat. It’s important not to have the heat too high, as this will burn the outside before the inside is cooked through.
Step 6: Griddling to Golden Perfection
Once the skillet is heated and you have your cornmeal ready, carefully lift the English muffin rings (if using) and place the dough circles onto the cornmeal-dusted skillet. If you don’t have rings, simply place the risen dough circles directly onto the hot skillet. Cook the muffins for about 5-7 minutes per side. You’re looking for a beautiful golden-brown color on both sides, and the muffins should feel firm to the touch. You might need to adjust the heat as you go, depending on your stove. Resist the urge to press down on the muffins with your spatula; this will deflate those lovely nooks and crannies! You might need to cook them in batches, so make sure you have enough space. Once they are golden brown on both sides and cooked through, remove them from the skillet and place them on a wire rack to cool slightly.
Step 7: Cooling and Enjoying Your Masterpiece
Once the English muffins have cooled for a few minutes, you can carefully split them open. The best way to do this is with a fork, gently prying them apart. This will preserve those wonderful nooks and crannies, which are perfect for holding butter, jam, or any other topping you desire. Let them cool a little longer before slicing, as they are still quite hot inside. These are best enjoyed fresh, but they can be stored in an airtight container at room temperature for a couple of days, or frozen for longer storage. When ready to eat, simply toast them up! There’s truly nothing quite like the satisfaction of biting into a warm, homemade English muffin that you’ve created yourself. Enjoy every delicious bite!

Conclusion:
And there you have it! Making your own easy homemade English muffins from scratch is incredibly rewarding and surprisingly simple. Forget the store-bought versions; these tender, slightly chewy delights with their signature nooks and crannies are far superior. They offer a fantastic base for all your breakfast and brunch creations, proving that deliciousness doesn’t have to be complicated. I truly encourage you to give this recipe a try – you’ll be amazed at how quickly they become a favorite in your kitchen.
Think about all the ways you can enjoy these delightful rounds! They are perfect toasted and slathered with butter or jam, but they also shine as the foundation for classic eggs Benedict, breakfast sandwiches piled high with beef bacon and cheese, or even as a vehicle for avocado toast. For a bit of fun, try incorporating savory additions like finely chopped chives or a pinch of smoked paprika into the dough, or sweeten them up with a touch of cinnamon for a dessert-inspired treat. The possibilities are truly endless!
Frequently Asked Questions:
Why don’t my English muffins have nooks and crannies?
The key to those signature nooks and crannies lies in the cooking method. Make sure you are cooking them on a griddle or heavy-bottomed pan over medium-low heat. Avoid overcrowding the pan, and don’t press them down while they cook. Patience is crucial here; they need time to develop that characteristic texture. Also, ensure your dough is adequately risen and has a slightly sticky consistency.
Can I freeze homemade English muffins?
Absolutely! Once completely cooled, you can wrap individual muffins tightly in plastic wrap and then place them in a freezer-safe bag or container. They should stay fresh in the freezer for up to 2-3 months. To reheat, simply toast them directly from frozen, or allow them to thaw at room temperature before toasting for the best results.
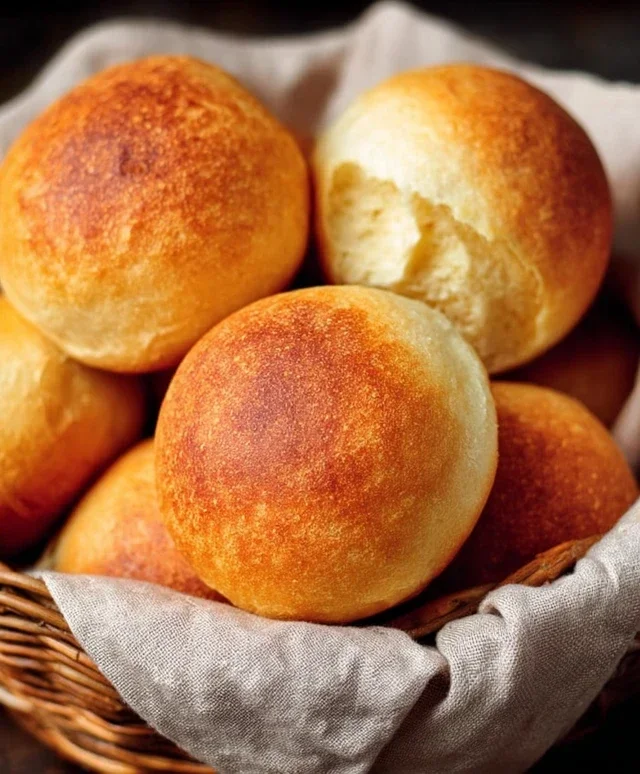
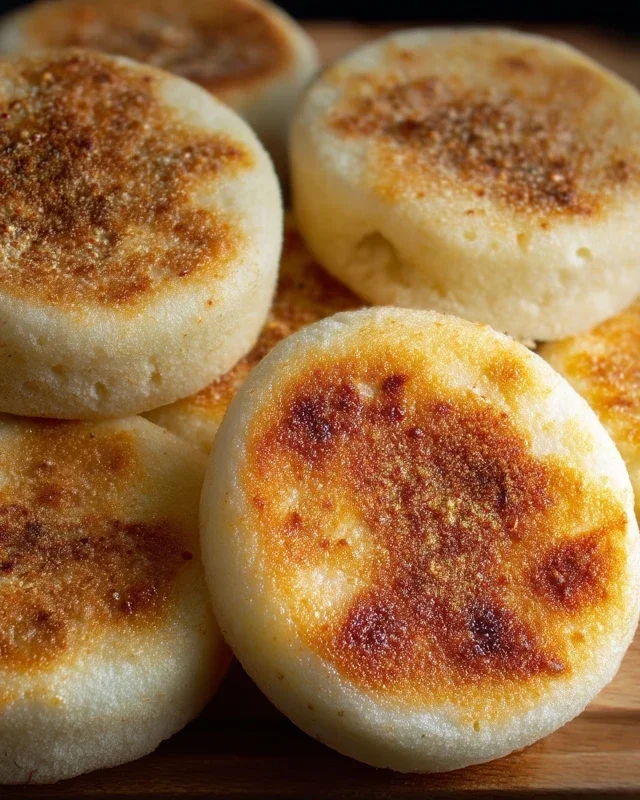
Easy Homemade English Muffins
Whip up a batch of soft, chewy, and delicious homemade English muffins with this easy recipe. Perfect for breakfast or brunch, these muffins have a classic nooks and crannies texture.
Ingredients
-
1 ¼ cups warm water
-
1 tablespoon sugar
-
1 teaspoon instant dry yeast
-
2 tablespoon oil
-
2 ¾ cups all purpose flour
-
1 teaspoon salt
-
cornmeal for dusting
Instructions
-
Step 1
In a large bowl, combine the warm water and sugar. Sprinkle the instant dry yeast over the top and let it sit for 5-10 minutes until foamy. -
Step 2
Stir in the oil and salt into the yeast mixture. -
Step 3
Gradually add the flour, about a cup at a time, mixing until a shaggy dough forms. If the dough is too sticky, add up to 1/4 cup more flour. -
Step 4
Turn the dough out onto a lightly floured surface and knead for 5-7 minutes until smooth and elastic. Alternatively, use a stand mixer with a dough hook for about 5 minutes. -
Step 5
Place the dough in a lightly oiled bowl, cover, and let it rise in a warm place for 1 hour, or until doubled in size. -
Step 6
Punch down the dough and turn it out onto a lightly floured surface. Pat or roll the dough to about 1/2 inch thickness. -
Step 7
Use a 3-inch round cutter (or a glass rim) to cut out circles of dough. Place the circles on a baking sheet lightly dusted with cornmeal, cover loosely, and let them rest for another 20-30 minutes. -
Step 8
Heat a lightly oiled griddle or frying pan over medium-low heat. Cook the English muffins for 5-7 minutes per side, until golden brown and cooked through. -
Step 9
Remove from the griddle and let cool on a wire rack. Split and toast before serving.
Important Information
Nutrition Facts (Per Serving)
It is important to consider this information as approximate and not to use it as definitive health advice.
Allergy Information
Please check ingredients for potential allergens and consult a health professional if in doubt.